47
CHANGING TO A DIFFERENT TYPE OF GAS.
Should a different gas be used from the gas for which
the boiler has been equipped, the following parts
must be replaced.
● Burner injectors (12 MCB2149).
● Burner pressures must be adjusted.
These modifications, together with the regulating
process, must be carried out by a qualified Corgi
registered engineer.
● Remove the front cover.
● Remove the room sealed cover, (8 screws).
● Unscrew the 4 screws from the electronic box, (2
screws on the front and 2 at the bottom of the unit).
Move the electronic box down.
● Remove the ionisation and spark electrodes.
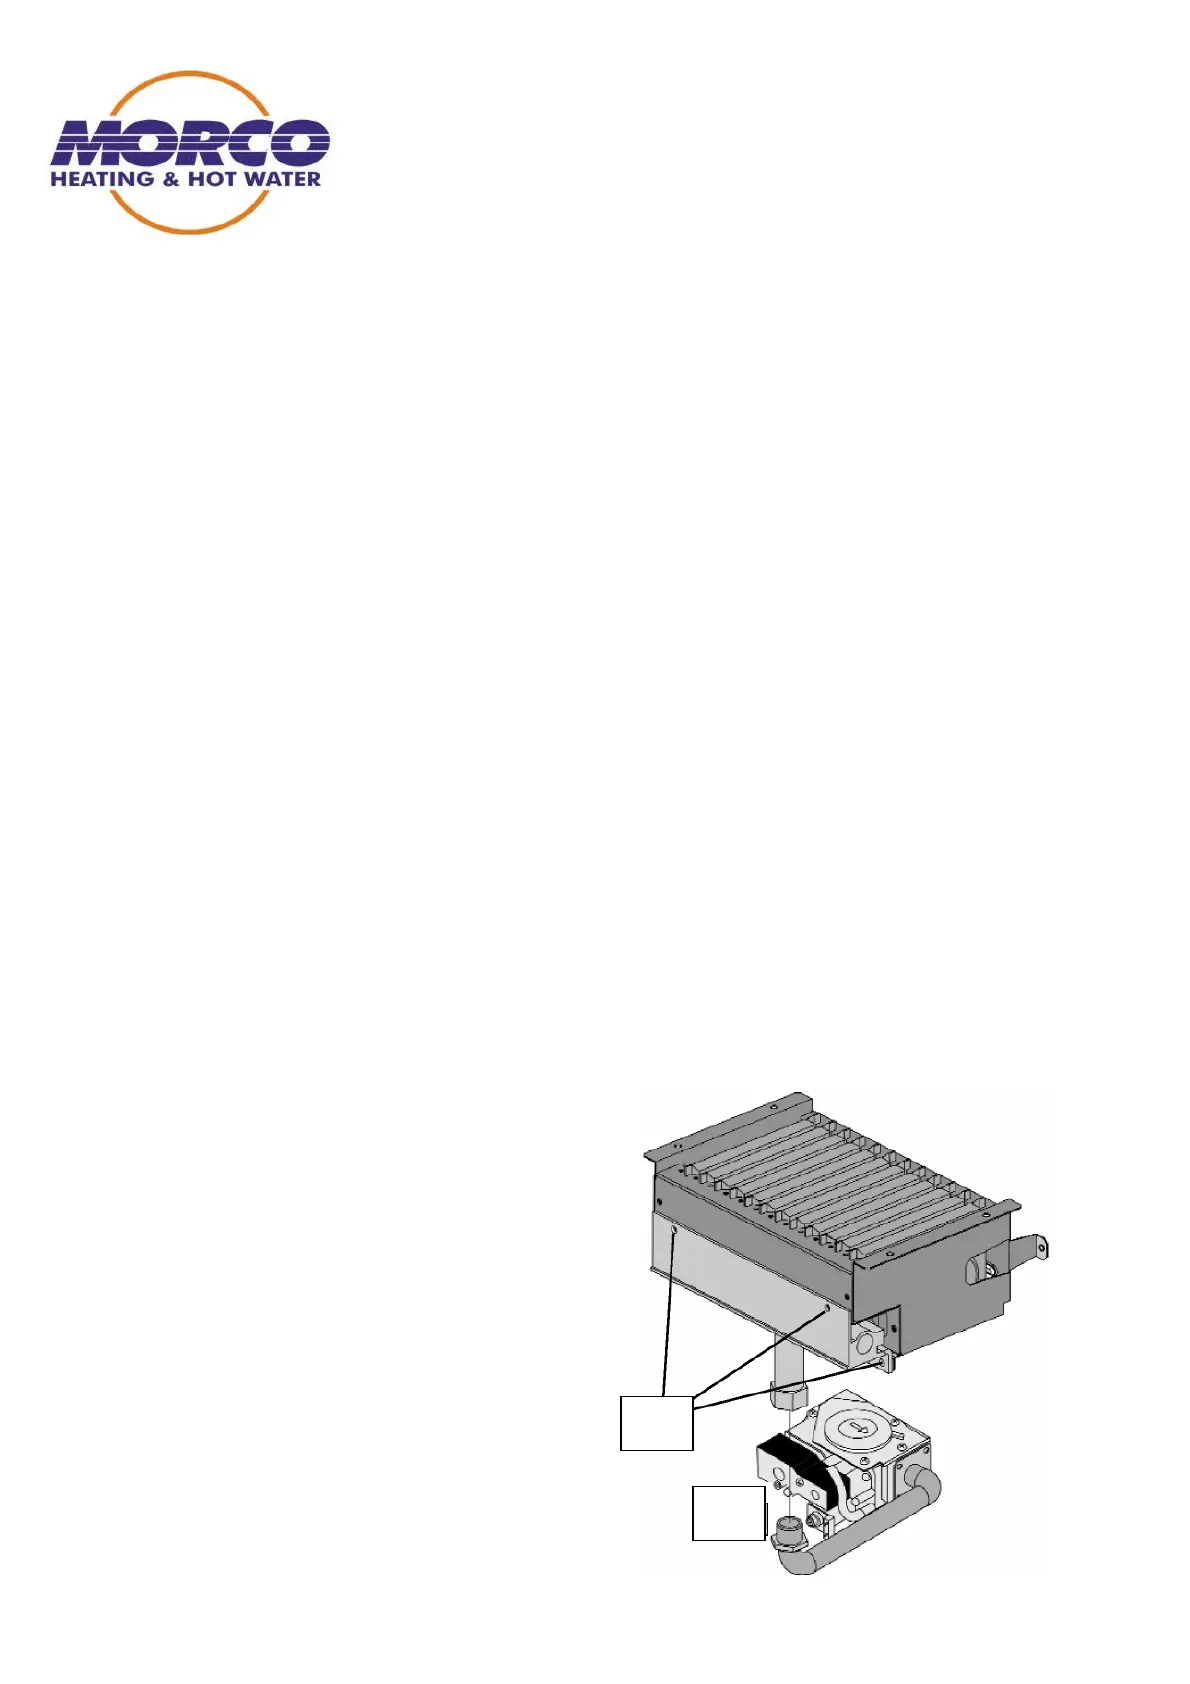
● Unscrew the hexagonal nut (B) which holds the
manifold to the gas valve, (figure 1).
● Unscrew the 4 screws (A) which hold the manifold
onto the burner. Remove the manifold, (figure 1).
● Change 12 burner injectors (E), (figure 2).
● Refit the manifold, ionisation & spark electrodes.
Reconnect the manifold to the gas valve (B). Refit
room sealed cover.
● To adjust the burner pressures to the new type of
gas, proceed as follows:
● Remove the plastic cap (D) of the electronic box.
The bridge S4: (figure 7).
- for LPG must be bridged.
- for Natural Gas must be un-bridged.
● Remove the clear plastic cap (C) (figure 4) from
the gas valve and run the boiler in DHW mode.
Set the maximum burner pressure:
● Set the DHW temperature to maximum.
● Adjust the variable resistance (P1) to maximum,
(rotate fully clockwise), (figure 7).
● Open a hot tap.
● Adjust the maximum burner pressure (chart 1).
Using a 10mm spanner rotate the nut (E) of the gas
valve (figure 5). Rotating clockwise increases the
burner pressure.
● Adjust the variable resistance (P1), rotating it anti-
clockwise until the burner pressure starts to drop.
Set the minimum burner pressure:
● Open a hot tap.
● Disconnect one of the modulating electro valve
terminals on the gas valve.
● Adjust the burner pressure to the value indicated in
chart 1. Holding hexagonal nut (E) with the spanner,
rotate the star screw (T). Rotating clockwise will
increase the pressure and anti-clockwise will decrease
the pressure.
Once the pressure is set, reconnect the terminal.
Set the ignition pressure:
● Adjust the ignition pressure on variable resistance
(P2), rotating clockwise increases the pressure and
anti-clockwise decreases the pressure (chart 1). To do
this you must do the following:
● Disconnect or remove the ionisation electrode.
● Turn on the boiler and during ignition, (when
sparking) adjust the variable resistance (P2) to the
correct value, (chart 1).
● Reconnect or refit ionisation electrode.
● To regulate the maximum heating output, you
adjust the variable resistance (P3). To do this the
boiler should be working in heating mode on
maximum temperature. Rotate (P3) clockwise to
increase pressure and anti-clockwise to decrease
pressure, (chart 1).
Note: The central heating power is factory set at
70% of its maximum.
● Refit the clear plastic cap onto the gas valve.
IMPORTANT: When finished, make sure the outlet
burner pressure nipple is fitted.
A
B