MORTEX PRODUCTS INC. 501 TERMINAL RD FORT WORTH, TX 76106 Page 8
FIRE HAZARD
NEVER PLACE A JUMPER BETWEEN “R” & “W”
Placing jumper wire between the RED and WHITE
thermostat wires at the air handler to override the
thermostat and energize the heater elements is an
extremely dangerous practice that can result in
damage to the thermostat, dangerous operation,
serious injury, property damage and/or death.
The interior sections of the furnace must be cleaned and adjusted
by a qualied service contractor once a year or before the start of
each heating season. The following items must be checked:
1. The blower wheel and motor for excessive dust/lint/ debris
buildup.
2. The electric heaters for dust/lint/debris buildup, wear, damage,
and corrosion.
3. The electrical components for excessive dust/lint/debris
buildup, wear, and deterioration.
4. The supply air duct system for excessive dust/lint/debris
buildup and deterioration.
5. The return air duct system for excessive dust/lint/debris buildup
and deterioration.
6. All electrical wiring for secure connections, wear, insulation
deterioration, and damage.
7. Indoor coil for dust/lint/debris buildup or damage.
8. Indoor coil drain pan for dust/lint/debris buildup, mold, and
proper drainage.
9. Furnace casing and all interior sheet metal panels or dividers.
Furnace Cleaning Procedure
1. Follow the instructions in Section 4: Furnace Startup and
Shutdown Instructions found in the Users Information Manual
to properly shut down the furnace.
2. Remove the access panel on the front of the furnace.
3. Remove the access panel on the front of the indoor coil
compartment.
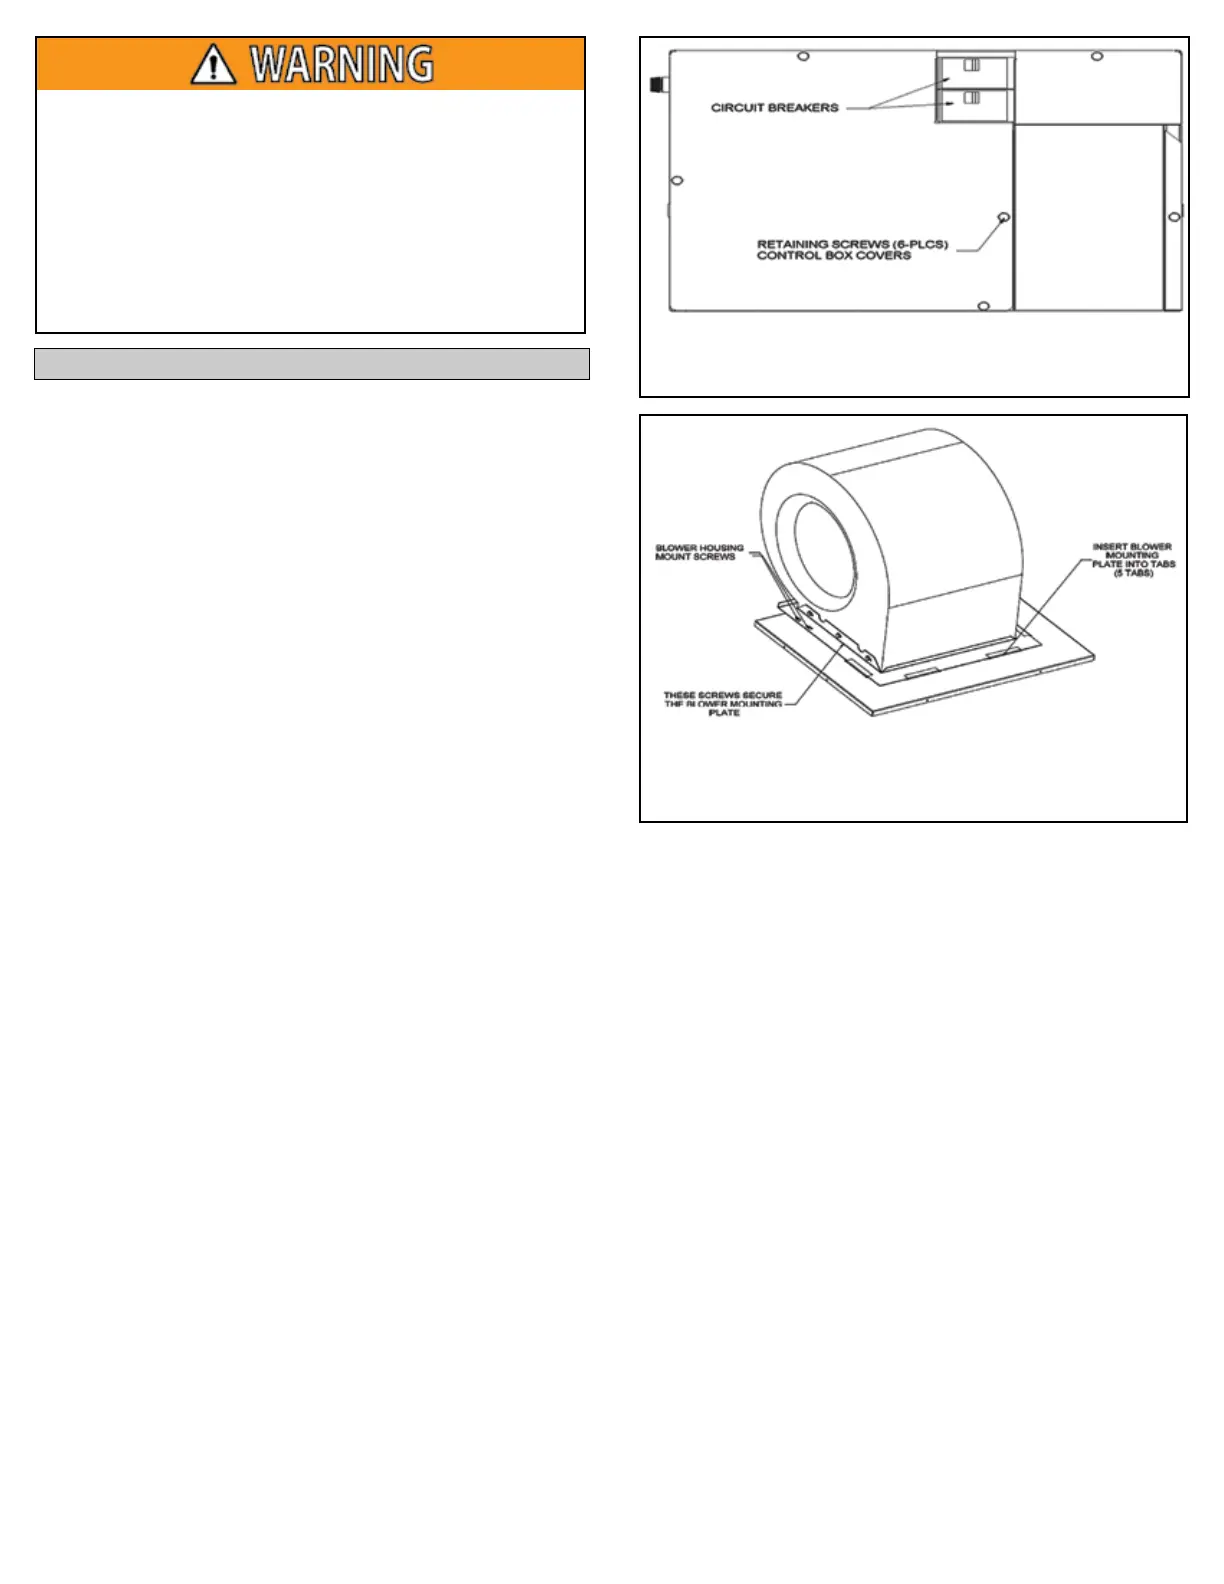
4. Remove the screws on the control box covers and remove both
covers (See Figure 6).
5. Remove the two screws on the right side and the screw on the
left side of the blower mounting plate and slide the blower out
of the furnace (See Figure 7).
6. Use a vacuum cleaner and small soft bristle brush to remove
any dust, lint, and debris from the blower compartment.
7. Inspect the area below the blower compartment where the
electric heating elements are located and remove any dust, lint,
and debris from around the heating elements. Be careful not to
damage the heating element.
NOTE: Use the soft bristle brush along with the vacuum to clean
the area so dirt or debris gets drawn into the vacuum hose and
does not fall into the supply duct.
SECTION 2: FURNACE MAINTENANCE
Figure 6: Control Box Cover
Figure 7: Blower Assembly and Mounting
Screw Location
8. Check the blower wheel for dust, lint, and debris buildup. Use the
brush and the vacuum cleaner to remove any dust, lint, and debris
from the blower wheel. Be careful not to move or remove any of the
balance weights located on the blower wheel blades. If the blower
wheel weight is moved or removed, the blower wheel will vibrate. If
the blower wheel is vibrating, it must be replaced.
9. Remove any dust, lint, and debris buildup from the blower motor.
Clean the openings on the motor housing. If these openings are
blocked, the motor may overheat and trip on its internal protector
and could fail prematurely.
10. Remove any dust, lint, and debris buildup in the supply and return
ducts as far as possible with the brush and vacuum cleaner. Excessive
amount of dust, lint, or debris in the ductwork should be cleaned by a
professional duct cleaning service.
11. Remove any dust, lint, and debris from the furnace controls and all
surfaces in the control box to prevent overheating and premature
failure of the controls and premature failure.
12. Remove any dust, lint, and debris buildup from indoor coil, coil co
compartment, and condensate drain pan.
13. After cleaning the drain pan, verify the drain pan is draining properly
by pouring water into the drain pan.
14. Remove any excess water that may have spilled from verifying the
condensate drain pan is draining properly.
15. Reinstall the blower assembly and secure the blower mount plate to
the fan deck using the screws that were removed in step 5.
16. Reinstall the control box covers and secure them to the control box\
with the screws that were removed in step 4.
17. Reinstall the furnace and indoor coil compartment access panels.
18. Follow the instructions in Section 4: Furnace Startup and Shutdown
Instructions found in the Users Information Manual to properly place
the furnace back into service.