6A 6B
ENEN
. INSTALLATION
BASE INSTALLATION PROCESS
01 • Connect all accessories according to the connections diagram (page 5).
02 • Connect the control board to a 230V power supply (terminals 4 and 5 - CN1).
03 • Check if the gate movement is the same as shown on the display.
04 • Make a course programming - menu P0 (página 8A).
05 • If necessary, adjust the deceleration time of the gate at opening and closing - menu P1
(page 8A).
06 • Adjust the gate force - menu P2 (page 8B).
07 • Re-program the course - menu P0 (page 8A).
08 • Enable or disable the use of Photocells in menu P5 and P6 (page 9A).
09 • Program a remote control (page 6B).
The control board is now fully configured!
Check the pages of the menu programming if you want to configure other features of the
Control board.
02 • Select (SU)
using ↑ ↓.
05 • Press cmd for 3 sec
and the location will be
empty.
The display will blink
and the position will
be free.
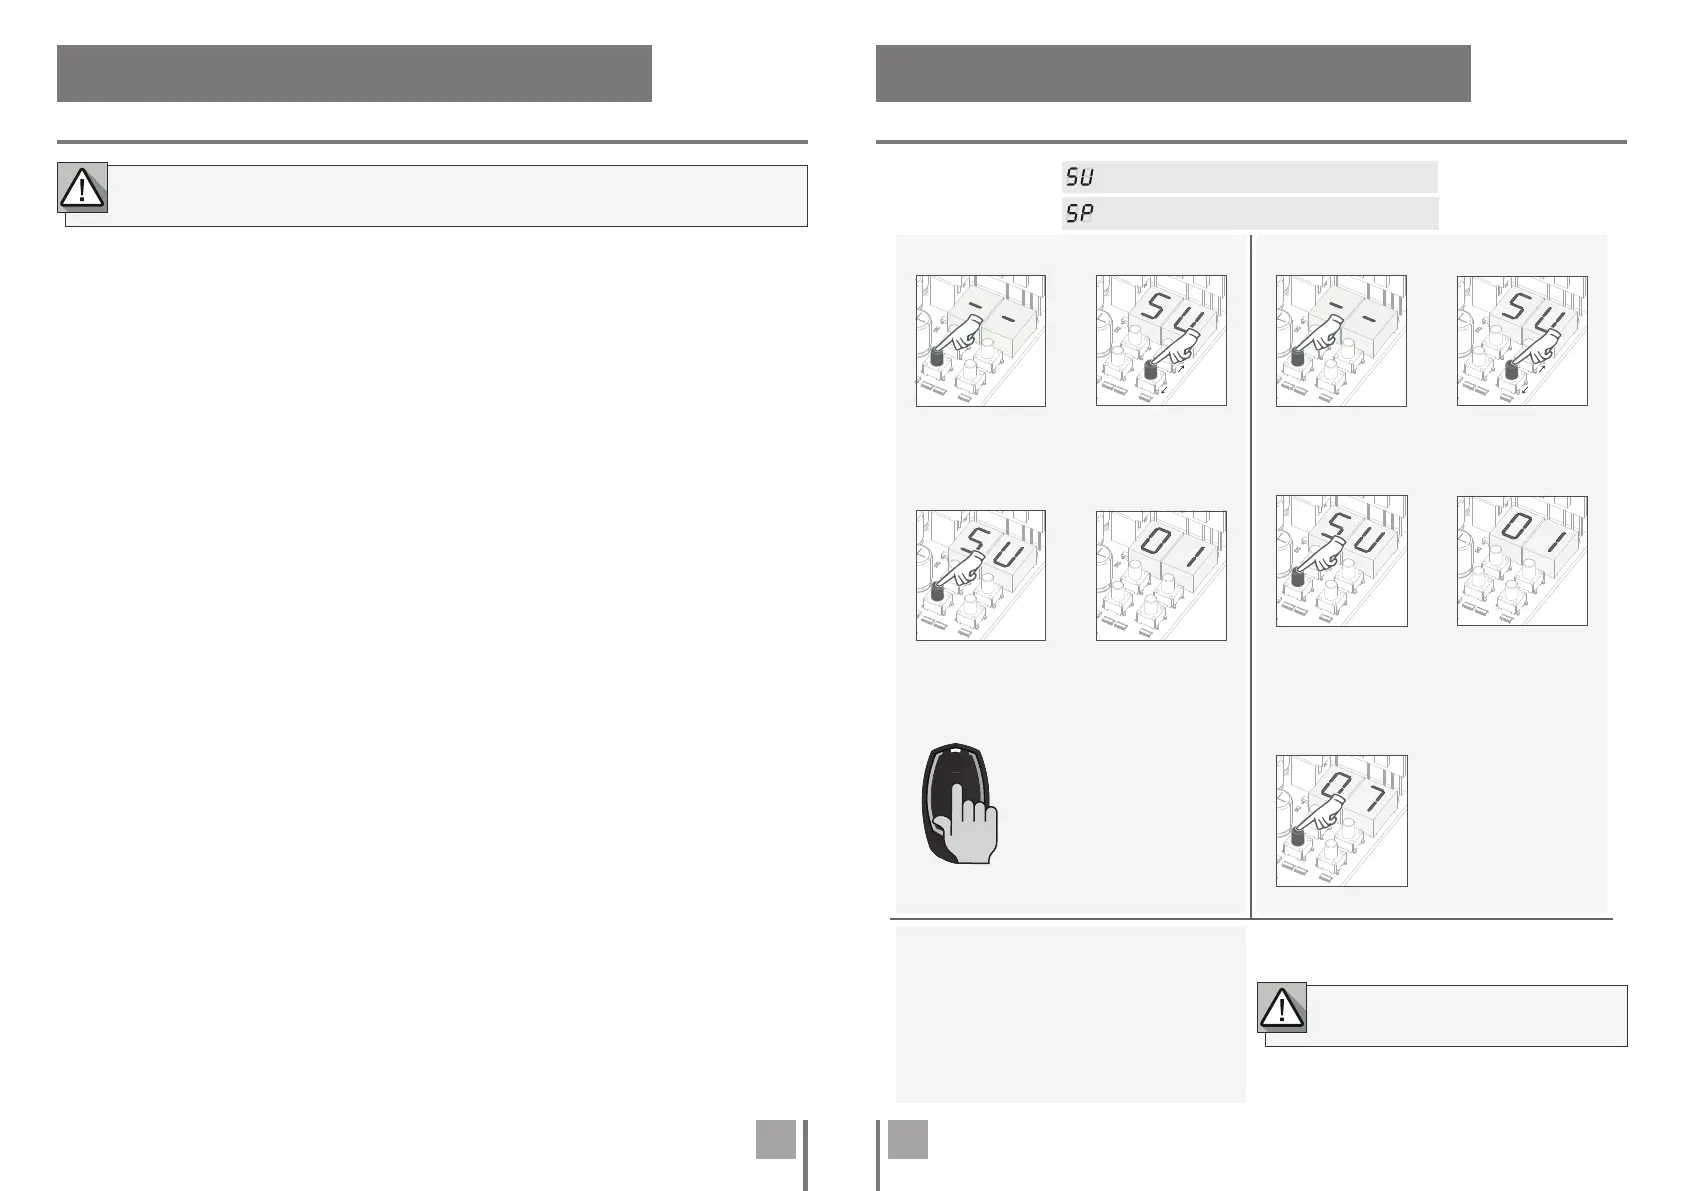
01 • Press the
cmd button for
3 sec.
Remote controls programming for total opening.
Remote controls programming for pedestrian opening.
02 • Select (SU)
using ↑ ↓.
03 • Press cmd
once to confirm.
04 • Use ↓↑ to
select the remote
control location
you want to
delete.
04 • The first free
position appears.
05 • Press the remote
control button you want
to program. The display
will blink and move to the
next free location.
03 • Press cmd
once to confirm.
01 • Press the
cmd button for
3 sec.
• PROGRAMMING REMOTE CONTROL
• ERASE ALL THE REMOTE CONTROL
• ERASE REMOTE CONTROL
. PROGRAMMING
PROGRAMMING AND DELETE REMOTE CONTROLS
The installation process assumes that the gate already has mechanical or electrical
limit switches installed.
• If you do not press any button for 10 sec.
the control board will return to standby.
02 • The display will show SU.
03 • SU will flash.
04 • LU flashes, confirming that all remote
control have been deleted.
01 • Press the cmd button for 10 sec.