P a g e | 9
User Guidelines – Flosense VNC 09-10-2020 Version 001
1.2. Connecting the Flosense display through router for Windows
In order to be able to connect the Flosense unit to your system using a router, the router
needs to have DHCP, for it to be able to designate an IP-address to the Flosense display.
The following steps will explain how to connect your Flosense display to the Machine UI or
to your PC. In order to successfully connect the display to your unit through a router, you
will need to setup the Flosense display to have a dynamic IP-address.
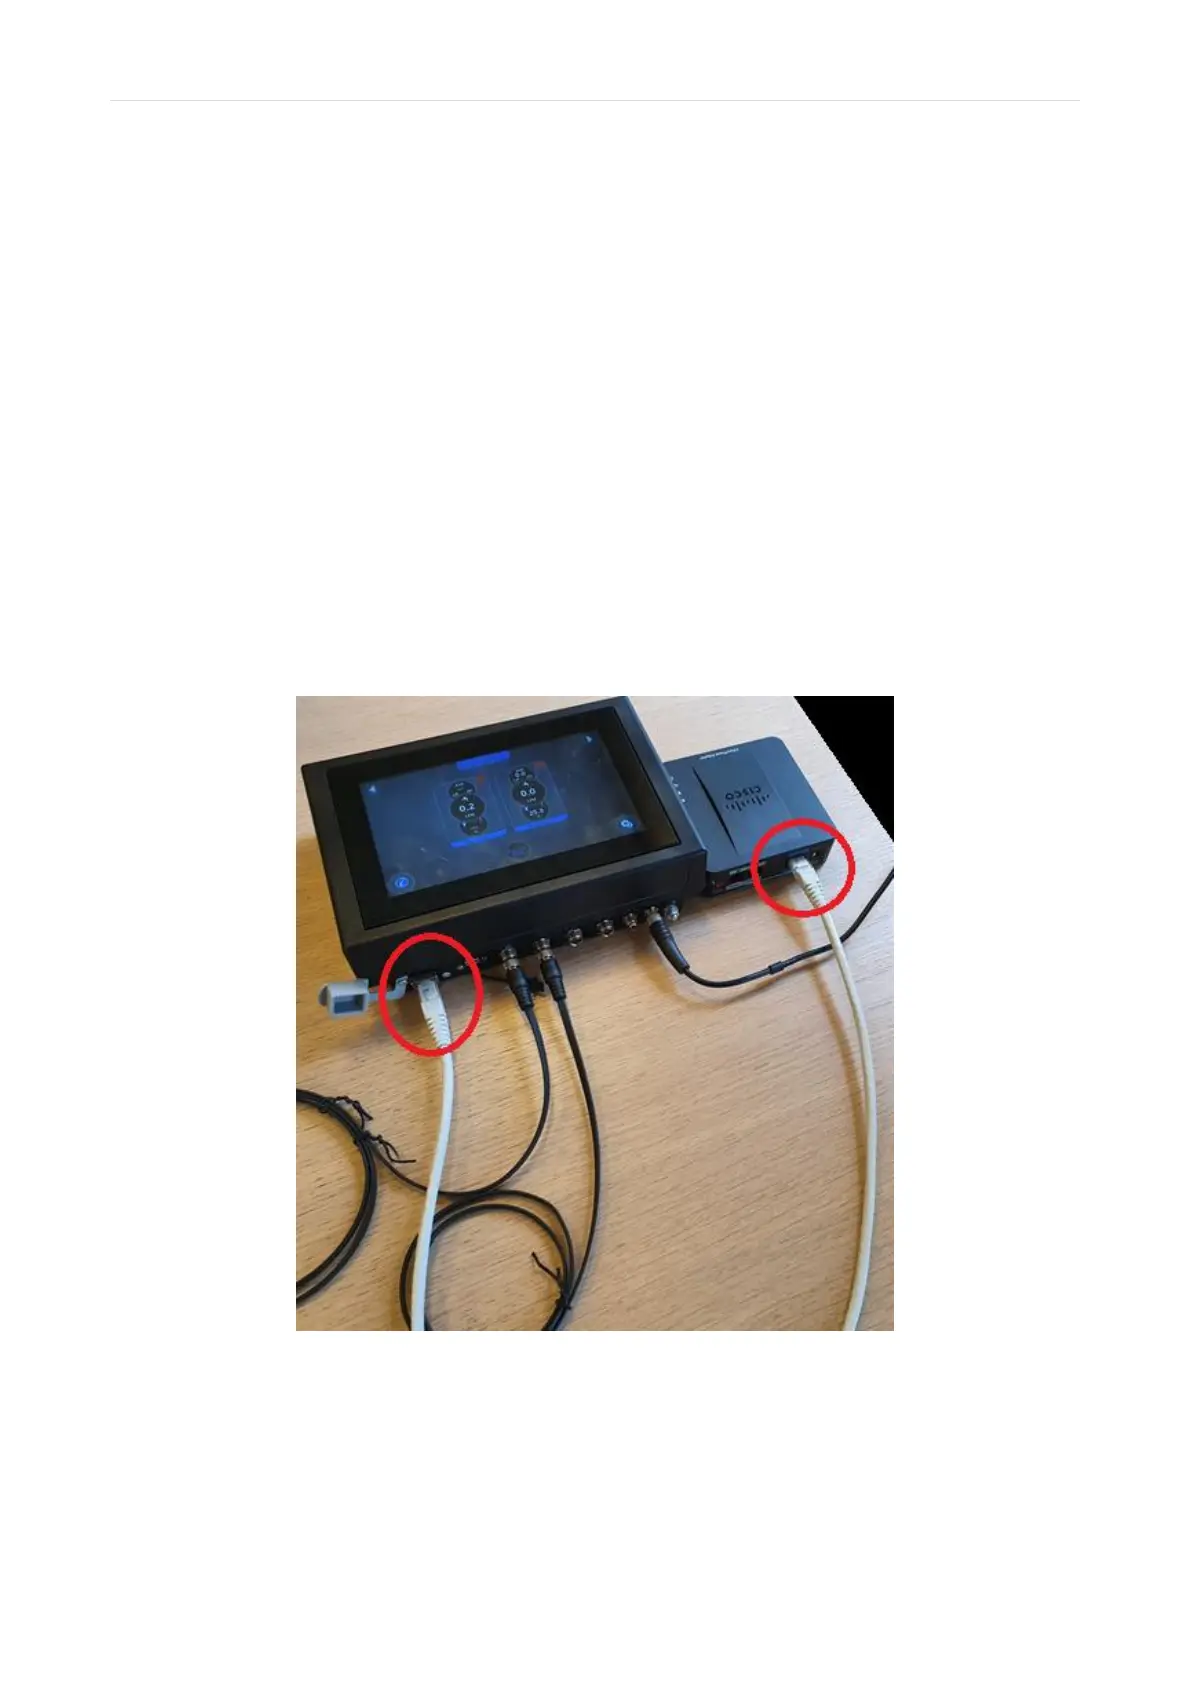
1) Connect the Flosense display to your router with an ethernet cable.
The Flosense display needs to be Turned OFF, before connecting the display to the
router as seen on the picture below. Once they are connected you can turn on the
Flosense display.
 Loading...