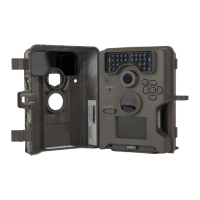
Slide the UNLOCK switch on the bottom of Camera and use the knob to pull the
slide-out Battery Tray. Install or eight(8) AA size alkaline or lithium batteries
with polarities as indicated in the Battery Tray. Re-install the Battery Tray.
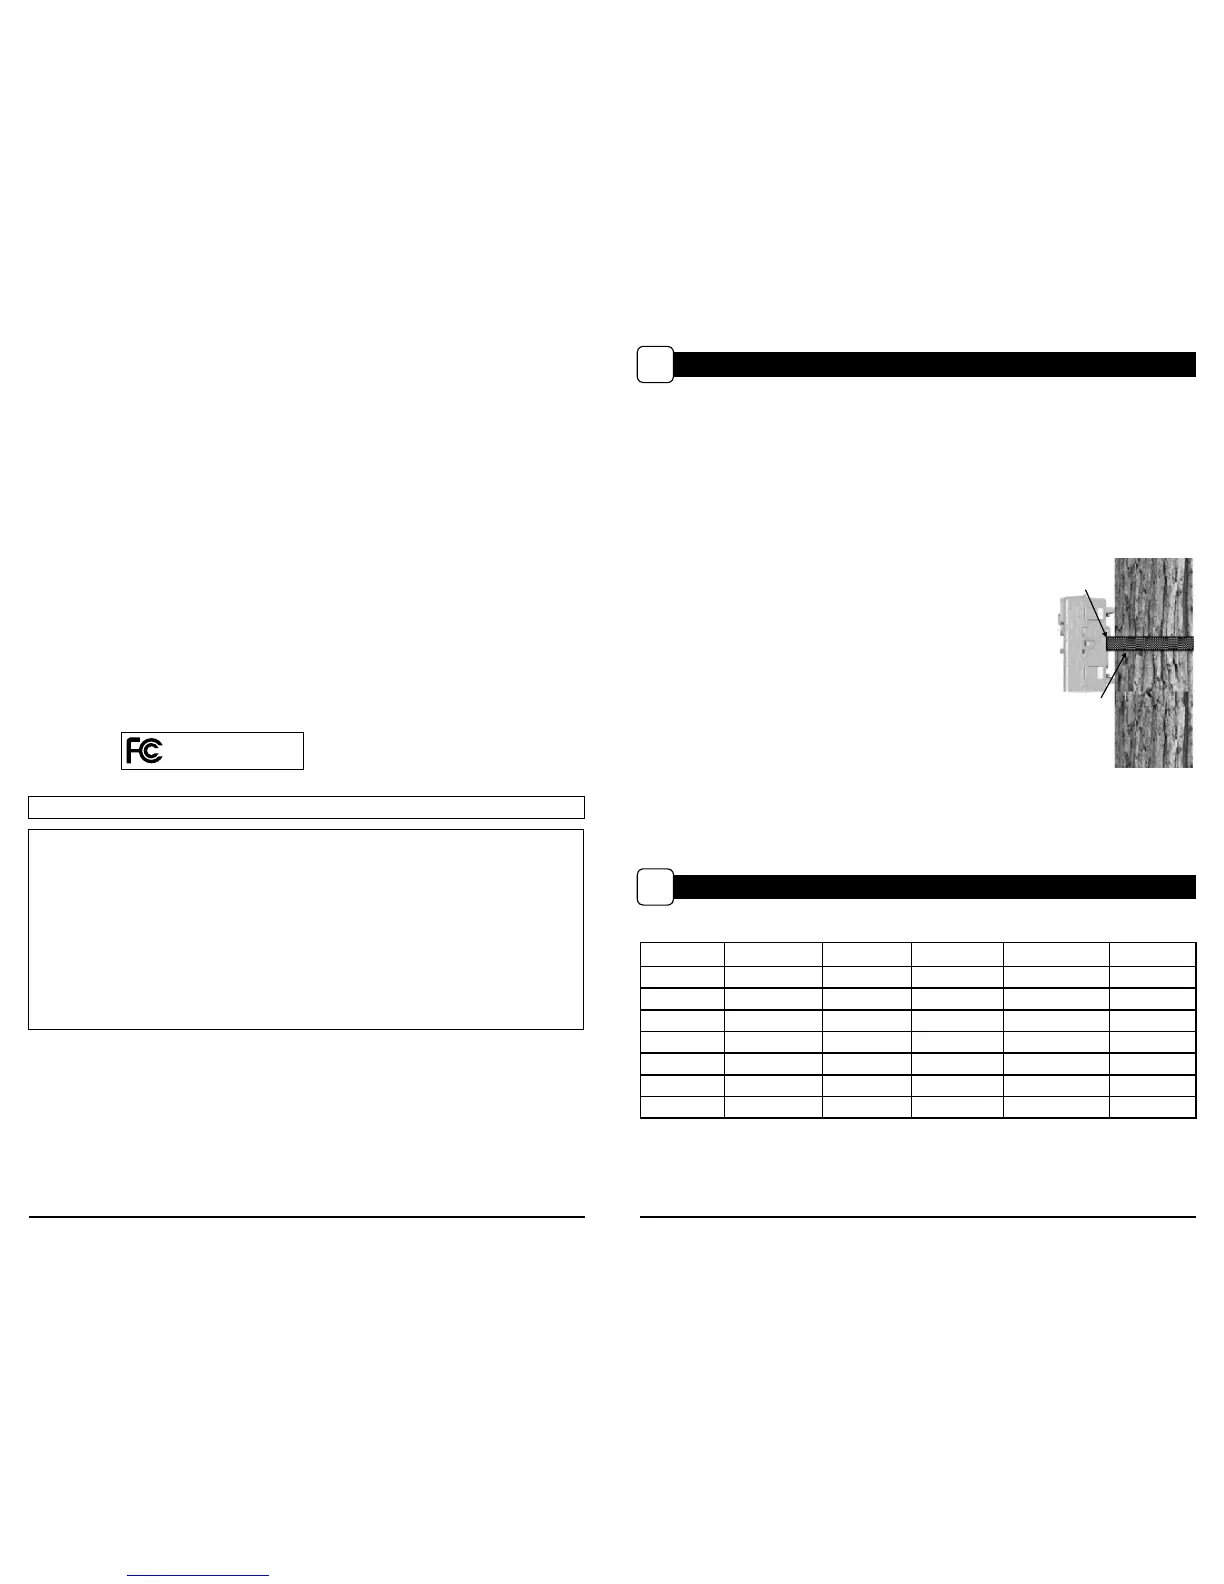
Thread the provided Mounting Strap through the Eyelets on the back of the
camera and secure to a tree or pole approximately 36" from the ground as shown.
Turn Camera on by sliding ON/OFF/IR TEST switch
to the ON position.
Press the MODE button one time to get to the
Camera Setup Menu. Set Time and Date by pressing
ENTER, using UP/DOWN to adjust selected field,
LEFT/RIGHT to move to the next field and ENTER
when done.
Press MODE button until MENU SELECTION
screen is displayed. Use the UP/DOWN buttons
until the MAIN SCREEN option is highlighted
yellow. Press ENTER.
Your Camera will now automatically take pictures
whenever an animal is detected in range -based on
the default settings below.
M-880 GameSpy Digital CameraPlotStalker Software Page 3
Page 14
PLOTSTALKER ACTIVITY SEARCH
B
ACTIVITY SEARCH
The Search Feature will scan through your photos and automatically
look for changes in regions that you identify in Setup.
In search mode, the PlotStalker software scans through the .mlt photo file, stops
on a photo when changes are found in your identified region, and then highlights
the changes in blue. You can click anywhere in the video viewing area to remove
the blue highlights.
ACTIVITY SEARCH SETUP
Click the Settings button to activate
the Region and Sensitivity settings
for the Activity Search
1
2
3
Click on the Set Motion Search Area Button.
Use the mouse to select and drag the red outline around the area you want to
search for movement. This allows you to focus on a very precise area if
required.
Click OK button on the Settings Popup window to confirm your settings and
exit the menu.
Set to High, Medium or Low - This sets the level of pixel change the program
will detect. Note; a pixel change will occur with a color, intensity, lighting or
movement so this setting is critical to obtain the desired results.
1
SENSITIVITY
Click on Default button to return to the default values for Search Area and
Sensitivity settings.
GPS Latitude - 000.000000 N
GPS Longitude - 000.000000 W
1
DEFAULT SETTINGS
DEFINE SEARCH REGION
Provides the ability to search for
changes in the photo in a specific
region rather than the entire photo.
Press the PUSH BUTTON RELEASE on the bottom of Camera and use the knob to pull the
slide-out
Battery Tray. Install six (6) C-cell alkaline batteries with polarities as indicated in
the Battery Tray. Re-install the Battery Tray and insert your SD card.
Thread the provided Mounting Strap through the Eyelets on the back of the camera and
secure to a tree or pole approximately 36” from the ground as shown.
Turn Camera on by sliding IR AIM/OFF/ON switch to the ON position.
Press the MENU button to enter the main menu, press up and
OK to select camera setup. Press OK to enter General setup.
Set Time and Date by pressing OK, using UP/DOWN to adjust
selected eld, LEFT/RIGHT to move to the next eld and OK
when done.
Press MENU button to return to main menu screen.
Press DOWN and OK to select CAPTURE MODE.
Switch camera to ON. Your camera will now automatically
take pictures whenever an animal is detected in range,
based on the default settings below.
STEP 1
STEP 2
STEP 3
STEP 4
STEP 5
STEP 7
Switch camera to IR Aim. Aim camera using motion
detection to determine target area. Walk in front of the
camera at the desired distance and the camera LED will
ash showing the covered area.
STEP 6
FCC Statements
Moultrie Products, LLC
MCG-12592
Note: Changes and modifications not expressly approved by the party responsible could void the user’s authority to operate this device.
This device complies with Part 15 of the FCC Rules. Operation is subject to the following two conditions: (1) This device may not cause harmful
interference, and (2) this device must accept any interference received, including interference that may cause undesired operation.
NOTE: THE MANUFACTURER IS NOT RESPONSIBLE FOR ANY RADIO OR TV INTERFERENCE CAUSED BY UNAUTHORIZED MODIFICATIONS TO THIS
EQUIPMENT. SUCH MODIFICATIONS COULD VOID THE USER’S AUTHORITY TO OPERATE THE EQUIPMENT.
NOTE: This device complies with the limits for a Class B digital device, pursuant to Part 15 of the FCC Rules. These limits are designed to provide
reasonable
protection against harmful interference in a residential installation. This device generates,
uses, and can radiate radio frequency energy
and, if not installed
and used in accordance with the instructions, may cause harmful interference to radio communications. However, there is no
guarantee that interference
will not occur in a particular installation. If this device does cause harmful interference to radio or television reception,
which can be determined by turning the equipment o and on, the user is encouraged to try to correct the interference by one or more of the
following measures:
- Reorient or relocate the receiving antenna.
- lncrease the separation between the equipment and receiver.
- Connect the equipment into an outlet on a circuit dierent from that to which the receiver is connected.
- Consult the dealer or an experienced radio/TV technician for help.
General Motion Detect Time Lapse
DATE/TIME: 01/01/99 12:00am EVENT DELAY: 10 SECONDS INTERVAL: 10 SECONDS
ERASE IMAGES: NO PHOTO OR VIDEO: PHOTO MULTI PROGRAM: 2 PROGRAM
CAPTURE MODE: MOTION DETECT PHOTO QUALITY: HIGH (4 MP) PROGRAM 1 WAKE UP: 6 AM
IR FLASH: AUTO MULTI-SHOTS: OFF PROGRAM 1 SLEEP: 9 AM
GEOTAGGING: OFF MOTION FREEZE: ON PROGRAM 2 WAKE UP: 4 PM
CAMERA NAME: MOULTRIECAM VIDEO LENGTH: 10 SECONDS PROGRAM 2 SLEEP: 7 PM
TEMPERATURE: FAHRENHEIT PHOTO QUALITY: HIGH (4 MP)
 Loading...