5
Installaon Instrucons:
Note: Please read all installaon instrucons carefully before installaon. For standard wood stud
installaon please see Secon A: Wood Stud Installaon. For concrete and masonry installaon, please
see Secon B: Concrete and Masonry Installaon.
Secon A: Wood Stud Installaon
1. Locang a stud: First you will need to locate a stud in the wall. If you know how to locate a stud
please connue to Step 2. If you would like help locang a stud, please see below.
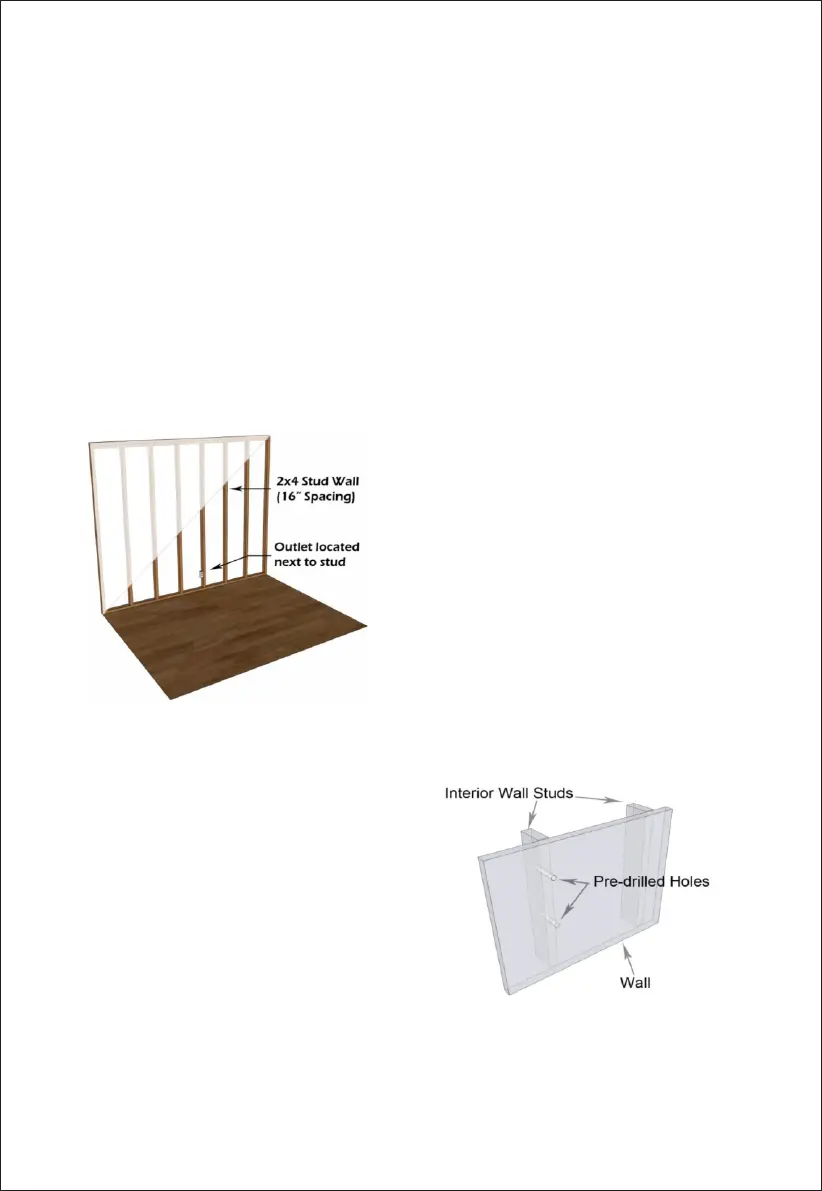
Finding a wooden stud in your home: One quick way to find a wall stud is to find a power outlet on
the wall. Power outlets are normally located next to a stud. The easiest way to confirm the locaon of a
stud is with an electronic stud finder, which you can purchase at a hardware store. Once you find an inial
stud, other wall studs are typically located in the wal l
every 16". Please note that some homes are constructed
with studs every 24". Addionally, many walls have "non-
stan d a rd " studs loc ate d next to doo rs, wi n d ows an d
fireplaces . To get the best support for your mount it is
important that you put the mounng screws for your wall
plate into the center of the wall stud. If it is difficult to
dete rmine the exact center of t he stud with your stud
finder, you can get the exact locaon of the stud using a
thin nail and hammer. With the hammer, pound the thin
nail into the wall in the area of the stud. If the nail is to
the side of th e stud it wi ll go thro ug h the dry wall and
easily into the empty space in the wall. If the nail is on
the stud, once it goes through the drywall, it will not go
into the wall easily as it is hing the wood of the stud. Keep repeang this process in the area of the stud
unl you can tell exactly where the stud starts and ends. The middle of these two points is the center of the
stud.
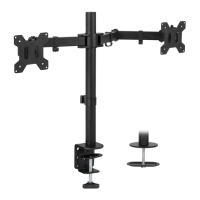
2. Mark and Pre-Drill Installaon Points: Once
you h av e loc ated a stu d, use th e inc l ude d wal l pla te
template to mark the exact locaon for your two wall
plate lag bolts. You can tape your template to the wall
an d v i e w it f r o m a d istan c e t o b e su re yo u l i ke t h e
posioning before proceeding with the install. Then use
a 5 m m or 3/ 16" dr i ll b i t to pre -dri ll thes e ho les to a
depth of 2".