6
3. Aaching the mount to your wall: Once the
two holes are pre-drilled, affix the wall plate to the wall
with the two lag bolts as shown. The included plasc
a n c h o r s D O N O T n e e d t o b e u s e d f o r w o o d s t u d
inst allao n . Whil e you ghte n d o wn the l a g bolts,
ensure the mount is level.
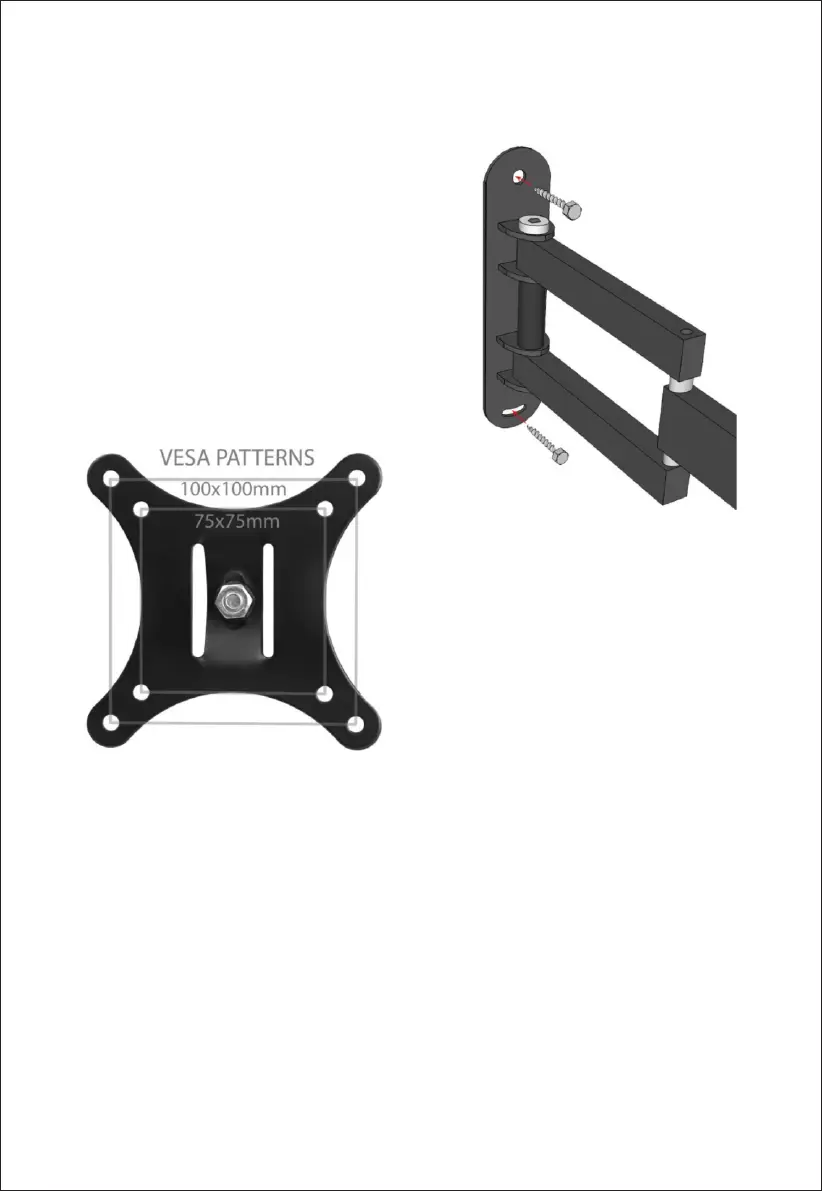
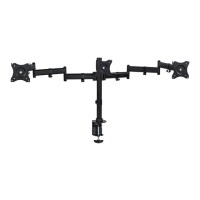
Determining the correct hole paern to use: The mount
fits 2 different V ESA stan dard hole paerns whi ch are
s h o w n t o t h e l e . U s e t h e h o l e p a e r n w h i c h
corresponds to the mounng holes on the back of your
TV. The mounng holes will be centered on the back of
your TV in a square or rectangular paern. They may be
flush or recessed and they may be covered with plasc
c a p s . I f y o u a r e u n f a m i l i a r w i t h m m s i z e s , t h e
s p e c i fic a o n s ta b l e s h o w s t h e sta n d a r d V E S A s i z e s
converted to inches (1" = 25.4mm).
Please note: The maximum mounng hole paerns for this mount is VESA 100. VESA 100 holes will be in a
square paern 100mm per side or about 4". Many larger TV's in the 26-32" size range will use VESA
100x200 or VESA 200x200. This mount will not fit these hole paerns. For the these hole paerns we
recommend our model.
4. Loca te d ispl ay mo unng ha rdw a re: To d ay, t h e va st ma jorit y of di spla ys ship from the
manufacturer with screws already in the wall mounng holes. In this case, all you have to do is use the
screws provided. If your display does not already have screws in the mounng holes, somemes the same
screws which are used for the desk stand can be used for wall mounng. In this case, when you remove the
desk stand from your display simply use these screws to aach the TV plate to the back of your display. If
the screws provided with your TV will work please proceed to Step 5. If not, please read the next secon.