EasyManua.ls Logo

Mountfield SP185 Li Kit - Safety Checks

Mountfield SP185 Li Kit
44 pages
Print Icon
To Next Page IconTo Next Page
To Previous Page IconTo Previous Page
Loading...
๎˜ˆ๎˜‘๎˜ƒ๎ž–๎˜ƒ๎ขฝ
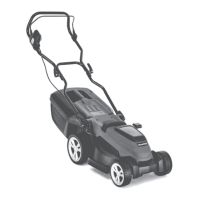
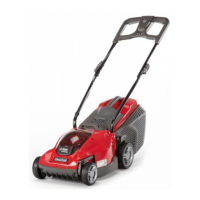
6.1.1 Checking the battery
๎˜…๎šป๎šผ๎›…๎›ˆ๎šป๎˜ƒ๎›‹๎›‰๎šฟ๎›„๎šฝ๎˜ƒ๎›Š๎šพ๎šป๎˜ƒ๎›ƒ๎šท๎šน๎šพ๎šฟ๎›„๎šป๎˜ƒ๎šผ๎›…๎›ˆ๎˜ƒ๎›Š๎šพ๎šป๎˜ƒ๎ฐ๎›ˆ๎›‰๎›Š๎˜ƒ๎›Š๎šฟ๎›ƒ๎šป๎˜ƒ๎šท๎šผ๎›Š๎šป๎›ˆ๎˜ƒ๎›†๎›‹๎›ˆ๎šน๎šพ๎šท๎›‰๎šป๎ž‘๎˜ƒ
fully charge the battery following the instructions in the
battery booklet.
๎˜…๎šป๎šผ๎›…๎›ˆ๎šป๎˜ƒ๎šป๎›Œ๎šป๎›ˆ๎›๎˜ƒ๎›‹๎›‰๎šป๎˜ƒ๎›…๎šผ๎˜ƒ๎›Š๎šพ๎šป๎˜ƒ๎›ƒ๎šท๎šน๎šพ๎šฟ๎›„๎šป๎ž‘๎˜ƒ๎šน๎šพ๎šป๎šน๎›๎˜ƒ๎›Š๎šพ๎šป๎˜ƒ๎šธ๎šท๎›Š๎›Š๎šป๎›ˆ๎›๎˜ƒ๎šน๎šพ๎šท๎›ˆ๎šฝ๎šป๎˜ƒ
status according to the instructions in the battery booklet.
6.1.2 Preparing the machine before starting work
NOTE This machine can be used to mow lawns in vari-
ous ways.
a. Preparation for grass cutting and collection in
the grass catcher:
1. For side discharge models: make sure that the
๎šฝ๎›‹๎šท๎›ˆ๎šบ๎˜ƒ๎žบ๎˜‰๎šฟ๎šฝ๎ž”๎˜ƒ๎ขธ๎ขน๎ž”๎˜„๎žป๎˜ƒ๎šฟ๎›‰๎˜ƒ๎›‚๎›…๎›๎šป๎›ˆ๎šป๎šบ๎˜ƒ๎šท๎›„๎šบ๎˜ƒ๎›‚๎›…๎šน๎›๎šป๎šบ๎˜ƒ๎šธ๎›๎˜ƒ๎›Š๎šพ๎šป๎˜ƒ๎›‰๎šท๎šผ๎šป-
๎›Š๎›๎˜ƒ๎›‚๎šป๎›Œ๎šป๎›ˆ๎˜ƒ๎žบ๎˜‰๎šฟ๎šฝ๎ž”๎˜ƒ๎ขธ๎ขน๎ž”๎˜…๎žป๎ž”
2. I๎›„๎›‰๎šป๎›ˆ๎›Š๎˜ƒ๎›Š๎šพ๎šป๎˜ƒ๎šฝ๎›ˆ๎šท๎›‰๎›‰๎˜ƒ๎šน๎šท๎›Š๎šน๎šพ๎šป๎›ˆ๎˜ƒ๎žบ๎˜‰๎šฟ๎šฝ๎ž”๎ขธ๎ขน๎ž”๎˜†๎žป.
b. Preparation for grass cutting and rear grass
discharge on the ground:
1. ๎˜๎šฟ๎šผ๎›Š๎˜ƒ๎›Š๎šพ๎šป๎˜ƒ๎›ˆ๎šป๎šท๎›ˆ๎˜ƒ๎šบ๎šฟ๎›‰๎šน๎šพ๎šท๎›ˆ๎šฝ๎šป๎˜ƒ๎šฝ๎›‹๎šท๎›ˆ๎šบ๎˜ƒ๎žบ๎˜‰๎šฟ๎šฝ๎ž”๎ขธ๎ขบ๎ž”๎˜„๎žป๎˜ƒ๎šท๎›„๎šบ๎˜ƒ๎ฐ๎›Š๎˜ƒ๎›Š๎šพ๎šป๎˜ƒ๎›†๎šฟ๎›„๎˜ƒ
(Fig.13.B).
2. For models with side discharge option: make sure that
the guard (Fig. 13.C) is lowered and locked by the safe-
ty lever (Fig. 13.D).
To remove the pin: see Fig.13.A/B.
c. Preparation for grass mowing and chopping
(mulching function):
๎˜๎šฟ๎šผ๎›Š๎˜ƒ๎›Š๎šพ๎šป๎˜ƒ๎›ˆ๎šป๎šท๎›ˆ๎˜ƒ๎šบ๎šฟ๎›‰๎šน๎šพ๎šท๎›ˆ๎šฝ๎šป๎˜ƒ๎šฝ๎›‹๎šท๎›ˆ๎šบ๎˜ƒ๎žบ๎˜‰๎šฟ๎šฝ๎ž”๎ขธ๎ขป๎ž”๎˜„๎žป๎˜ƒ๎šท๎›„๎šบ๎˜ƒ๎šฟ๎›„๎›‰๎šป๎›ˆ๎›Š๎˜ƒ๎›Š๎šพ๎šป๎˜ƒ
๎šน๎šพ๎›‹๎›Š๎šป๎˜ƒ๎›†๎›‚๎›‹๎šฝ๎˜ƒ๎žบ๎˜‰๎šฟ๎šฝ๎ž”๎ขธ๎ขป๎ž”๎˜…๎žป๎˜ƒ๎šฟ๎›„๎˜ƒ๎›Š๎šพ๎šป๎˜ƒ๎šบ๎šฟ๎›‰๎šน๎šพ๎šท๎›ˆ๎šฝ๎šป๎˜ƒ๎›…๎›†๎šป๎›„๎šฟ๎›„๎šฝ๎ž‘๎˜ƒ๎›๎šป๎šป๎›†๎šฟ๎›„๎šฝ๎˜ƒ๎šฟ๎›Š๎˜ƒ
slightly tilted to the right; then fasten it by inserting the two
๎›†๎šฟ๎›„๎›‰๎˜ƒ๎žบ๎˜‰๎šฟ๎šฝ๎ž”๎ขธ๎ขป๎ž”๎˜…๎ž”๎ขธ๎žป๎˜ƒ๎šฟ๎›„๎˜ƒ๎›Š๎šพ๎šป๎˜ƒ๎›†๎›ˆ๎›…๎›Œ๎šฟ๎šบ๎šป๎šบ๎˜ƒ๎šพ๎›…๎›‚๎šป๎›‰๎ž‘๎˜ƒ๎›‹๎›„๎›Š๎šฟ๎›‚๎˜ƒ๎›Š๎šพ๎šป๎˜ƒ๎šป๎›„๎šฝ๎šท๎šฝ๎šป-
ment click is heard.
For models with side discharge option: make sure that the
๎›‰๎šฟ๎šบ๎šป๎˜ƒ๎šบ๎šฟ๎›‰๎šน๎šพ๎šท๎›ˆ๎šฝ๎šป๎˜ƒ๎šฝ๎›‹๎šท๎›ˆ๎šบ๎˜ƒ๎žบ๎˜‰๎šฟ๎šฝ๎ž”๎˜ƒ๎ขธ๎ขป๎ž”๎˜†๎žป๎˜ƒ๎šฟ๎›‰๎˜ƒ๎›‚๎›…๎›๎šป๎›ˆ๎šป๎šบ๎˜ƒ๎šท๎›„๎šบ๎˜ƒ๎›‚๎›…๎šน๎›๎šป๎šบ๎˜ƒ๎šธ๎›๎˜ƒ
the safety lever ๎žบ๎˜‰๎šฟ๎šฝ๎ž”๎˜ƒ๎ขธ๎ขป๎ž”๎˜‡๎žป๎ž”
d. Preparation for grass cutting and side dis-
charge on the ground:
1. Lift the rear discharge guard (Fig.15.A) and insert the
๎šน๎šพ๎›‹๎›Š๎šป๎˜ƒ๎›†๎›‚๎›‹๎šฝ๎˜ƒ๎žบ๎˜‰๎šฟ๎šฝ๎ž”๎ขธ๎ขผ๎ž”๎˜…๎žป๎˜ƒ๎šฟ๎›„๎˜ƒ๎›Š๎šพ๎šป๎˜ƒ๎šบ๎šฟ๎›‰๎šน๎šพ๎šท๎›ˆ๎šฝ๎šป๎˜ƒ๎›…๎›†๎šป๎›„๎šฟ๎›„๎šฝ๎ž‘๎˜ƒ๎›๎šป๎šป๎›†-
ing it slightly tilted to the right; then fasten it by insert-
๎šฟ๎›„๎šฝ๎˜ƒ๎›Š๎šพ๎šป๎˜ƒ๎›Š๎›๎›…๎˜ƒ๎›†๎šฟ๎›„๎›‰๎˜ƒ๎žบ๎˜‰๎šฟ๎šฝ๎ž”๎ขธ๎ขผ๎ž”๎˜…๎ž”๎ขธ๎žป๎˜ƒ๎šฟ๎›„๎˜ƒ๎›Š๎šพ๎šป๎˜ƒ๎›†๎›ˆ๎›…๎›Œ๎šฟ๎šบ๎šป๎šบ๎˜ƒ๎šพ๎›…๎›‚๎šป๎›‰๎ž‘๎˜ƒ๎›‹๎›„๎›Š๎šฟ๎›‚๎˜ƒ
the engagement click is heard.
๎ขน๎ž” Slightly push the safety lever (Fig.15.C) and lift the side
discharge guard (Fig.15.D).
3. Insert the side discharge chute (Fig.15.E).
๎ขป๎ž” Close the side discharge guard (Fig.15.D) so as to lock
the side discharge chute (Fig.15.E).
To remove the side discharge chute:
5. Slightly push the safety lever (Fig.15.C) and lift the
side discharge guard (Fig.15.D).
๎ขฝ๎ž” Release the side discharge chute (Fig.15.E).
6.2 SAFETY CHECKS
Always carry out the safety checks before use.
6.2.1 Safety check before every use
โ€ข Check the integrity and the correct mounting of all com-
ponents of the machine;
โ€ข make sure that all fastening devices are correctly tight-
ened;
โ€ข keep all surfaces of the machine clean and dry.
6.2.2 Machine operating test
Action Result
1. Start the machine and
engage the cutting
๎›ƒ๎šป๎šท๎›„๎›‰๎˜ƒ๎žบ๎›†๎šท๎›ˆ๎ž”๎ขฝ๎ž”๎ขบ๎žป๎ž”
2. Release the operator
๎›†๎›ˆ๎šป๎›‰๎šป๎›„๎šน๎šป๎˜ƒ๎›‚๎šป๎›Œ๎šป๎›ˆ๎˜ƒ๎žบ๎˜‰๎šฟ๎šฝ๎ž”๎ขน๎ขธ๎˜ƒ
A).
1. The cutting means
should move.
2. The lever should return
automatically and
rapidly to the neutral
๎›†๎›…๎›‰๎šฟ๎›Š๎šฟ๎›…๎›„๎ž‘๎˜ƒ๎›Š๎šพ๎šป๎˜ƒ๎šป๎›„๎šฝ๎šฟ๎›„๎šป๎˜ƒ
๎›ƒ๎›‹๎›‰๎›Š๎˜ƒ๎›‰๎›๎šฟ๎›Š๎šน๎šพ๎˜ƒ๎›…๎ฎ๎˜ƒ๎šท๎›„๎šบ๎˜ƒ
the cutting means
must stop within a few
seconds.
1. Start the machine (par.
6.3) and operate the
drive lever (par. 5.๎ขน๎ž”๎ขบ).
2. Disengage the drive
lever.
1. The wheels should
move the machine
forward.
2. The wheels should
stop and the machine
stops moving forward.
Test driving No abnormal vibrations.
No abnormal sound.
If any of the results fail to match the indications
provided in the tables, do not use the machine! Contact
an Authorised Service Centre to have it checked and
repaired if necessary.
6.3 ๎˜–๎˜—๎˜„๎˜•๎˜—๎ž—๎˜˜๎˜“
NOTE Start the machine on a ๎ฒat surface without obsta-
cles or high grass.
1. Open the hatch for accessing the battery compart-
๎›ƒ๎šป๎›„๎›Š๎˜ƒ๎žบ๎˜‰๎šฟ๎šฝ๎ž”๎ขธ๎ขฝ๎ž”๎˜„๎žป๎ž”
2. Fit the batteries correctly in their compartments
๎žบ๎˜‰๎šฟ๎šฝ๎ž”๎˜ƒ๎ขพ๎ž”๎ขน๎ž”๎ขบ๎ž”๎˜„๎žป๎˜ƒ๎›†๎›ˆ๎šป๎›‰๎›‰๎šฟ๎›„๎šฝ๎˜ƒ๎šบ๎›…๎›๎›„๎˜ƒ๎›‹๎›„๎›Š๎šฟ๎›‚๎˜ƒ๎›Š๎šพ๎šป๎˜ƒ๎šป๎›„๎šบ๎˜ƒ๎šท๎›„๎šบ๎˜ƒ๎›‹๎›„๎›Š๎šฟ๎›‚๎˜ƒ
๎›๎›…๎›‹๎˜ƒ๎šพ๎šป๎šท๎›ˆ๎˜ƒ๎šฟ๎›Š๎˜ƒ๎šน๎›‚๎šฟ๎šน๎›๎›‰๎˜ƒ๎ฐ๎›ˆ๎›ƒ๎›‚๎›๎˜ƒ๎šฟ๎›„๎›Š๎›…๎˜ƒ๎›†๎›…๎›‰๎šฟ๎›Š๎šฟ๎›…๎›„๎ž‘๎˜ƒ๎šป๎›„๎›‰๎›‹๎›ˆ๎šฟ๎›„๎šฝ๎˜ƒ๎›Š๎šพ๎›‹๎›‰๎˜ƒ
the electrical contact.
3. ๎˜Œ๎›„๎›‰๎šป๎›ˆ๎›Š๎˜ƒ๎›Š๎šพ๎šป๎˜ƒ๎›‰๎šท๎šผ๎šป๎›Š๎›๎˜ƒ๎›๎šป๎›๎˜ƒ๎›‹๎›„๎›Š๎šฟ๎›‚๎˜ƒ๎›Š๎šพ๎šป๎˜ƒ๎šป๎›„๎šบ๎˜ƒ๎žบ๎˜‰๎šฟ๎šฝ๎ž”๎ขธ๎ขพ๎ž”๎˜„๎žป๎ž”๎˜ƒ๎˜Œ๎šผ๎˜ƒ๎›ˆ๎šป-
๎›‡๎›‹๎šฟ๎›ˆ๎šป๎šบ๎ž‘๎˜ƒ๎›Š๎›‹๎›ˆ๎›„๎˜ƒ๎›Š๎šพ๎šป๎˜ƒ๎›๎šป๎›๎˜ƒ๎›Š๎›…๎˜ƒ๎ฅฒ๎˜’๎˜‘๎ฅฒ๎˜ƒ๎›†๎›…๎›‰๎šฟ๎›Š๎šฟ๎›…๎›„๎ž”
4. Completely close the hatch again.
5. For models that require using a power button for
๎›‰๎›Š๎šท๎›ˆ๎›Š๎šฟ๎›„๎šฝ๎ž‘๎˜ƒ๎›‹๎›‰๎šป๎˜ƒ๎›Š๎šพ๎šป๎˜ƒ๎›†๎›…๎›๎šป๎›ˆ๎˜ƒ๎šธ๎›‹๎›Š๎›Š๎›…๎›„๎˜ƒ๎žบ๎ฐ๎šฝ๎ž”๎˜ƒ๎ขธ๎ขฟ๎ž”๎˜„๎žป๎ž”๎˜ƒ๎˜—๎šพ๎šป๎˜ƒ๎˜๎˜ˆ๎˜‡๎˜ƒ
stays on for 15 seconds.
6. ๎˜ˆ๎›„๎šฝ๎šท๎šฝ๎šป๎˜ƒ๎›Š๎šพ๎šป๎˜ƒ๎šน๎›‹๎›Š๎›Š๎šฟ๎›„๎šฝ๎˜ƒ๎›ƒ๎šป๎šท๎›„๎›‰๎˜ƒ๎šธ๎›๎˜ƒ๎ฐ๎›ˆ๎›‰๎›Š๎˜ƒ๎›†๎›ˆ๎šป๎›‰๎›‰๎šฟ๎›„๎šฝ๎˜ƒ๎›Š๎šพ๎šป๎˜ƒ
๎›‰๎šท๎šผ๎šป๎›Š๎›๎˜ƒ๎šธ๎›‹๎›Š๎›Š๎›…๎›„๎˜ƒ๎žบ๎˜‰๎šฟ๎šฝ๎ž”๎ขธ๎ฃ€๎ž”๎˜„๎žป๎˜ƒ๎šท๎›„๎šบ๎˜ƒ๎›Š๎šพ๎šป๎›„๎˜ƒ๎›†๎›ˆ๎šป๎›‰๎›‰๎šฟ๎›„๎šฝ๎˜ƒ๎›Š๎šพ๎šป๎˜ƒ๎›…๎›†๎šป๎›ˆ-
๎šท๎›Š๎›…๎›ˆ๎˜ƒ๎›†๎›ˆ๎šป๎›‰๎šป๎›„๎šน๎šป๎˜ƒ๎›‚๎šป๎›Œ๎šป๎›ˆ๎˜ƒ๎žบ๎˜‰๎šฟ๎šฝ๎ž”๎ขธ๎ฃ€๎ž”๎˜…๎žป๎ž”
7. ๎˜—๎›…๎˜ƒ๎šป๎›„๎šฝ๎šท๎šฝ๎šป๎˜ƒ๎›Š๎šพ๎šป๎˜ƒ๎›Š๎›ˆ๎šท๎šน๎›Š๎šฟ๎›…๎›„๎ž‘๎˜ƒ๎›†๎›ˆ๎šป๎›‰๎›‰๎˜ƒ๎›Š๎šพ๎šป๎˜ƒ๎›‚๎šป๎›Œ๎šป๎›ˆ๎˜ƒ๎šธ๎šป๎šพ๎šฟ๎›„๎šบ๎˜ƒ๎›Š๎šพ๎šป๎˜ƒ
๎šพ๎šท๎›„๎šบ๎›‚๎šป๎˜ƒ๎žบ๎˜‰๎šฟ๎šฝ๎ž”๎ขธ๎ฃ€๎ž”๎˜†๎žป๎ž”

Table of Contents

Related product manuals