Before any work is performed on the HYDRIVE, remove the
cover and thoroughly clean the unit to remove all traces of
dirt. Do not allow water vapor to enter the hydraulic system
during the cleaning process.
5.1 Maintenance schedule
After the first 10 hours of operation
1. Inspect hydraulic system for hydraulic oil leaks. If leaks
are observed, shut down system immediately and
repair as necessary.
2. Replace the HYDRIVE return filter (19).
3. Inspect all HYDRIVE mounting bolts, fittings and hoses.
Tighten and replace as necessary.
4. Check the HYDRIVE fan speed and relief valve setting.
Adjust as required, following the instructions in this
manual.
Every 3 months
1. Follow the sections 1, 3 and 4 provided in the "After 10
hours of operation" section.
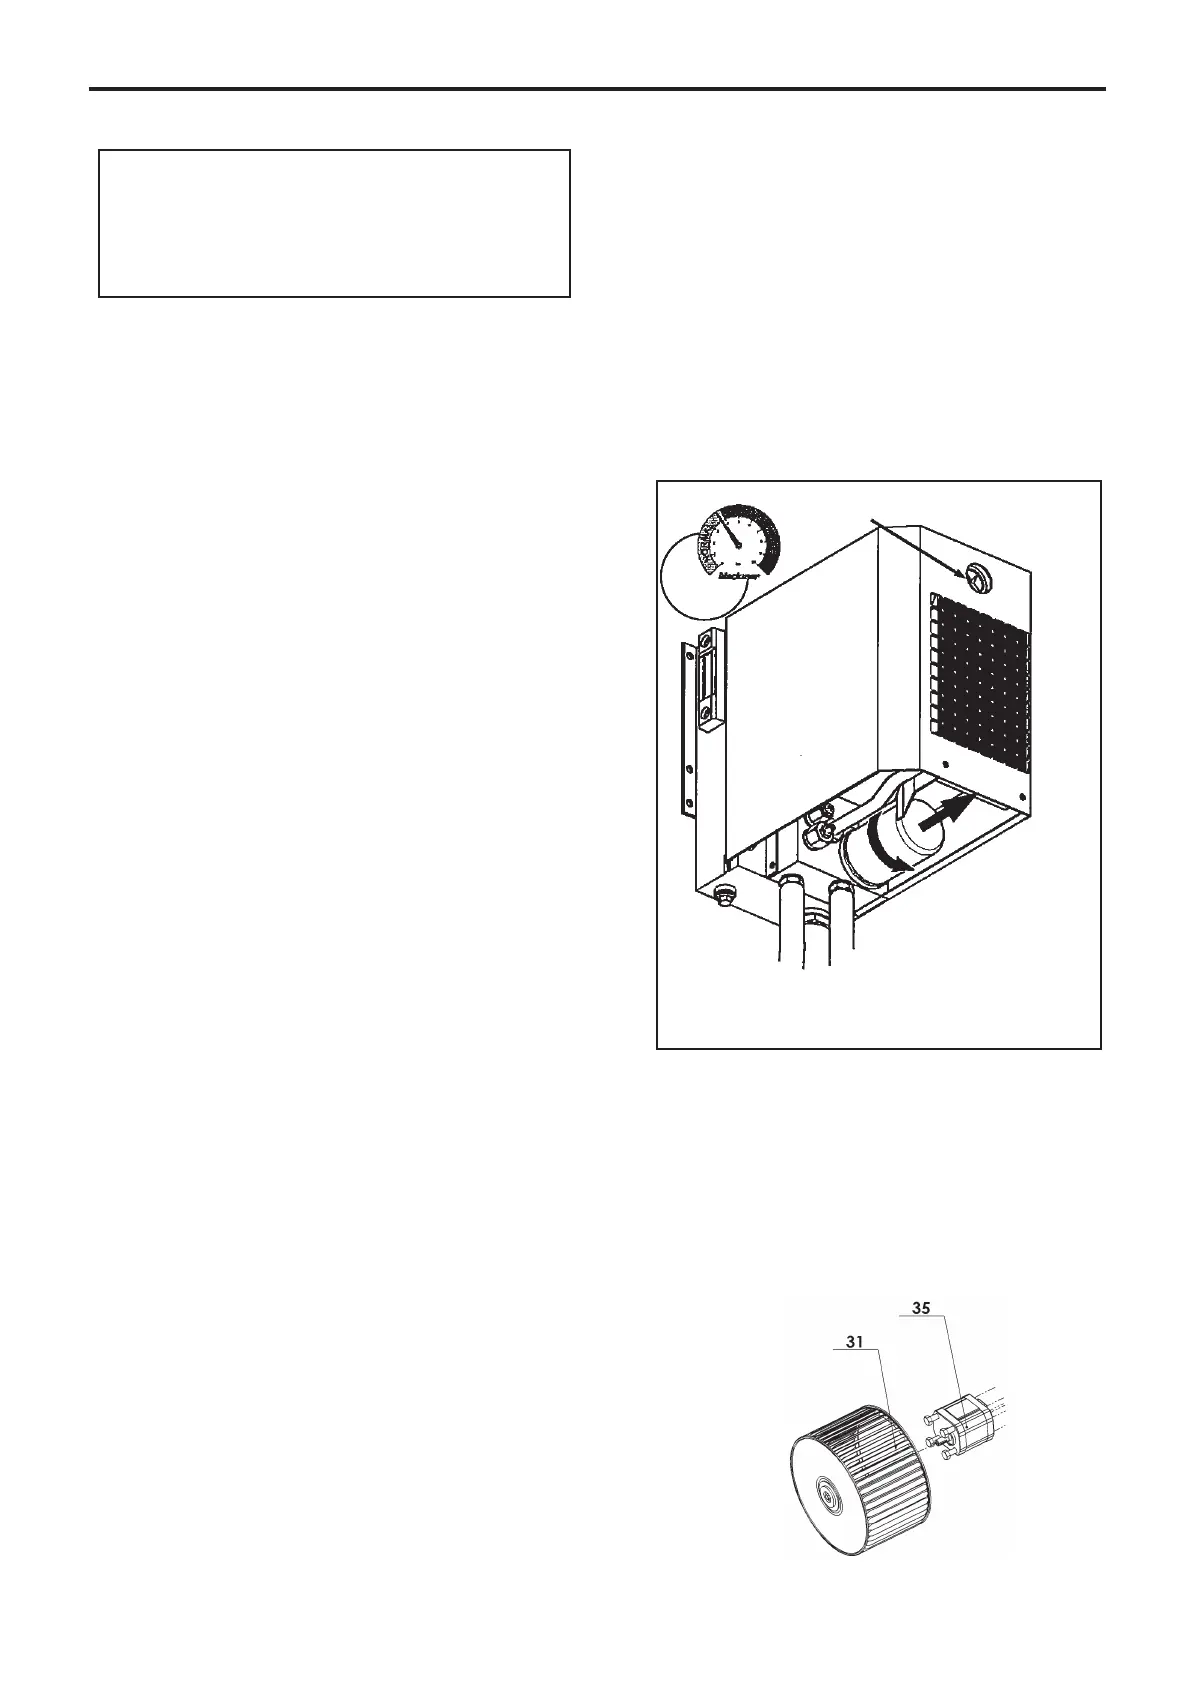
2. When the HYDRIVE hydraulic oil is cold, the oil restric-
tion gauge (20) may read in the red area of the gauge.
After the HYDRIVE warms to operating temperature,
the oil restriction gauge MUST return to the GREEN
level. If the reading fails to return to the GREEN level
the return filter (19) MUST be replaced.
3. Inspect the HYDRIVE radiator (44) and fan (31) for
damage. Carefully clean with air or steam. DO NOT
remove the fan blade balancing clips.
Every 12 months
1. Follow ALL instructions provided in "Every 3 Months"
section.
2. Replace hydraulic oil following the instructions provided
in HYDRAULIC OIL and PRIMING THE HYDRIVE
SYSTEM sections of this manual.
5.2 Return filter replacement
Check the return filter (19) at least every 3 months and
replaced at least every 12 months (see Figure 10).
1. Remove filter by turning it counter-clockwise. If neces-
sary use a filter wrench to remove canister. Properly
dispose of the old filter element.
2. Install new filter element (19). DO NOT overtighten filter
canister.
3. Refill the HYDRIVE resevoir following the instructions
in the HYDRAULIC OIL and PRIMING THE HYDRIVE
sections of this manual.
5.3 Fan replacement
The new fan (31) must be fitted on the hydraulic shaft
(35) without forcing :
• Remove any burrs.
• Apply some grease.
• After tightening, check that it rotates perfectly round
and doesn’t touch the structure.
Figure 10
Return filter
Filter gauge
Remove the HYDRIVE return filter
by turning it counterclockwise
NOTICE
HYDRIVE SERVICE SHALL BE PERFORMED BY
QUALIFIED TECHNICIANS ONLY. SERVICE SHALL
CONFORM TO ALL APPLICABLE LOCAL AND
NATIONAL REGULATIONS AND SAFETY STANDARDS.
13/16
NT 206-A00 10.11 Hydrive e
5. MAINTENANCE