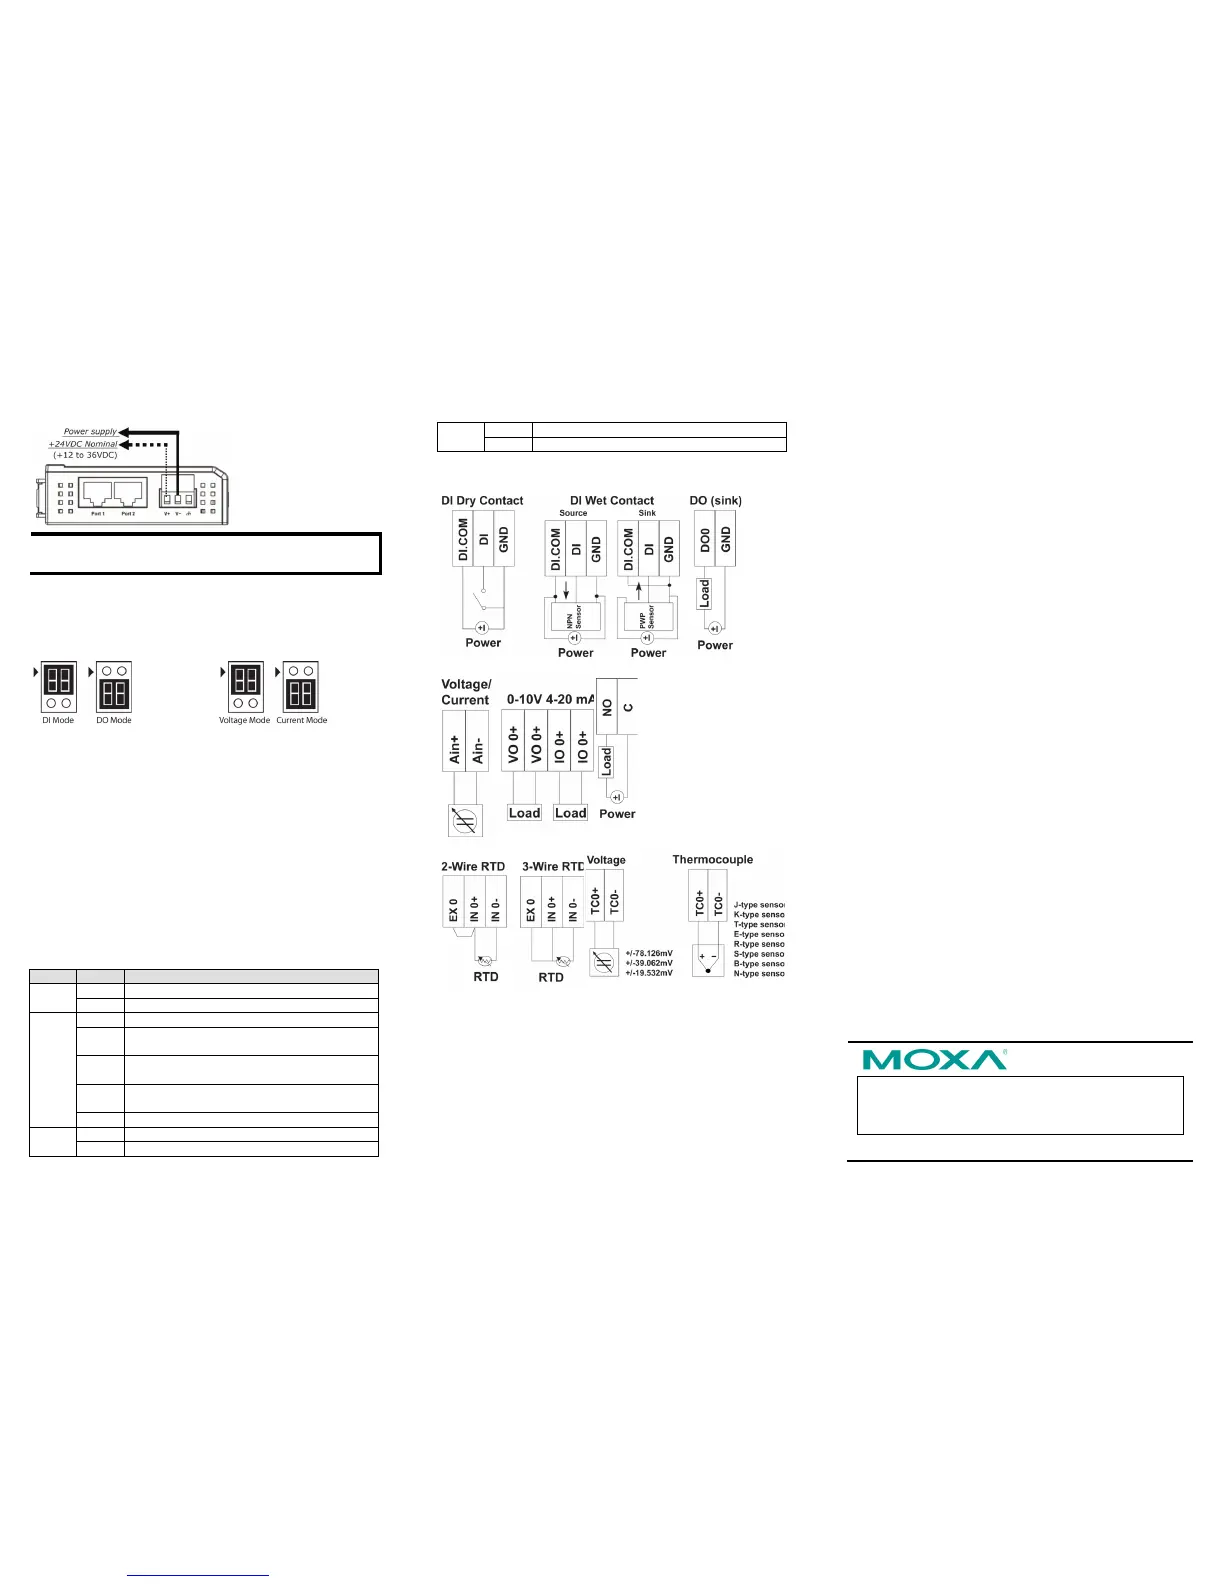
Mounting
The ioLogik E1200 is designed with a vertical form factor, and can
be used with both DIN-Rail and wall mounting applications. When
mounting on a rail, release the bottom mounting kit, install the
ioLogik on the rail, and then restore the bottom mounting kit to fix
the ioLogik to the rail. When using wall mounting, release both the
upper and bottom DIN-Rail kits.
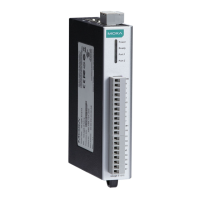
The ioLogik E1200 has two built-in Ethernet switch ports for
connecting either a standard direct or cross-over Ethernet cable to
either RJ45 port.
LED Indicators
5. System Configuration
Configuration via Web Console
Main configuration of an ioLogik E1200 is via its web console.
• Default IP Address: 192.168.127.254
• Subnet Mask: 255.255.255.0
Note: Be sure to configure the host PC’s IP address to the same
subnet as the ioLogik E1200. For example, 192.168.127.253
ioSearch Utility
ioSearch is a search utility that helps users locate an ioLogik E1200
on the local network. The utility can be found in the Document and
Software CD Software ioSearch; the latest version can be
downloaded from Moxa’s website.
Load Factory Default Settings
There are three ways to restore the ioLogik E1200 to the factory
default settings.
1. Hold the RESET button for 5 seconds.
2. Right click the specified ioLogik in the ioSearch utility and
select “Reset to Default.”
3. Select “Load Factory Default” from the web console.
Modbus Address Table
Please refer to the user’s manual for details of the ioLogik’s
Modbus address, or refer to the start address of the I/O channels in
web console User-defined Modbus Addressing Default
Address.
Active OPC Server Connection
Take the following steps to connect the ioLogik E1200 to an Active
OPC Server:
1. Disable the user-defined Modbus address function.
2. Install the Active OPC Server Lite Package from Document and
Software CD Software AOPC Lite ActiveOPCSetup
Install.exe
3. Install from Web console Active OPC Server Settings
AOPC & I/O Settings; specify the IP address where the Active
OPC Server is installed. Specify the I/O channels that need to
be added to Active OPC Server Lite. Submit the settings and
then Save/Restart.
4. From web console Active OPC Server Settings Create
AOPC Tag, click the “Create Tag” button.
5. Launch Active OPC Server Lite from Start Programs MOXA
IOServer ActiveOPC ActiveOPC. Save the configuration
before exiting the Active OPC Server Lite program.

 Loading...