The contact you are probing is a direct positive voltage.
The component you are testing is short-circuit.
The component is a very high current component (i.e., Starter motor).
When the tool in DC Voltage mode, contact the probe tip to the negative terminal
of the component, the red LED should light. While observing the red LED, quickly
depressing and releasing the power switch rearward. If the red LED went off and
the green LED came on, you may proceed with further activation (Figure 13), If
the green LED went off at that instant or if the circuit breaker tripped, the tool has
been overload. This could happen for the following reasons:
Activating Components W / Ground:
WARNING: The arbitrary applying of
voltage to some circuits may damage the
vehicle's electronic components, therefore,
it is highly recommended to use the
vehicle manufacturer's schematics and
diagnostic procedures for testing.
Note: When connecting power to the component, the lifespan of the power
switch can be extended if the switch is pressed first and then the tip contacts the
component; the arcing will be formed at the tip rather than the switch.
The contact you are probing is a direct
ground.
The component you are testing is short-
circuited.
The component is of very high current
component (i.e., Starter motor).
If the circuit breaker is tripped , reset it by
waiting for it to cool down 15 seconds and
the depressing the reset button.
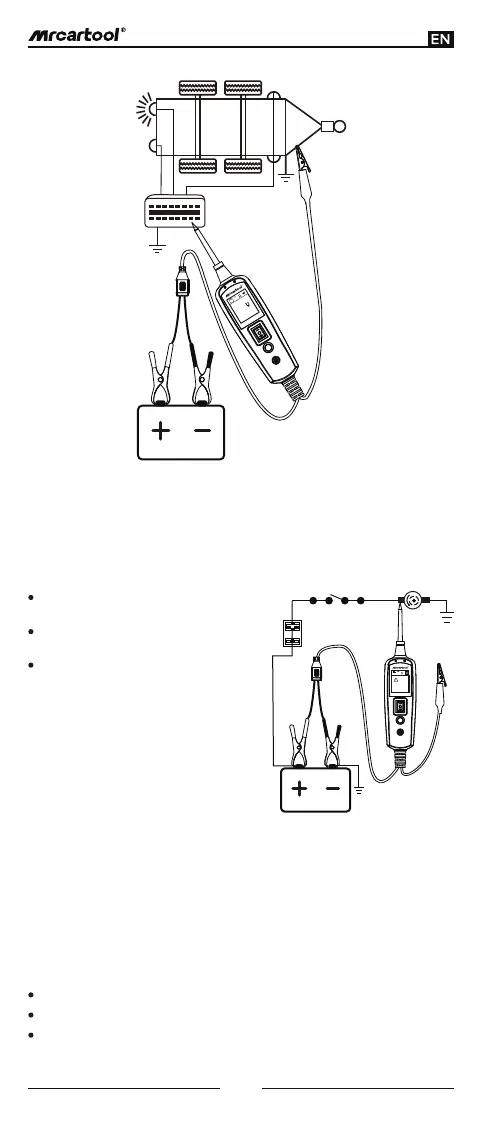
While the tool in DC voltage mode, contact the probe tip to the positive terminal
of the component, the green LED should light, which indicates continuity to
ground. While observing the green LED, quickly depressing and releasing the
power switch forward. If the green LED went off and the red LED came on, you
may proceed with further activation (Figure 12). If the green LED went off at that
instant or if the circuit breaker tripped, the tool has been overloaded. This could
happen for the following reasons:
Activating Components in the Vehicle:
(Figure 11)
V
V
0.0
(Figure 12)
Press and
Hold to
Change!
V V
6