1. Inflate your spa to the max air pressure
2. Insert your valve wrench into the valve and turn the wrench clockwise to tighten the valve onto the spa
1. Completely deflate your spa
2. Remove the dust cap, insert the valve
wrench into the valve and turn counter-
clockwise to remove the valve
3. Check the rubber ring to make sure that
it is in the correct position, secured tightly
around the valve, and check that there is
no debris in the way
4. Ensure that the pin spring is functioning
properly and that there are no cracks
along the edges
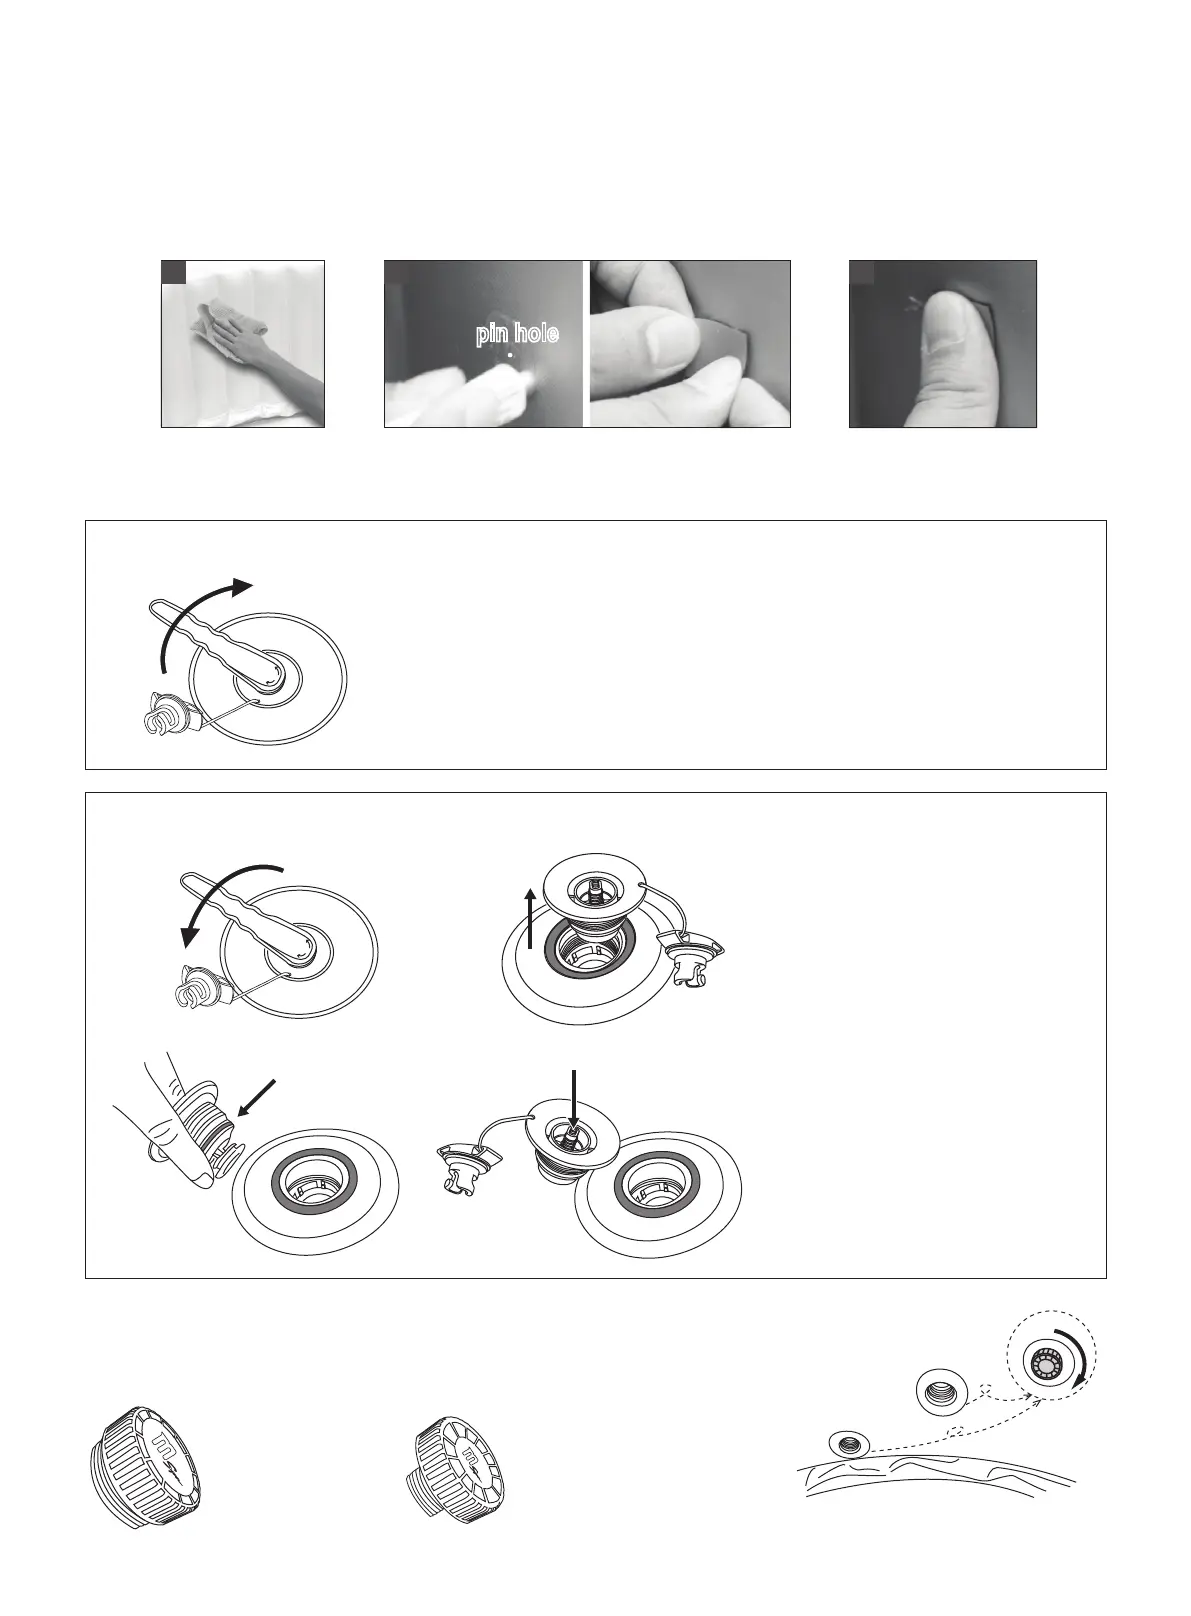
Spa Tub and Air Bladder Repair
Use the enclosed repair patch to repair any puncture:
1. Clean and dry the area to be repaired thoroughly
2. Apply the glue to the PVC patch and quickly attach it onto the damaged surface. (Glue is not included)
3. Smooth the surface to remove any air bubbles and allow it dry for 5-10 minutes
NOTE: Glue is not included.
1 32
pin holepin hole
18
How to fix a leaking valve (MONO / NAVAL)
Rubber Ring
open
close
open
close
A. Try to tighten the valve
B. Re-install or replace the valve
Water Outlet & Inlet Cap And Air Inlet Cap Instructions
1. Air inlet cap x 1pc
For Spa models with external control box, the following caps are offered in the repair kit:
2. Water outlet & inlet cap x 2pcs
pic 1