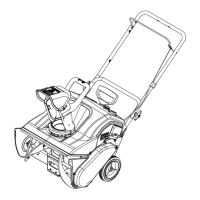
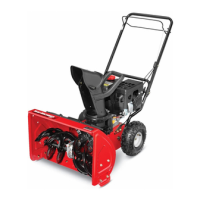
6 Section 2 — ASSembly & Set-Up
Tools Required
• Adjustable Wrench or Socket Set
• Needle Nose Pliers
Handle Assembly
1. Cut cable ties securing chute control rod
or flex shaft to lower handle (if applicable)
and set aside.
NOTE: If your unit is equipped with a
cable tie securing the control cables to the
engine do not cut the cable tie.
2. Loosen the top two lock nuts (a) securing
the upper and lower handle and remove
the two carriage screws (b) from the lower
handle and set aside as shown in Figure
2-2. Refer to inset in Figure 2-2 for models
with side support.
Figure 2-2
3. Place shift lever in Forward-6 position
(if equipped).
4. Observe lower rear area of equipment to
be sure both cables are aligned and seated
properly in roller guides. See Figure 2-3.
NOTE: On select units, chute-pitch control
cables will be routed under the engine on the
left side and will not use roller guides.
Figure 2-3
5. Pull up on the upper handle, align the
upper handle with the lower handle. See
Figure 2-4.
6. Reattach the two carriage screws and lock
nuts removed earlier as shown in Figure
2-2.
7. Finish securing the handle by tightening
the top two lock nuts loosened earlier.
Remove and discard any rubber bands, if
present. They are for packaging purposes
only.
Figure 2-4
Chute Clean-Out Tool
The chute clean-out tool is fastened to the top
of the auger housing with a mounting clip. See
Figure 2-5.
Figure 2-5
Tires
Pneumatic (Air-Pressurized) Tires
The tires are over-inflated for shipping purposes.
Check the tire pressure before operating the
snow thrower. Refer to the tire side wall for tire
manufacturer’s recommended psi and deflate (or
inflate) the tires as necessary.
WARNING: Under any
circumstance do not exceed
manufacturer’s recommended psi.
Equal tire pressure should be
maintained at all times. Excessive
pressure when seating beads may
cause tire/rim assembly to burst
with force sufficient to cause serious
injury. Refer to sidewall of tire for
recommended pressure.
NOTE: Equal tire pressure is to be maintained at
all times for performance purposes.
Non-Pneumatic (Airless) Tires
Some units are equipped with non-pneumatic
tires. Therefore, these airless tires are considered
maintenance free with regards to air pressure
Drift Cutters (If Equipped)
The drift cutters are mounted inverted at the
factory for shipping purposes.
Standard
1. Remove two screws (a) and lock nuts (b)
that secure each drift cutter, and remove
them from the sides of auger housing. See
Figure Figure 2-6.
2. Turn the drift cutters around and position
them as shown in Figure 2-6 to the outside
of the auger housing.
Figure 2-6
3. Attach drift cutters with screws (a) and
lock nuts (b) removed in Step 1.
Tool-less
1. Remove two carriage bolts (a) and wing
nuts (b) that secure each drift cutter, and
remove them from the sides of auger
housing. See Figure 2-7.
2. Turn the drift cutters around and position
them as shown in Figure 2-7 to the outside
of the auger housing.
Figure 2-7
3. Attach drift cutters with carriage bolts (a)
and wing nuts (b) removed in Step 1.
(a)
(b)
(b)
(a)
(a)
(b)
(b)
(a)
 Loading...