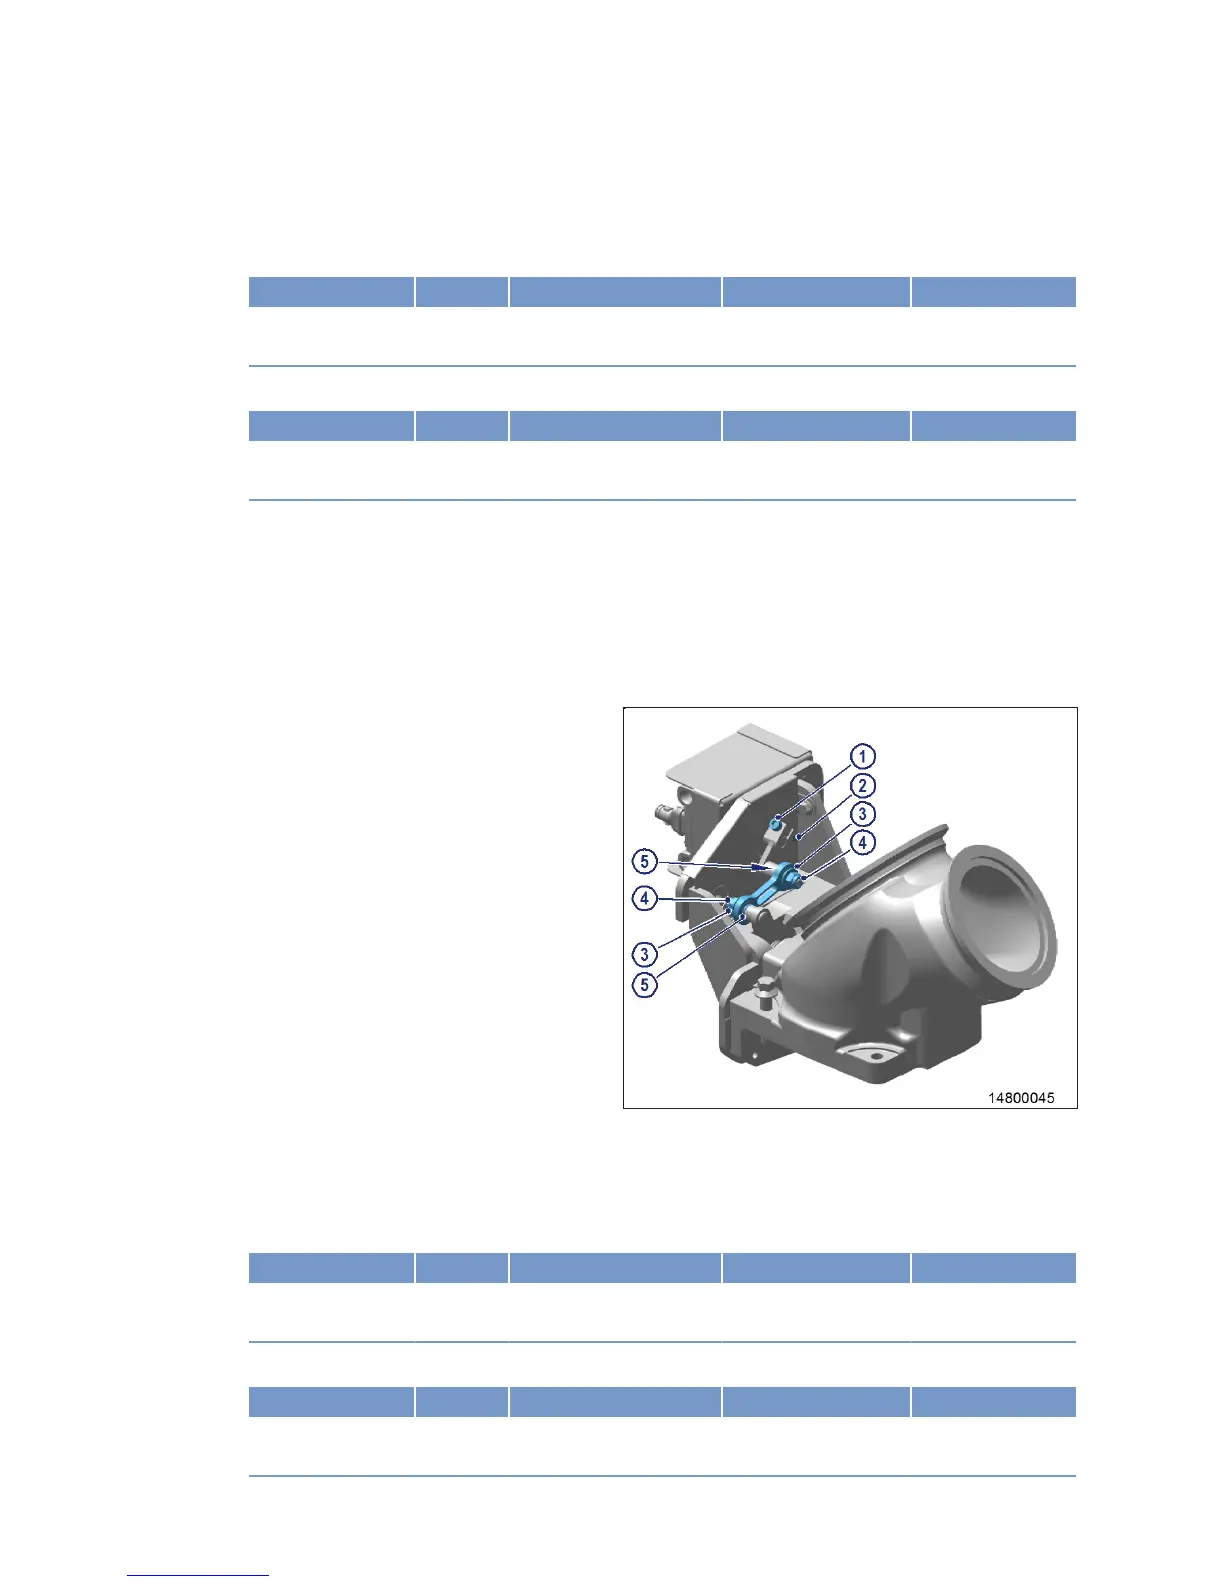
Installing coupling rods (bypass and EGR shutoff flaps)
1. Insert coupling rod and washers (3).
2. Tighten lever with locking screw (5) and locknut (4) on output shaft to the specified tightening torque.
Name Size Type Lubricant Value/Standard
Nut / screw Tightening torque (Assembly paste (Ul-
tra-Therm MTU))
6 Nm + 2 Nm
3. Tighten washers (1) and locknuts (2) to the specified tightening torque.
Name Size Type Lubricant Value/Standard
Nut Tightening torque (Assembly paste (Ul-
tra-Therm MTU))
16 Nm ± 2 Nm
Note: Following each change to the mechanism of the exhaust recirculation system, an actuator test (teach-in
routine) with DiaSys® must be carried out. (→ Page 191).
Removing coupling rod (donor cylinder flap)
Note: For installation position of exhaust flaps, refer to overview (→ Page 144).
1. Remove guard plates of exhaust flap.
2. Remove locknuts (4).
3. Remove washers (3).
4. Remove locking screw (1) and locknut (2).
Result: Lever detached from actuator output shaft.
5. Remove coupling rod and lever.
6. Take off washers (5).
Installing coupling rod (donor cylinder flap)
1. Insert coupling rod and washers (5).
2. Tighten lever with locking screw (1) and locknut (2) on output shaft to the specified tightening torque.
Name Size Type Lubricant Value/Standard
Nut / screw Tightening torque (Assembly paste (Ul-
tra-Therm MTU))
6 Nm + 2 Nm
3. Tighten washers (3) and locknuts (4) to the specified tightening torque.
Name Size Type Lubricant Value/Standard
Nut Tightening torque (Assembly paste (Ul-
tra-Therm MTU))
16 Nm ± 2 Nm
150 | Task Description | MS150112/01E 2014-10
TIM-ID: 0000044549 - 003



 To Next Page