12
2.2. FREQUENCY AND DUTY CYCLE MEASUREMENTS
Connect the red lead to the + terminal and the black lead to the COM terminal.
Set the switch to V or V .
Use the Hz% key to select the desired function: Hz or %.
Place the test probes on the element to be tested and maintain a rm contact.
The measurement is displayed.
2.3. CURRENT MEASUREMENT
Set the switch to one of the A positions, depending on the value of the current
to be measured. If you do not know the value of the current in advance,
start in the 600A setting.
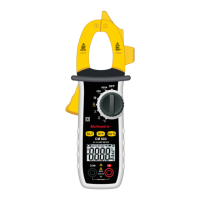
Press the trigger to open the jaws of the clamp and clamp only one conductor.
Center the conductor in the jaws with the help of the marks.
The current is displayed.
Keep your ngers away from the terminals during current measurements.
2.4. RESISTANCE, DIODE, AND CONTINUITY MEASUREMENTS
Connect the red lead to the + terminal and the black lead to the COM terminal.
Set the switch to Ω .
Cut off power to the device to be tested and discharge all high-voltage
capacitors.
Use the SLT key to select the desired function: Ω, or .
Place the test probes on the element to be tested and maintain a rm contact.
For diode voltage measurements, place the red probe tip on the cathode
and the black probe tip on the anode.
The measurement is displayed.
For low resistance measurements, measure the resistance of the leads
by short-circuiting the probe tips. Subtract the value so found from the
low resistance measurements.
2.5. CAPACITANCE MEASUREMENT
Connect the red lead to the + terminal and the black lead to the COM terminal.
Set the switch to .
Cut off power to the device to be tested and discharge all high-voltage
capacitors.
Place the test probes on the element to be tested and maintain a rm contact.
The measurement is displayed. Wait for the measurement to stabilize.
2.6. TEMPERATURE MEASUREMENT
Connect a K thermocouple between the + and COM terminals.
Set the switch to °C.
Place the end of the thermocouple on the object or in the environment to
be measured.
The measurement is displayed. Wait for the measurement to stabilize.
2.7. AUTO OFF
To save the batteries, the instrument switches itself off automatically after 30
minutes if the user has not shown signs of being present by turning the switch
or pressing a key.
To suppress auto off, press the SLT key while turning the switch when starting
up.
3. CHARACTERISTICS
3.1. REFERENCE CONDITIONS
Quantity of inuence Reference values
Temperature 23 ±5°C
Relative humidity <80% RH
Supply voltage 4.5 ±0.1V
Frequency of the measured signal DC or 45 to 65Hz
Type of signal sinusoidal
External electric eld <1V/m
DC external magnetic eld <40A/m

 Loading...