12 - English
7. Configuration and connection check
7-3. Basic configuration
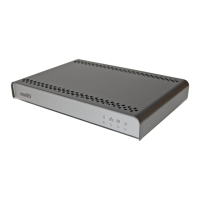
After the test card has been shown, the monitor orientation setting will appear. By
clicking the centre button you can rotate the menu system to fit the orientation of the
monitor.
Figure 4. By pressing the centre button the configuration menu can be rotated.
When the proper orientation of the menu system has been chosen the language setting
menu will appear. By choosing the language, also the language keyboard setting is
selected.
Figure 5. The language settings menu.
Next is the setup menu login page. You will find see the virtual keyboard at the bottom of
the page. By default the username is “admin” and the password is “admin”.
13 - English
7. Configuration and connection check
7-4. Stand alone setup
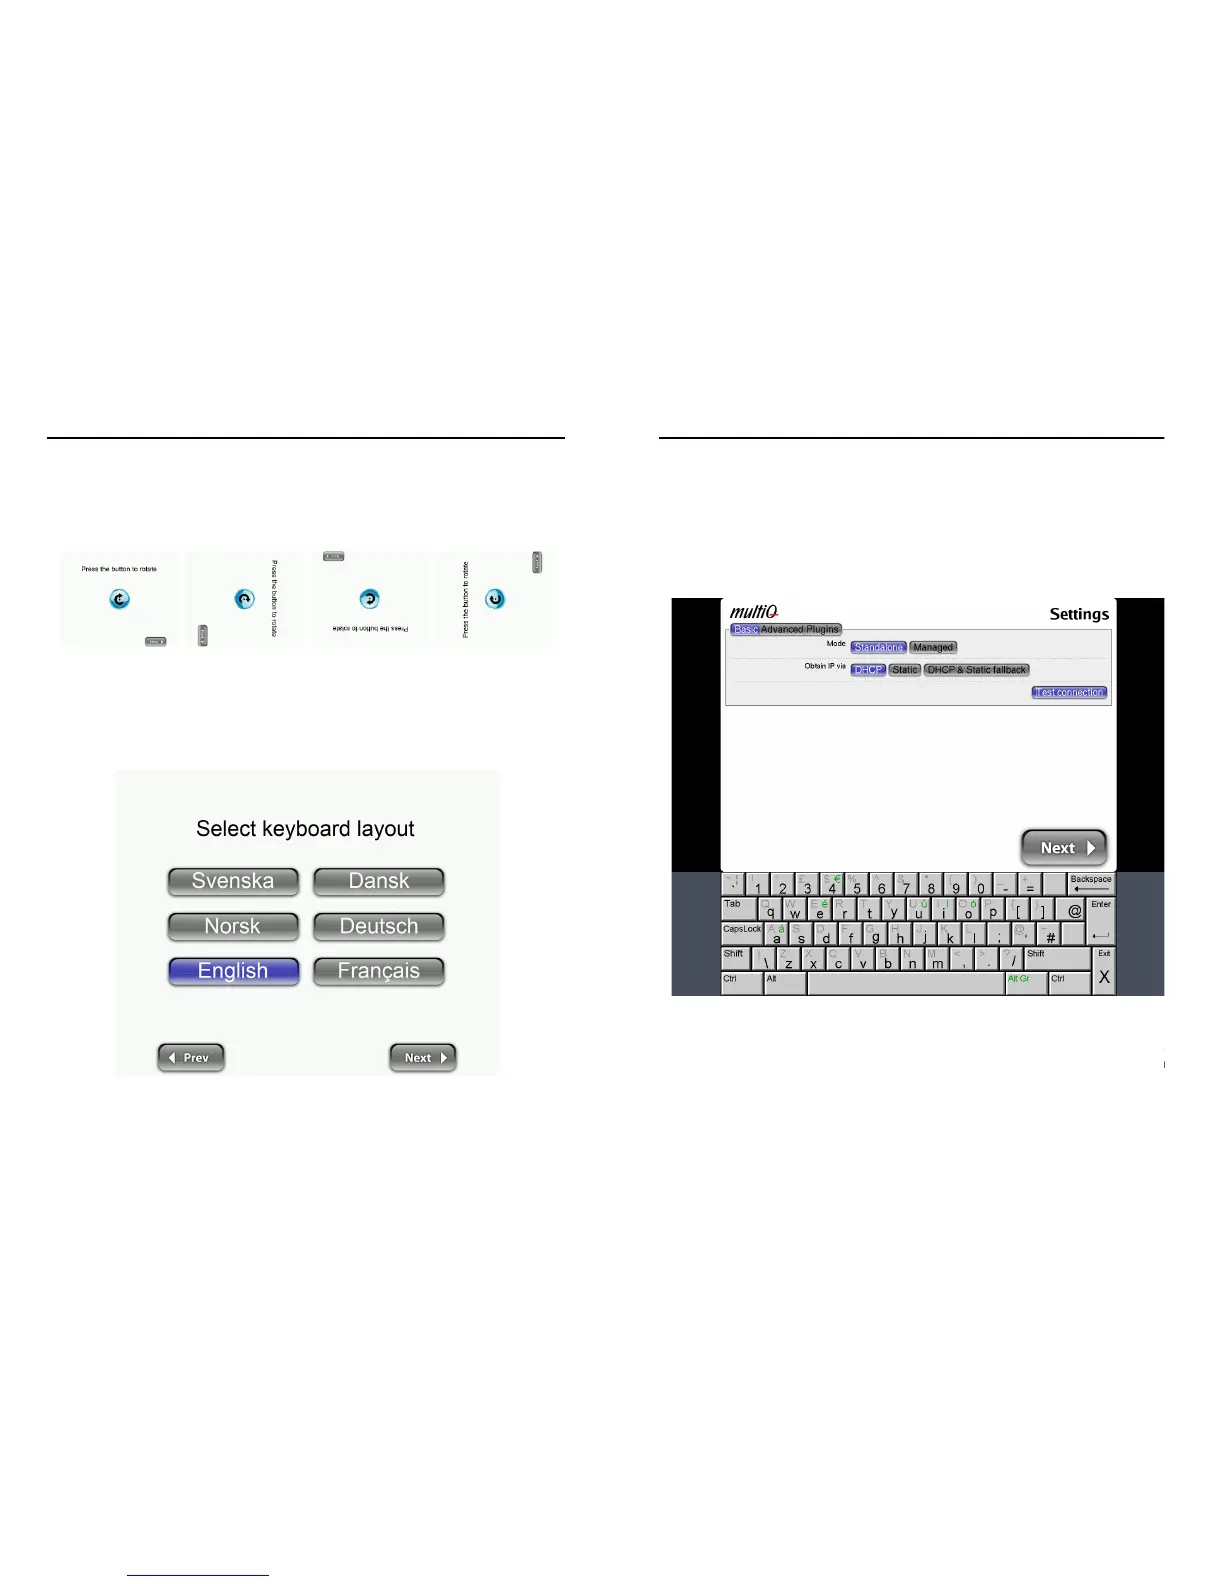
As default the “Basic” setup menu is chosen. If you intend to use the media monitor as
a standalone unit (without access to a central managing system) press the “Standalone”
button (default).
In most cases media players are connected to a local network that provides an IP
address automatically. If so, press “DHCP”. Then press “Test connection”.
Figure 6. Standalone setup with DHCP selected.
Before proceeding to the next menu a Test connection should be made. Clicking the test
connection button will provide you with the IP address that the unit has acquired from
the DHCP server.