1111
1111
11
ENGLISH
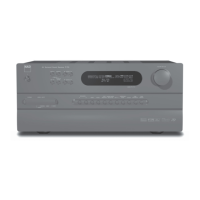
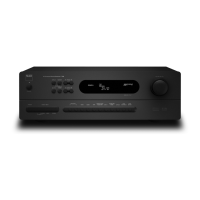
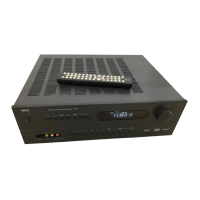
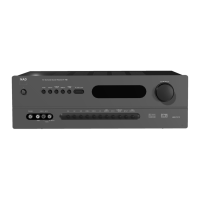
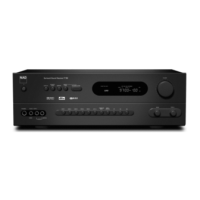
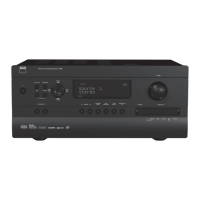
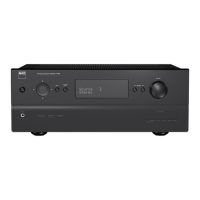
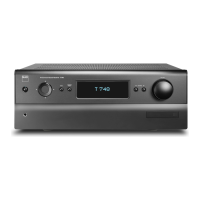
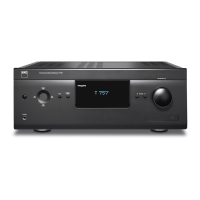
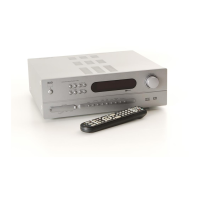
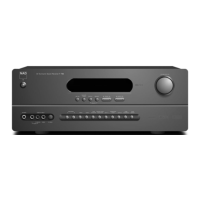
FRONT PANEL
12 TAPE MONITOR: Press to engage the Tape Monitor loop. The signal present at the rear-panel TAPE MONITOR IN jacks will be heard. Press again
to release and return to the previously selected input.
NOTE: Selecting any other input selection while Tape Monitor is engaged automatically releases it.
13 DIGITAL AUDIO SELECTOR: Use to select digital audio input independently of video input to cycle through the T 773’s 6 digital audio inputs (OPT
1-2; Coaxial 3-6). Press repeatedly to step through the T 773’s digital audio inputs. The digital inputs are shown collectively as Digital 1-6 in the VFL
display’s small corner readout. Any digital input can be assigned to any video input (DVD, SAT, VCR, VIDEO 4-5, CD). The chart below shows the
default assignments; see “Input Setup,” below.
Digital Input Jack Default Assignment
OPT 1 DVD
OPT 2 SAT
Coax 3 VCR
Coax 4 VIDEO 4
Coax 5 VIDEO 5
Coax 6 CD
NOTE: Digital inputs take precedence: The T 773 will automatically play any active signal present at the selected digital input; if none is present,
it will “fall back” to the analog audio input assigned to that Video input. Digital inputs can be selected OFF to listen to the analog input of a source
with an assigned digital input.
NOTE: Changing the digital audio input via the Digital Audio Selector is a temporary setting that will be lost when the input is changed or the A/V
Receiver is cycled though Standby or OFF. (See the section “Input Setup” below to reassign digital inputs to video or audio inputs.)
14 EXT 7.1: Press to listen to the component connected to the T 773’s 7.1 CH. INPUT jacks (typically, a DVD-Audio or SACD-Multichannel player). The
HTR 2 remote’s [Ext. 7.1/5.1] key (“10+”) works similarly.
15 SURROUND MODE: Use to select the T 773’s Listening Mode. Press repeatedly to step through the T 773’s Listening Modes. See “About the T 773’s
Listening Modes,” below.
NOTE: Depending on the format of the currently selected input (digital or analog; stereo or multi-channel), different modes will be available. See
“About the T 773’s Listening Modes,” below.
16 LEVELS: Press repeatedly to select the channel, and then use the VOLUME(SETUP) knob to adjust the levels of the T 773’s 7 channels/pairs in turn:
front-left, -center, –right; surround; surround back; subwoofer. The selected channel appears on the VFL and on-screen displays; use the
VOLUME(SETUP) knob to adjust its level relative to the others over a range of ±12 dB. Channel levels may also be adjusted via the on-screen menus;
see “Adjusting Channel Levels,” below.
NOTE: The HTR 2 remote’s [Surr.], [Center], and [Sub]
/keys provide direct access to those channels’ relative levels, however in this case the
level changes are only temporary and are not saved in memory.
17 TONE CONTROLS: Press to adjust treble using the VOLUME (SETUP) knob over a ±10 dB range; press again to adjust bass, and a third time to exit
tone-control adjustment.
18 TONE DEFEAT: Press to disable the tone controls; press again to re-enable them (for instance, to compare a tone setting to unmodified sound.
NOTE: While TONE DEFEAT is engaged, the TONE CONTROLS key will have no effect.
19 SPEAKERS A & B: Press either speaker A or B or both to select the set of speakers you wish to listen to. The Speakers A are the main set of 6 multi-
channel front and surround speakers. The Speaker B are an auxiliary set for remote locations such as other rooms of your home. For Speaker B
selection all surround sound sources are downmixed to stereo as shown in the florescent display.
20 VIDEO 6 INPUT: Use these convenience jacks for occasional sources, such as a camcorder, portable MP3 or tape player, or a videogame console,
or any other analog audio, or composite or S-Video video source. Select the Video 6 input using the HTR 2 remote, or the front-panel VIDEO key.
21 PHONES: Accepts stereo headphone using a standard 1/4-inch stereo phone plug (use a suitable adapter for headphones equipped with a smaller
plug); set the Listening Mode to “Stereo.”
NOTE: For headphone listening the front left/right speakers must be set to “Large” on the OSD’s Speaker Settings page, otherwise headphone bass
response will be restricted.
NOTE: Plugging in headphones will automatically switch the T773 to “Stereo” mode.