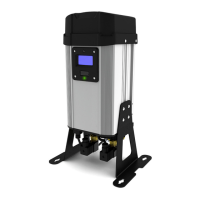
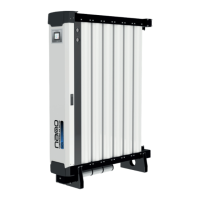
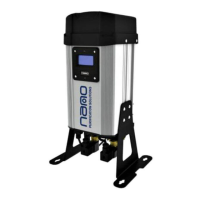
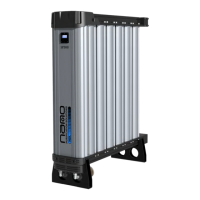
This document is a maintenance and service manual for the nano D1 Series Heatless Compressed Air Dryer.
Function Description
The nano D1 Series is a heatless compressed air dryer designed to remove moisture from compressed air, ensuring a dry air supply for various applications. It operates by cycling between two columns containing desiccant material, which adsorbs water vapor from the compressed air. While one column is drying the incoming air, the other is regenerated by a small portion of the dry air (purge air) flowing in the reverse direction. This continuous cycling ensures a consistent supply of dry air.
Important Technical Specifications
The manual covers models NDL-010, 020, 030, 040, and 050, including ES (Energy Saving) models.
- Operating Pressure Parameters: The inlet operating pressure should be between 6-16 barg (58-232 psig).
- Inlet Air Temperature: The inlet air temperature should be between 1.5°C - 50°C (35°F - 122°F).
- Electrical Fuse: T2A 250V (located at Fig 8.A).
- Dewpoint Sensor (for ES Models): NSK-130.
- Manifold Tightening Torque:
- M4 cap head screws (purge block to outlet manifold): 3Nm.
- M6 long cap head screws (valve block to dryer column): 5Nm.
- M6 cap head screws (inlet manifold to dryer column): 5Nm.
- M5 dome head screws (top cover): less than 1Nm (hand tightened).
- Filtration: Requires a 0.1µm or better coalescing filter, especially when not connected to an oil-free compressor. A water separator is also part of the recommended system layout.
Usage Features
The dryer is designed for continuous operation, providing dry compressed air. Key usage considerations include:
- Start-up Procedure:
- Connect to mains power.
- Connect all pipework, ensuring inlet and outlet valves are closed.
- Verify inlet operating pressure (6-16 barg) and inlet air temperature (1.5°C - 50°C).
- Slowly open the inlet valve.
- Turn on electrical power; the dryer will display its status and commence normal operation. The software version number will be displayed for the first 5 seconds.
- Slowly open the outlet valve.
- Safety: It is crucial that the system includes a pressure limiting/relief device between the compressor and the dryer, set to prevent exceeding 16 barg (232 psig).
- Airflow: Do not allow the dryer to flow air unless it is powered up, switched on, and cycling, as this can lead to cartridge contamination and necessitate replacement.
- Controller Display: The dryer displays its status during normal operation. For ES models, the dewpoint sensor reading will alternate with "dewpoint alarm" every 5 seconds if the dew point is not achieved, activating a no-volt alarm.
Maintenance Features
The manual provides detailed instructions for various service intervals and procedures, emphasizing the use of genuine service parts and adherence to manufacturer guidelines for warranty validity.
- Service Intervals:
- Service A (Every 12,000 hrs or 24 months):
- Outlet manifold service.
- Desiccant cartridge replacement.
- Inlet manifold service.
- Service B (Every 24,000 hrs or 4 years):
- Exhaust valve replacement (NDK-010~050 & NVK-050 kits).
- Service C (Annually, for ES Models Only):
- Dewpoint sensor replacement (NSK-130 kit).
- Recommended Tools:
- Terminal screwdriver
- Allen keys (3mm, 4mm, 6mm, 8mm)
- Torque wrench (8-60Nm) with 6mm/10mm sockets
- 20mm pin spanner
- Valve extraction tool
- Internal circlip pliers
- Magnet (for resetting controller)
- Petroleum jelly (Vasoline)
- Dryer Shutdown Procedure (Essential before maintenance):
- Isolate the product from the compressed air supply and fully depressurize.
- Switch off and isolate from mains power.
- Close inlet and outlet valves.
- Cycle the dryer twice to ensure exhausts and complete depressurization (listen for "clicking" of exhaust valves without air exhausted).
- Once fully depressurized, isolate from the power supply.
- Maintenance Guidelines:
- Only authorized, competent, and trained personnel should perform maintenance.
- All connections must be undone with care, especially pressurized areas.
- Do not modify or adjust control settings.
- Use only certified nano-purification solutions approved replacement parts.
- Always check connections for leakage and secure seating before operation.
- Ensure all loose parts removed during maintenance are refitted correctly.
- Resetting Dryer Controller:
- Ensure the dryer is on and running.
- Place a magnet over the controller reset area for 8-10 seconds until the dryer resets.
- The hours run counter will then show '00000'.
- Troubleshooting: The manual includes a comprehensive troubleshooting guide for common issues such as poor dew point performance, failure to cycle, and constant depressurization, along with corresponding solutions.
- Service Record: A dedicated section is provided for customers to document the service history, including service type, date, and technician's signature/print.