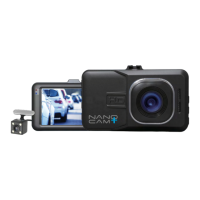
8
2.5 Initial Settings
Before using the Car DVR we recommend
Formatting the Inserted Micro SD Card and setting the correct Time and Date.
2.5.1 Formatting the Inserted Micro SD Card
Formatting the Micro SD card will delete all information on the inserted Micro SD Card and prepare the card for use with
the Car DVR.
1. Press the
(OK) Button to stop the Car DVR from recording.
2. Press the
(Menu) Button to enter the Video Menu.
3. Press the
(Menu) Button again to enter the Settings Menu.
4. Use the
and Buttons to navigate the Settings Menu and highlight the Format setting and press (OK) to select.
5. Select SD Card and press the
(OK) Button.
6. Select OK to confirm and press the
(OK) Button.
Note:
1. Menus cannot be accessed while the camera is recording. Please stop the recording before attempting to access the menu.
2. Formatting your Micro SD Card will delete all files from the card. Once these files have been deleted you will not be able to
recover them.
2.5.2 Set Date / Time
Setting the Time and Date allows you to stamp your footage with the date and time as a reference.
1. Press the (OK) Button to stop the Car DVR from recording.
2. Hold the
(Menu) Button for 2 seconds to enter the Settings Menu.
3. Use the
and Buttons to navigate the Settings Menu and highlight the Date setting and press
OK
to select.
4. Use the and buttons to edit the selected digit and the
(Mode) button to confirm and progress to the next digit.
5. Once the time and date has been entered press the
(Menu) button to save and exit the Date setting.
Note:
1. Menus cannot be accessed while the camera is recording. Please stop the recording before attempting to access the menu.
2. Once the time and date is set it can be stamped onto your footage using the Date Stamp setting. Please see section Date Stamp
for more details.
2.6 Using the Car DVR
2.6.1 Recording Video
When the Car DVR is connected to your vehicle's 12v power supply, the Car DVR will automatically power up and begin
recording when you start your vehicle. During the start up the buttons will be unresponsive and the camera will take a
moment to begin recording. The Car DVR will automatically stop recording and shut down when your vehicle is powered off.