NAPCO Gemini C-Series Control Panel Installation Instructions--Volume 2
Page 40 Installation Instructions, Volume 2
Anti-Jam Time
If the communicator does not detect a dial tone within 7 seconds, the Anti-Jam feature will be activated. That is, the commu-
nicator will go off line for a 16-second anti-jam interval in order to free the telephone circuit from an incoming call, then make
another 7-second attempt at dial-tone detection. If still unsuccessful, the communicator will again go off line for 16 seconds,
then proceed to dial anyway.
Area Descriptions
The PCD-Windows Quickloader Area Descriptions tab of the Area Assignment screen provides a means of adding descrip-
tions for each area (the Area Description column is for reference only within Quickloader). The Ready Message column is
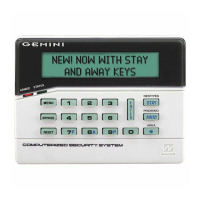
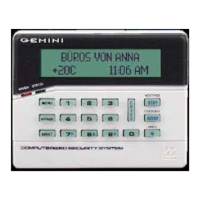
the text message that appears in the keypad display when no zones are faulted and the system is ready to arm (the message
is a 13 character description that appears above the time and date). The Interior 1 and Interior 2 columns provide a means
of adding a description (28 characters each) for these groups of zones (areas). See Interior 1 Bypass.
Areas
Zone Area 1-Zone Area 8
Area Disarm Silencing Options
Area Priority Arming
Although the default program will automatically set up Zones 1 through 8 for Zone Area 1, the panel may be partitioned into
eight areas. Each zone must be assigned to at least one area. At least one zone must be assigned to Area 1 in a Fire or
combination Fire/Burglary system. If a Burglary zone is selected for both areas, that common zone will not arm until both ar-
eas are armed. If any zone disarms, the common zone will disarm. NOTE: Area 1 must be used for Fire for all combination
Fire/Burglary systems.
In a multiple-area system, be sure to also program:
• Enable User Code by Area (see User Codes/Authority Levels);
• Keypad Area Assignments
• Bell Control / Area Disarm Silencing Options (determines which area outputs (Burg Bell, Pulse Burg Bell, Burg PGM1,
Burg PGM2 and the Burg Aux Relay) that may be silenced);
• Subscriber Opening/Closing ID Numbers and Event ID Numbers (if reporting);
• System Trouble Subscriber ID Number
If Priority Area Arming is selected, the Priority Area must be armed before the Arming Area can be armed.
Program the Area Disarm Silencing Options in the PCD-Windows Quickloader Area Assignment screen.
Audible Test on Arming
Tests the alarm circuit each time the system is armed. The alarm is activated briefly (for about 8 seconds) after the panel is
armed. If the alarm does not sound, the device may be defective.
Auto Bell Test on Arming see Auto Output Test Upon Arming
Auto-Bypass (Do not program for UL installations)
Auto-Bypass Re-entry
Zones programmed for Auto-Bypass will be bypassed (automatically removed) if in trouble when arming. A momentary beep
will sound at the keypad to warn that the system has been armed without the protection of the auto-bypassed zone. (Note
that the exit/entry door must be closed before arming, otherwise the Exit/Entry Zone will be auto-bypassed). Note: A zone in
trouble that is not programmed for Auto-Bypass will cause an alarm on arming after a 10-second arming delay.
If Auto-Bypass Re-entry is selected, securing a zone that is programmed for Auto-Bypass, while armed, will cause that
zone to re-enter the system in an armed state.
Auto Disarm / Rearm Delay (Do not program for UL installations)
If the panel was auto-disarmed on schedule and a rearm delay is programmed (see Time Selection), the panel will automati-
cally rearm after the delay if no activity has been detected.
Auto Output Test Upon Arming
Auto Bell Test on Arming
(Required for UL Mercantile installations.)
This will activate the Burglary Bell briefly 10 seconds after the area is armed. If the alarm does not sound, the device may be
defective.
Automatic Interior Bypass / Easy Exit (Do not program for UL installations)
Convert from Away to Stay based on no egress through exit door. Default is enabled. This feature will cause all Interior-1
Zones to automatically be bypassed if the Exit/Entry doors are not opened during the exit-delay period. If the U button is
pressed while armed, exit delay will restart and the Exit/Entry doors may be opened to permit someone to exit (while others
BURGLARY GLOSSARY
 Loading...


