EasyManua.ls Logo

Napoleon GDS28 User Manual

Napoleon GDS28
6 pages
To Next Page IconTo Next Page
Page #1 background imageLoading...
Page #1 background image
GDS28 Safety Barrier Trim Installation Instructions
Wolf Steel Ltd., 24 Napoleon Rd., Barrie, ON L4M 0G8 Canada • 1(866)820-8686 • www.napoleonreplaces.com
W415-1916 / 10.15.18
!
WARNING
If the information in these instructions is not followed exactly, a fire or explosion may result causing property damage,
personal injury or death.
Ensure the appliance, safety barrier and glass are completely cool before starting installation.
To avoid danger of suffocation keep the packaging bag away from babies and children. Do not use in cribs, bed,
carriages, or play pens. This bag is not a toy. Knot before throwing away.
Installer: Leave this leaflet with the appliance. Consumer: Retain this leaflet for future reference.
Caution: A barrier designed to reduce the risk of burns from the hot viewing glass is provided with this appliance and shall be
installed. This barrier is not designed for prolonged contact.
Included in this kit:
1
2
3
4
Top of appliance
door assembly
Bottom of appliance
door assembly
Hinge
pins
2 x trims 2 x barrier rods8 x screws1 x control door assembly
Remove screws and discard.
4 x spacers
Question and Answer IconNeed help?

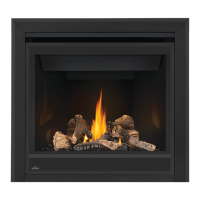
Do you have a question about the Napoleon GDS28 and is the answer not in the manual?

Napoleon GDS28 Specifications

General IconGeneral
Fuel TypeNatural Gas or Propane
Log Set MaterialCeramic Fiber
BTU Input (Natural Gas)28, 000 BTU
Ignition TypeElectronic Ignition
Glass TypeCeramic Glass
WarrantyLifetime Limited Warranty

Summary

GDS28 Safety Barrier Trim Installation Instructions

Control Door Assembly Installation

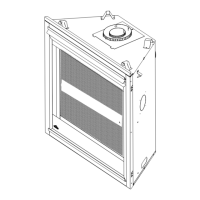
Install the control door assembly onto the appliance as shown in step 1.

Barrier Rod and Trim Positioning

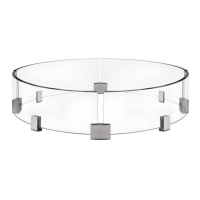
Position the barrier rods and trims on the appliance as depicted in step 2.

Bottom Guard Attachment Preparation

Attach the bottom guard to the appliance and prepare for further steps.

Top Guard and Screw Removal

Prepare the top guard assembly and remove necessary screws.

Bottom Guard Rod Securing

Install both rods into the far ends of the bottom guard and secure with screws.

Barrier Rods with Spacers

Ensure spacers are placed between the trim and safety barrier rods.

Barrier Assembly Alignment

Align the barrier assembly with hinge pins for proper fitting.

Control Door Hinge Pin Removal

Tap hinge pins out of the control door assembly and set them aside.

New Control Door Assembly Installation

Install the new control door assembly using the previously removed hinge pins.

Barrier and Appliance Integration

Integrate the safety barrier with the appliance door assembly.

Final Barrier Attachment

Attach the safety barrier to the appliance door assembly.
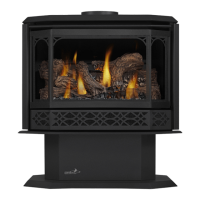
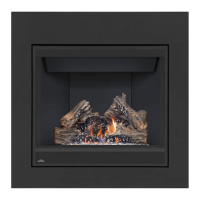
Related product manuals