This document provides folding instructions for a Quick Assembly Guide for a Napoleon Rogue 525 gas grill, followed by the assembly guide itself. The guide is designed to be printed in black and white on a 25 1/2" W x 22" H sheet of paper.
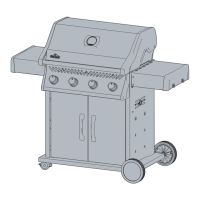
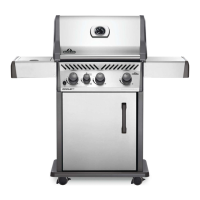
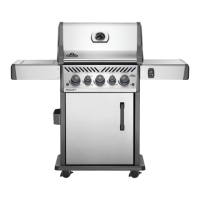
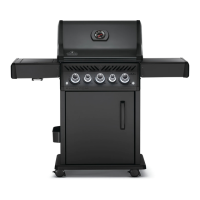
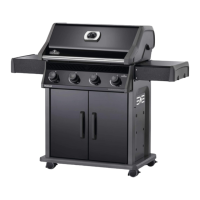
The Napoleon Rogue 525 is a gas grill designed for outdoor cooking. It features multiple burners, side shelves for preparation and serving, and a cabinet base for storage. The grill is built with a sturdy construction, indicating durability for outdoor use.
Assembly Process:
The assembly guide is presented through a series of numbered diagrams, each illustrating a specific step. The process begins with unpacking and identifying components, then proceeds to the construction of the grill's main body, side shelves, and other features.
- Step 14: This step appears to involve the installation of various small components, possibly related to the gas lines or ignition system, as indicated by the presence of small parts and a gas cylinder icon. It also shows the attachment of a handle or control knob.
- Step 15: This step focuses on attaching components to the grill's lid or hood, possibly including hinges or a thermometer. It also shows the installation of a side burner or a similar accessory on one of the side shelves.
- Step 16: This step details the assembly of a side shelf, showing the attachment of a handle and other small parts. It also illustrates the installation of a gas cylinder within the grill's cabinet.
- Step 17: This diagram shows the completed grill cabinet with doors closed, suggesting the completion of the main structural assembly.
- Step 18: This step illustrates the installation of a side burner or a similar accessory into one of the side shelves, including the connection of gas lines.
- Step 19: This step shows the attachment of the grill grates and heat diffusers inside the main cooking area, indicating the preparation for cooking.
- Step 20: This step focuses on the installation of the wheels and casters to the base of the grill, allowing for mobility. It also shows the attachment of a drip tray or grease management system.
- Step 21: This step illustrates the placement of the cooking grates and warming rack inside the grill, completing the cooking surface setup.
- Step 22: This final step shows the completed grill with all components in place, ready for use. It also includes an icon of a flame, suggesting a test of the burners.
The main assembly sequence, detailed on the third page of the document, breaks down the construction into 13 primary steps, each with sub-steps and visual cues.
- Step 1: This initial step involves assembling the base of the grill, including the attachment of the wheels and the lower shelf. It shows various screws and small parts being used to secure the components.
- Step 2: This step focuses on attaching the side panels to the base, forming the cabinet structure. It indicates the use of multiple screws and the alignment of parts.
- Step 3: This step shows the installation of the back panel of the grill cabinet, further solidifying the structure. It also illustrates the attachment of internal supports or brackets.
- Step 4: This step details the installation of the front panels or doors of the cabinet, completing the enclosure. It shows the hinges and handles being attached.
- Step 5: This step involves attaching the main cooking box to the cabinet base. It shows the alignment of the cooking box with the pre-assembled base and the securing of fasteners.
- Step 6: This step illustrates the installation of the gas manifold and burner tubes into the cooking box. It shows the careful placement of these components and their connection points.
- Step 7: This step focuses on attaching the side shelves to the main grill body. It shows the alignment of the shelves with the side panels and the securing of fasteners.
- Step 8: This step details the installation of the control panel and knobs. It shows the placement of the control panel and the attachment of the burner control knobs.
- Step 9: This step involves attaching the wheels and casters to the base of the grill, providing mobility. It shows the securing of the wheels with bolts and nuts.
- Step 10: This step illustrates the installation of the drip tray and grease management system. It shows the placement of the drip tray beneath the burners.
- Step 11: This step shows the completed grill cabinet with the side shelves attached and the control panel in place. It represents a significant milestone in the assembly process.
- Step 12: This step details the placement of the cooking grates and warming rack inside the grill. It shows the careful positioning of these components within the cooking box.
- Step 13: This final step shows the completed grill with all major components assembled, including the lid and side shelves. It represents the grill ready for its first use.
Usage Features:
The Napoleon Rogue 525 is designed for versatile outdoor cooking. It features multiple burners, allowing for direct and indirect grilling, as well as precise temperature control. The side shelves provide ample space for food preparation, holding utensils, or resting cooked items. The enclosed cabinet offers convenient storage for a propane tank and grilling accessories, keeping them protected from the elements and out of sight. The presence of wheels ensures that the grill can be easily moved and positioned as needed, making it suitable for various outdoor settings. The grill's design suggests ease of use, with clearly marked controls and a straightforward ignition system.
Maintenance Features:
While specific maintenance instructions are not detailed in this assembly guide, the design of the Napoleon Rogue 525 hints at several maintenance-friendly features:
- Drip Tray/Grease Management System: The presence of a drip tray (as indicated in step 10 of the main assembly) suggests an easy way to collect grease and food debris, simplifying cleanup and preventing flare-ups. Regular emptying and cleaning of this tray would be a key maintenance task.
- Removable Grates: The cooking grates are shown being placed into the grill, implying they are removable. This allows for easy cleaning of the grates themselves and access to the burner area for maintenance.
- Durable Construction: The robust construction, with metal panels and sturdy components, suggests that the grill is built to withstand outdoor conditions. Regular cleaning of the exterior surfaces would help maintain its appearance and prevent corrosion.
- Accessibility: The assembly process shows various components being attached, suggesting that parts like burners or igniters could be accessed for inspection or replacement if needed, though specific instructions for this are not provided in this document.
Overall, the Napoleon Rogue 525 appears to be a well-designed gas grill, offering a balance of cooking performance, convenience, and ease of assembly and potential maintenance.