AUDIO 2 DJ – 28
Software Setup
1. Start TRAKTOR.
2. Open Preferences > Audio Setup > Audio Setup.
3. From the Audio Device list, select the AUDIO 2 DJ entry.
4. Open Preferences > Audio Setup > Output Routing.
5. Choose Internal Mixing Mode.
6. Assign 1: Out and 2: Out to the Output Master.
7. Assign 3: Out and 4: Out to the Output Monitor for pre-listening to the Tracks.
8. Close the Preferences.
9. Turn up the volume of your amplier to the level you would like to use during your
performance.
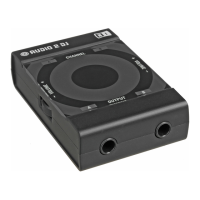
10. Play a track and double-click the Main VoluMe knob in the Master panel of TRAKTOR
to set the output volume amplication in the software to 0 dB. Adjust the output vol-
ume of the Audio 2 DJ with the Volume Control for Output A on the left side of the
AUDIO 2 DJ.
11. Turn the Mix knob fully to the left and activate the HeadpHone Cue button in the mixer
strip of the playing deck. Double-click the VOL knob in the Master panel to set the
headphone output amplication to 0 dB. Finally adjust the headphone volume with
the Volume Control for Output B on the right side of the Audio 2 DJ.
Test the Setup
1. From TRAKTOR’s Browser List, drag tracks in both decks and hit the Play/Pause
Buttons.
2. Drag the crossfader all the way to the left (Deck A).
3. Click on the HeadpHone Cue button next to Deck B. You should hear the track playing on
Deck B in your headphones while the track in Deck A is playing via your speakers.