64
12.Insert2.5”x10”cardboardbetweentheFlywheelandthe
Brake Magnet, and tape the cardboard to the Brake Magnet.
Note: Be sure the cardboard covers all of the Brake Magnet.
13. Measure or mark a piece of scrap paper the length from the
end of the Tensioner Bolt to the outer Tensioner Nut. This will
assist with re-assembly.
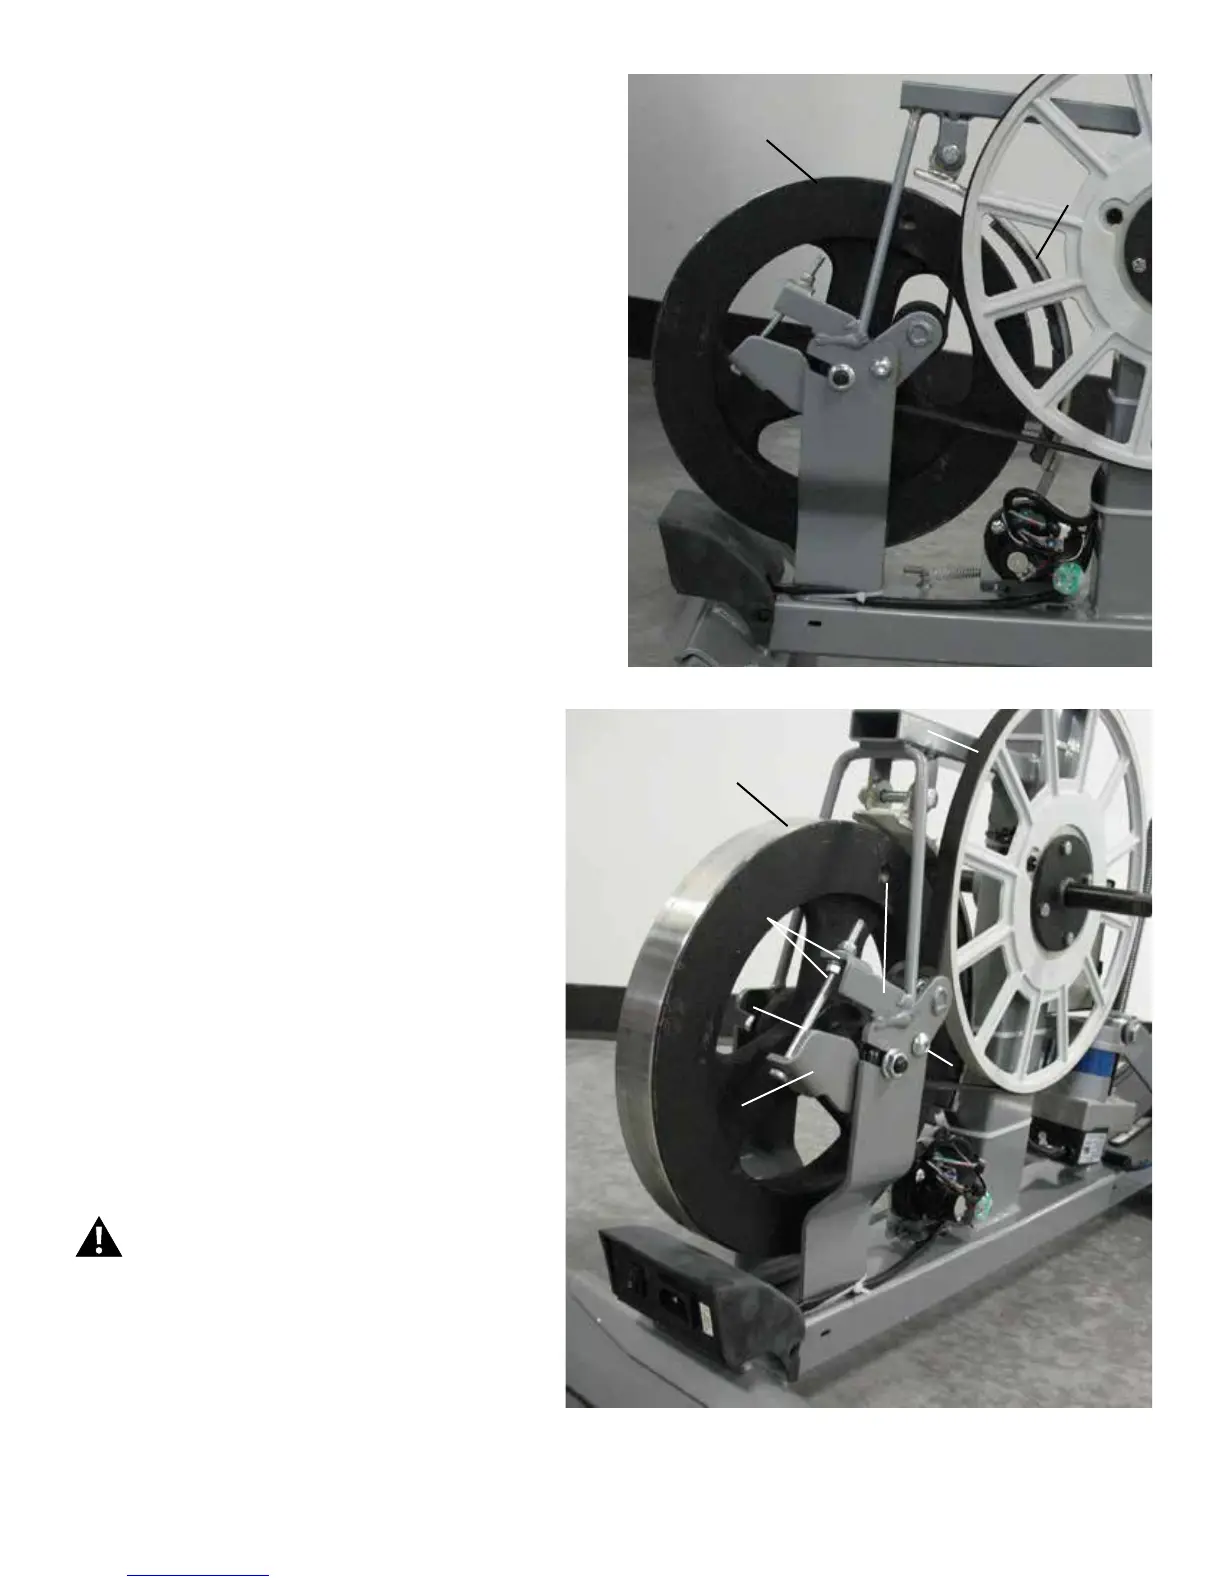
14. Using a 10mm wrench, loosen and remove the outer
Tensioner Nut so the Tension Bolt can be released from the
Tensioner Bracket.
15.Usinga6mmhexwrenchanda13mmwrench,loosenthe
Tensioner Assembly Hardware (A) that attaches the Tensioner
Assembly to the Frame Bracket.
Note: Usethehexwrenchtoholdtheboltinplaceontheoutside
and turn the nut from the inside.
16. Turn the Drive Pulley clockwise while forcing the Drive Belt to
the outside to remove it. The belt will come off of the Drive Pulley.
Keep ngers out of any pinch hazards when turning
the Pulleys.
Tensioner Assembly
Tensioner Bracket
Tensioner Nuts
Tensioner Bolt
A
Flywheel
Flywheel
Brake Magnet
Drive Pulley
Drive Belt
 Loading...