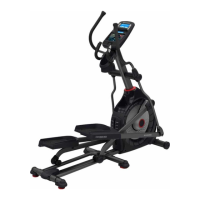
Do you have a question about the Nautilus EV716 and is the answer not in the manual?
Instructions to save the manual for future reference.
Emphasizes reading and following all warnings and procedures in the manual.
Lists the specific tools required for assembling the elliptical trainer.
Details the quantities and descriptions of all hardware components included for assembly.
Provides visual representations of hardware items to aid in identification during assembly.
Displays torque settings for various bolts and fasteners as viewed from the front of the elliptical.
Displays torque settings for various bolts and fasteners as viewed from the rear of the elliptical.
Instructions for safely unpacking the elliptical and removing all packing and shipping materials.
Guides the user through the process of removing the elliptical unit from its protective packaging.
Details the procedure for attaching the rear frame to the main base unit of the elliptical.
Instructions on how to attach the left and right side rails to the main base unit.
Guides the user in attaching the support uprights to the side rails using specified hardware.
Instructions for attaching the linkage cover to the base unit, including reattaching the lockout knob.
Details the process of attaching the left and right swing arms to the side rails using bolts and nuts.
Explains how to install the foot plates and feed the roller wheels through the pod assembly.
Guides the attachment of front and rear connecting arm pivots to the elliptical frame.
Instructions for connecting control wires and attaching the left and right upper body arms and their covers.
Details the steps for checking torque, machine operation, alignment, and stability after assembly.
Instructions for installing the left and right swing arm covers and rear pivot covers.
Guides the installation of upright caps, front pivot covers, and stabilizer end caps.
Explains how to connect various control wires and attach the display console to the base unit.
Instructions for connecting the power cord to a suitable electrical outlet.
Prompts the user to record installation date, installer, serial number, and firmware version for service.
Provides contact information for customer service and support offices worldwide.
Lists contact details for international offices, including Switzerland, Germany, Italy, and the UK.
| Type | Elliptical Trainer |
|---|---|
| Resistance Levels | 25 |
| Weight Capacity | 350 lbs |
| Programs | 29 |
| Heart Rate Monitoring | Contact and telemetry enabled |
| Display | LCD |