EasyManua.ls Logo

Nautilus E614 - User Manual

Nautilus E614
62 pages
Print Icon
To Next Page IconTo Next Page
Loading...
1
Nautilus
®
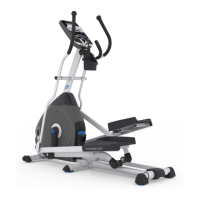
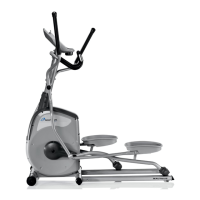
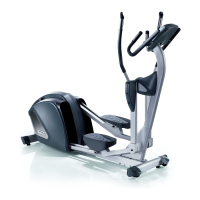
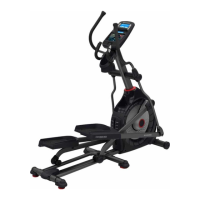
E614 (Model Year 2014) Elliptical
Fitness Machine Service Manual
8008059.021516.B
Service Manual
Section Code Section Page Number
1 Important Safety Instructions 2
1 Safety Warning Labels and Serial Number 3
1 ReadingtheProductSpecicationDecal 3
1 Specications 3
1 Maintenance 4
1 Moving the Machine 5
1 Leveling the Machine 5
1 Troubleshooting 6
1 Console Service Mode 8
1 Maintenance Parts Exploded View 10
1 Replacement Procedure Skill Level 11
Mechanical Procedures 12
2 Adjust the Belt Tension 12
3 Set the Brake Tension 15
Part Replacement 18
4 Console 18
5 Static Handlebar and Water Bottle Holder 20
6 Upper and Lower Handlebar Arms 22
7 Pedals and Legs 25
8 Front Stabilizer 27
9 Lift Assembly and Rail Assembly 29
10 Transport Wheels, Front Endcaps and Footpads 34
11 Shrouds 36
12 Console Mast 41
13 DataCableintheMast 44
14 Brake Assembly 48
15 Servo Motor 51
16 DriveBeltandFlywheelAssembly 54
17 Tensioner Assembly (Idler Assembly) 57
18 RPM Sensor (Speed Sensor) 59
19 Power Inlet 61
Table of Contents
Nautilus, Inc., (800) NAUTILUS / (800) 628-8458, www.NautilusInc.com - Customer Service: North America (800) 605-3369, csnls@nautilus.com | outside U.S. technics@nautilus.com |
© 2014 Nautilus, Inc. | ® indicates trademarks registered in the United States. These marks may be registered in other nations or otherwise protected by common law.

Other manuals for Nautilus E614

Questions and Answers

  • M
    mjohnsonAug 17, 2025
    How to fix a sticking incline assembly on my Nautilus Elliptical Trainer?
    • J
      joshua81Aug 17, 2025
      To resolve incline assembly issues on your Nautilus Elliptical Trainer, adjust the levelers to raise the front of the rail assembly until there is 0.6cm - 1.25cm (1/4” - 1/2”) space between the top of the incline assembly and the main unit shroud.
  • P
    pclarkAug 20, 2025
    Why does my Nautilus E614 Elliptical Trainer console shut off during use?
    • A
      Angela MillerAug 20, 2025
      If your Nautilus Elliptical Trainer console shuts off while you're using it, ensure the unit is plugged into a working wall outlet. Also, check the connection to make sure it's secure and undamaged; replace the adapter or connection at the unit if necessary. Finally, all wires in the cable should be intact; if any are cut or crimped, replace the cable.
  • N
    Nicole GuzmanAug 23, 2025
    What to do if my Nautilus E614 Elliptical Trainer displays 'Please Stride'?
    • L
      Lauren KerrAug 23, 2025
      If your Nautilus Elliptical Trainer displays 'Please Stride' or shows no speed/RPM reading, first, check that all wires in the cable are intact; replace the cable if any are cut or crimped. Next, ensure the cable is securely connected and properly oriented, making sure the small latch on the connector lines up and snaps into place. Also, confirm the magnet is in place on the pulley. Finally, the speed sensor should be aligned with the magnet and connected to the data cable; realign the sensor if needed, and replace it if damaged.
  • D
    Dr. Matthew GarciaAug 26, 2025
    How to fix a squeaking noise on my Nautilus E614?
    • T
      Terri DixonAug 26, 2025
      If you're experiencing a squeaking noise that gets worse during your Nautilus Elliptical Trainer workout, slightly loosen the pivot rod bolt until the noise stops. You can also apply white lithium grease for a temporary fix. Additionally, apply silicone lubricant to a dry cloth and wipe the rails to eliminate roller noise.
  • T
    Timothy MurilloAug 28, 2025
    Why won't my Nautilus E614 turn on?
    • J
      Jerry ChungAug 28, 2025
      If your Nautilus Elliptical Trainer has no display, a partial display, or won't turn on, ensure it's plugged into a functioning wall outlet. The connection should be secure and undamaged; replace the adapter or connection if damaged. All wires in the cable should be intact; replace the cable if any are crimped or cut. Be sure the cable is connected securely and oriented properly, with the small latch on the connector lined up and snapped into place. Check for any cracks or damage to the console display and replace it if damaged. If the console only has a partial display and all connections are fine, replace the console.
  • T
    Tyler MatthewsAug 31, 2025
    How to level my Nautilus E614?
    • P
      perezkariAug 31, 2025
      If your Nautilus Elliptical Trainer rocks or doesn't sit level, adjust the levelers until the machine is level. If the surface is extremely uneven, you may need to move the machine to a more level area.
  • J
    Jennifer SantosSep 3, 2025
    What to do if the fan on my Nautilus E614 won't turn on/off?
    • J
      James HartSep 3, 2025
      If the fan on your Nautilus Elliptical Trainer won't turn on or off, make sure all wires in the cable are intact; replace the cable if any are cut or crimped. Ensure the cable is securely connected and oriented properly, with the small latch on the connector lined up and snapped into place. Unplug the unit from the electrical outlet for 3 minutes, then reconnect it.
  • R
    Ronald KingSep 5, 2025
    Why is the heart rate not displaying on my Nautilus E614 Elliptical Trainer?
    • E
      Erik JonesSep 5, 2025
      If your Nautilus Elliptical Trainer is operating but the contact heart rate (HR) is not displayed, make sure the cable is securely connected to the console. Also, ensure the cables from the handlebars and the cable to the console are secure and undamaged. Be sure your hands are centered on the HR sensors, kept still, and with relatively equal pressure applied to each side. A conductive electrode cream (heart rate cream) can help improve contact. If these steps don't work, the static handlebar should be replaced.
  • L
    Lacey YatesSep 8, 2025
    What to do if the fan on my Nautilus E614 Elliptical Trainer is not working?
    • P
      Patrick FieldsSep 8, 2025
      If the fan on your Nautilus Elliptical Trainer won't turn on, but the console operates, unplug the unit from the electrical outlet for 5 minutes. Remove any material from the fan. If necessary, detach the console to help with removal. If you are unable to remove the blockage, replace the console.
  • L
    lindafullerSep 12, 2025
    How to tighten loose foot pedals on my Nautilus E614?
    • K
      katie39Sep 12, 2025
      If the foot pedals on your Nautilus Elliptical Trainer feel loose or the unit is difficult to operate, tightly secure all hardware on the Pedal Arms and Handlebar Arms.

Summary

Important Safety Instructions

Machine Specifications and Identification

Reading the Product Specification Decal

Guidance on interpreting the machine's specification decal for key information.

Specifications

Provides technical details about the machine, including weight and power requirements.

Machine Operation and Basic Maintenance

Moving the Machine

Instructions on how to safely relocate the elliptical fitness machine.

Leveling the Machine

Steps to ensure the machine is stable and level on uneven surfaces.

Troubleshooting and Console Features

Troubleshooting Common Issues

Addresses common problems and provides solutions for machine malfunctions.

Console Service and Setup Modes

Accessing console settings, diagnostics, and manufacturing tests.

Key Adjustments and Component Replacements

Adjusting Belt Tension

Procedure for setting the correct drive belt tension.

Setting Brake Tension (Calibration)

Calibrating the resistance system for optimal performance.

Replacing the Console

Step-by-step guide for replacing the machine's console unit.

Replacing the Brake Assembly

Instructions for removing and installing the brake assembly.

Replacing the Drive Belt and Flywheel

Instructions for replacing the main drive belt and flywheel assembly.

Nautilus E614 Specifications

General IconGeneral
TypeElliptical Trainer
Resistance Levels20
Stride Length20 inches
Weight Capacity300 lbs
DisplayLCD
Power SourceAC adapter
Display TypeLCD
Heart Rate MonitoringContact and telemetry enabled
Warranty10 year frame, 3 year parts, 1 year labor

Related product manuals