67
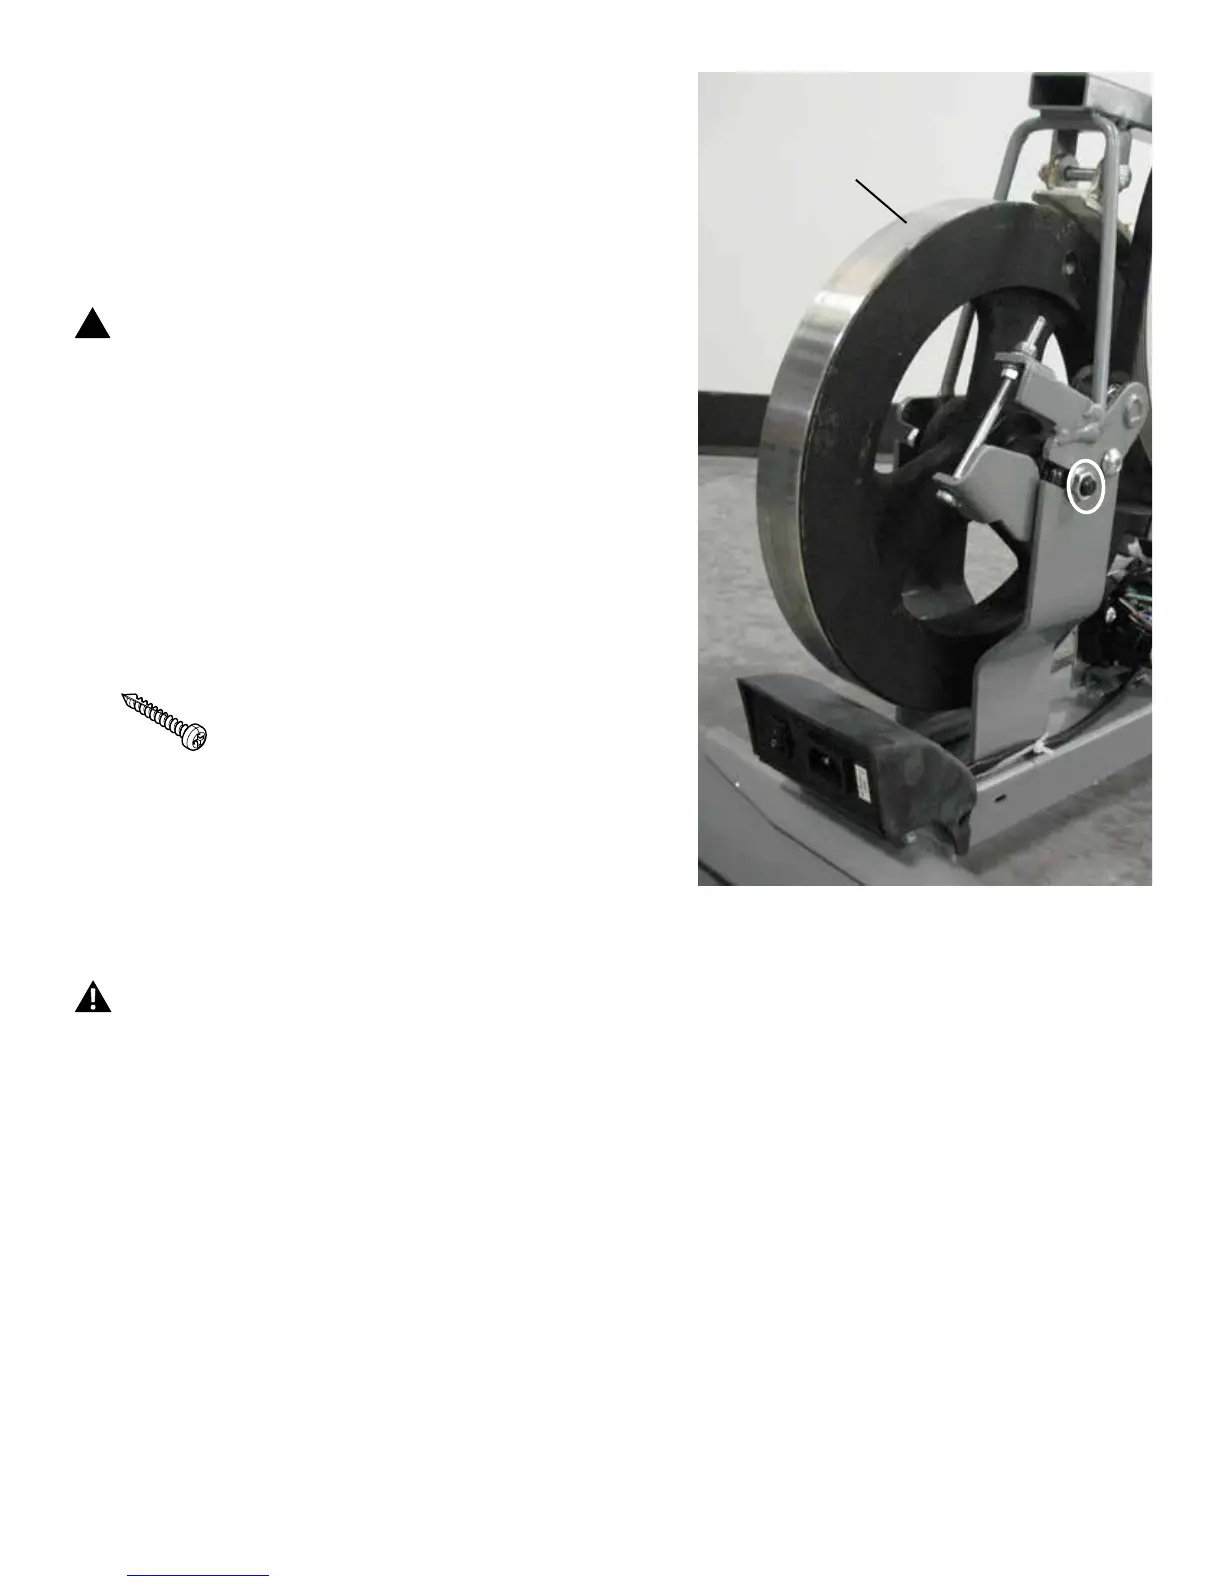
28. To tighten the Flywheel hardware use the 17mm open end
wrench to hold the nut on one side steady and tighten the nut on
the opposite side with the 17mm socket and wrench.
29. Before fully attaching the Shrouds, power up the machine to
verify that the Magnet Arm can move freely, and that the Brake
MagnetandFlywheeldonottouchatthemaximumresistance
level.
!
Machine is on. Current is active. There is risk of
electrical shock. Be sure to keep ngers clear of all
pinch hazards when you change the resistance level.
30. Installation is the reverse procedure.
PuttheLeftShroudinpositionrsttoalignthescrewsforthe
RightShroud.Installthetopscrewsrst.Besurethetabsinthe
Motorized Lift Cover snap into the Side Shrouds.
NOTICE: This step may require two people. Be sure not to
crimp any cables.
Note: Self-tapping screws attach the Shrouds to the Frame.
Installation does not require the use of the crank puller. Be sure
the Crank Arms are connected at 180° from each other.
31. Inspect your machine to ensure that all hardware is tight and
components are properly assembled.
Do not use until the machine has been fully assem-
bled and inspected for correct performance in
accordance with the Owner’s Manual.
Flywheel

 Loading...