13
DXP1000DVR
Select the Radio icon from the Main Menu screen.
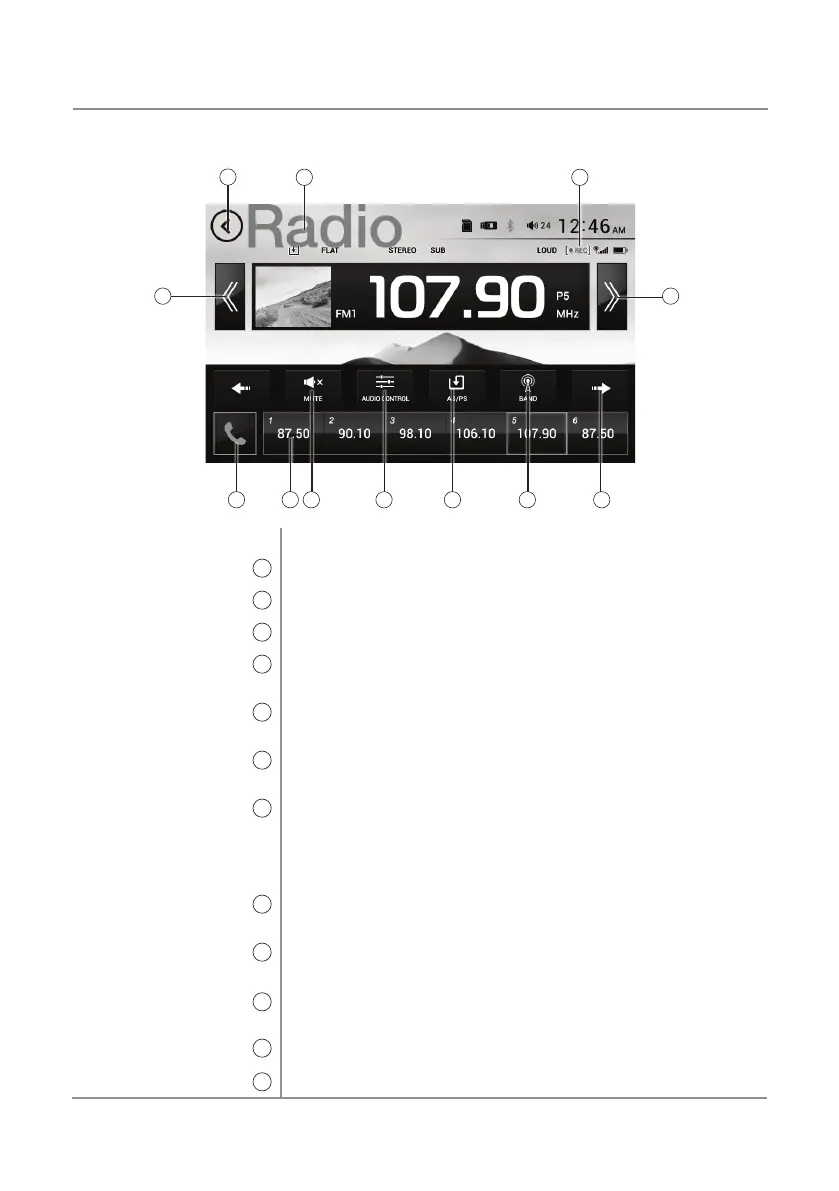
Press to return to Main Menu screen.
Displays current mode of operation.
This icon will flash when the DVR is recording in the background.
Press << to tune radio to a lower frequency. Press < to tune the unit
down one step at a time.
Press >> to tune radio to a higher frequency. Press > to tune the unit up
one step at a time.
Press to access the Phone when Bluetooth is enabled. If Bluetooth is
turned off, pressing this button will turn it on.
Press to display the six preset stations stored in memory in the current
band. To store a preset station, tune unit to desired station, then press
and hold the desired preset button to store the current station in that
preset spot. Up to 18 FM and 12 AM stations can be stored in memory.
Momentarily press any preset station to play it instantly.
Press to mute the unit's sound. Press again to unmute, or sound can be
restored by adjusting the volume on the front panel.
Press to adjust Audio options as described on page 10.
Press to scan preset stations and listen to the first 10 seconds of each.
Press again to stop scanning and listen to the station. Press and hold to
automatically find and store the strongest stations as presets.
Press to select between two AM and three FM bands.
Press to see the next screen of options.
Radio Operation
Main Menu
1
Current Mode Indicator
2
DVR Recording
3
Tune Frequency Down
4
Tune Frequency Up
5
Phone
6
Preset Stations
7
Mute
8
Audio Control
9
Automatically Store /
Preset Scan
10
Band
11
Next Options
12
5
1
4
2
8
AM/FM Tuner Operation
6
7
9
11
10
11
3
 Loading...