71Installing a Cascade System
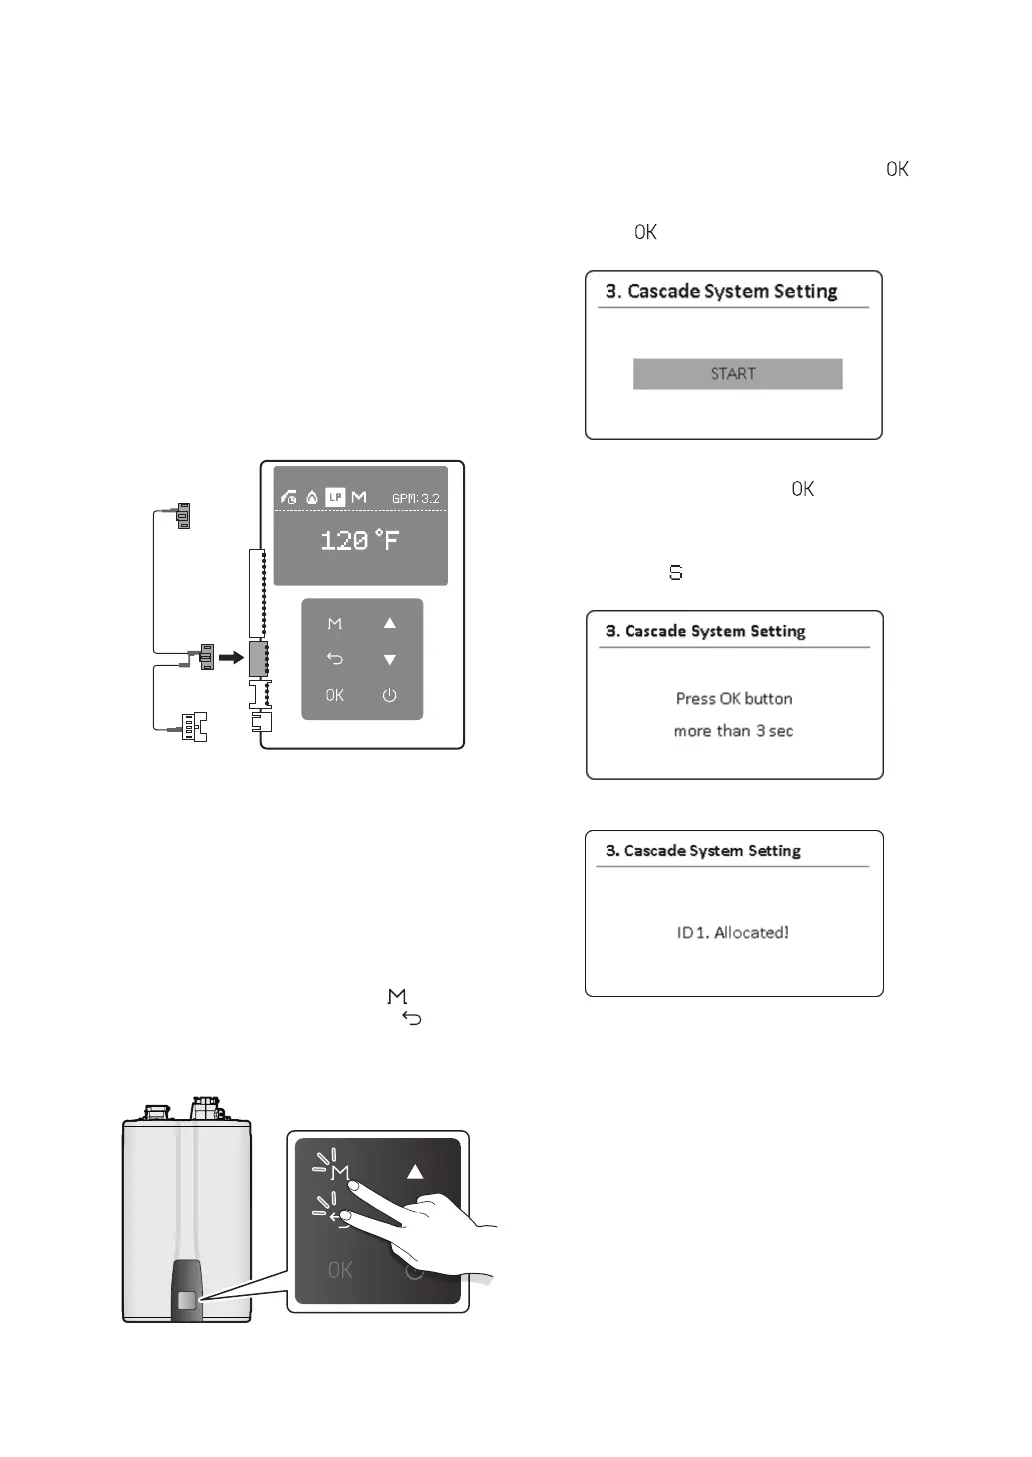
2. Select 2. Cascade Status and Set > 3. Cascade
System Setting by pressing the OK button (
).
Then the START button will appear on the main
water heater’s front panel display. Press the OK
button (
) to start the cascade system setting.
3. Press and hold the OK button ( ) for 3 seconds
on the sub unit. Then, the ID 1. Allocated!
message will appear on the sub unit’s front
panel display. When the water heater is set to a
sub unit, the
icon will appear on the display.
4. Repeat step 3 to configure the rest of the sub
water heaters in the system.
5.2 Connecting the
Communication Cables
Up to 32 water heaters can be connected with
Navien Ready-Link communication cables. Select
one of the water heaters in the cascade system
as the main water heater, and then connect the
other water heaters to it as sub. Before making any
connections, ensure that the power is turned off to
all water heaters.
Connect the Ready-Link cables to the J6 ports on
the left side of the front panel:
5.2.1 Configuring the Communication
Settings
After connecting the Ready-Link communication
cables, restore power to the water heater and turn
on all water heaters using the Power button.
To configure the communication settings:
1. Press and hold the Menu button (
) on
the main unit and the Back button (
)
simultaneously for 3 seconds on the main water
heater to access the Service/Installer menu.
 Loading...