INSTALLATION/ SERVICE MANUAL
INSTALLATION/ SERVICE MANUAL
17
18
1. Power down
• Turn o key, disconnect battery
• Put car on a stand and block wheels
• Use insulated tools
• Never use battery as workbench
2. Remove OEM Protective Cover
• Remove cables from controller
• Unclip OEM Wire Harness
3. Remove OEM Controller
4. Install TXT Mounting Plate
• Align plate with existing holes (where OEM controller
was fastened) and fasten with screws (Fig. 2)
INSTALLATION INSTRUCTIONS
E-Z-GO TXT 48 DC to AC Conversion
Disconnect all batteries before beginning
installation. If the car has a run/tow switch, you must
place the switch in the TOW position first!
CAUTION
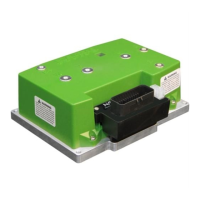
PARTS INCLUDED
• AC Controller
• AC 4 kW motor
• On-The-Fly programmer
(Optional)
• Mounting plate and
hardware
• Run/Tow switch mount
• Motor phase cable
• Speed sensor/motor
temperature harness
To view our Installation
video for Golf Cars, visit:
NavitasVS.com/support
Fig. 1
Fig. 2
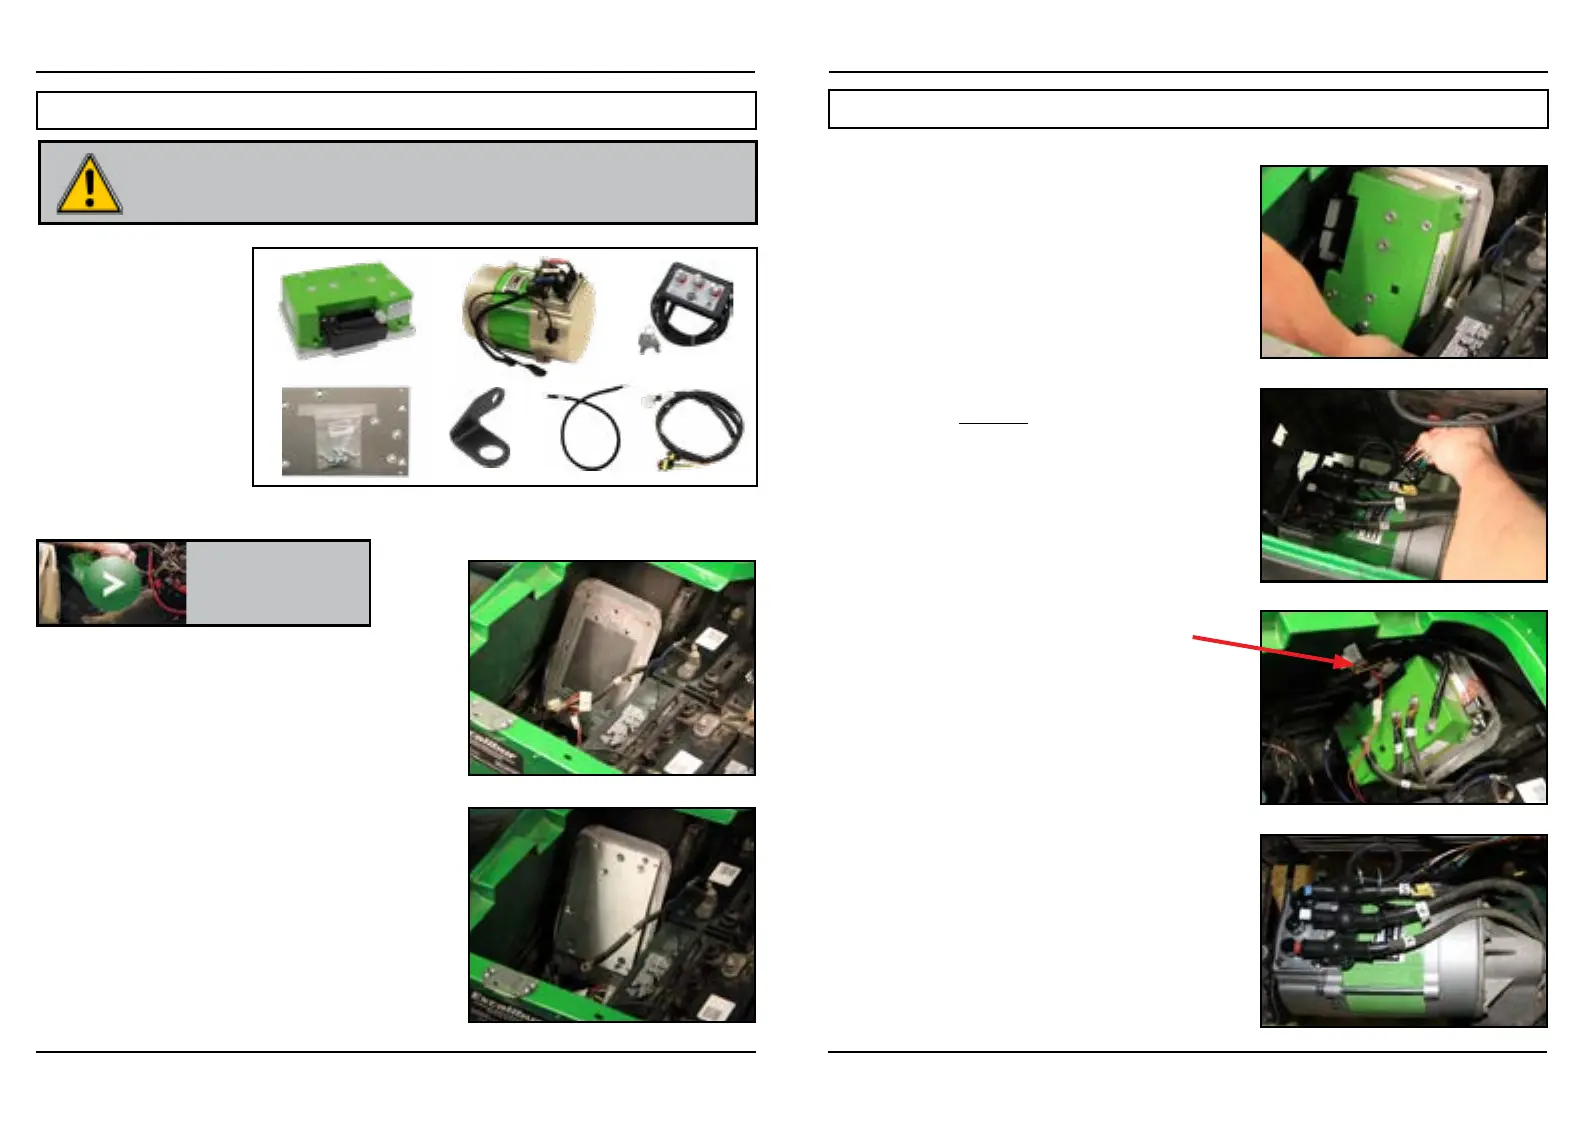
5. Mount Controller
• Install Navitas AC controller (Fig. 3)
• Attach Run/Tow switch mount and fasten Run/Tow
switch to mount.
• Connect B- from battery, B+ from solenoid and motor
phase cables to U, V, W (use new cable provided as
‘W’ and re-use the 2 existing motor phase cables from
A1=U, A2=V) to the controller
(Fig. 5)
6. Motor Conversion
• Remove motor cables A1 & A2 from motor
• Remove and DISCARD field cables (F1, F2)
• Remove DC motor. Save motor mounting bolts.
• Install Navitas AC motor using the motor mounting
bolts from the DC Motor.
• Connect new speed sensor/motor temp harness to
motor (Fig. 4) and route to controller.
• Connect motor phase wires from controller using the
removed A1 and A2 wires and the included wire (U =
U, V = V and W = W) (Fig. 6)
• Check cabling to make sure U, V, and W match
exactly from motor to controller (Fig. 6)
7. Connect OEM Harness to Adaptor Module
8. Connect Speed Sensor/Motor Temperature
Wire Harness to Controller (Fig. 5)
9. Install On-The-Fly Programmer (optional)
• Install OTF (optional) (see install description in RXV INSTALL instructions, p12)
• Connect OTF to Navitas Controller
• Zip Tie loose cables
10. Test Installation
• Lift rear wheels
• Reconnect battery pack
• Put in “RUN” mode
• Turn key on
• Put in “F” for Forward
• Press on throttle to activate wheels
INSTALLATION INSTRUCTIONS
E-Z-GO TXT 48 DC to AC Conversion cont’d
Fig. 3
Fig. 4
Fig. 5
Fig. 6
Note: This instruction is for stock TXT-48 model carts. Other E-Z-GO models might need extra parts and steps
not covered in this installation.
 Loading...

