7NAVMAN M100 User Manual
Installation
Location
The NAVMAN M100 is designed for above or
below deck installation. Select a position that is:
• At least 300mm from a compass
• At least 500mm from any radio
• Easy to read by the helmsman and crew
• Protected from physical damage
• Accessible to electrical cable connections
• Protected from water spray reaching rear
of instrument.
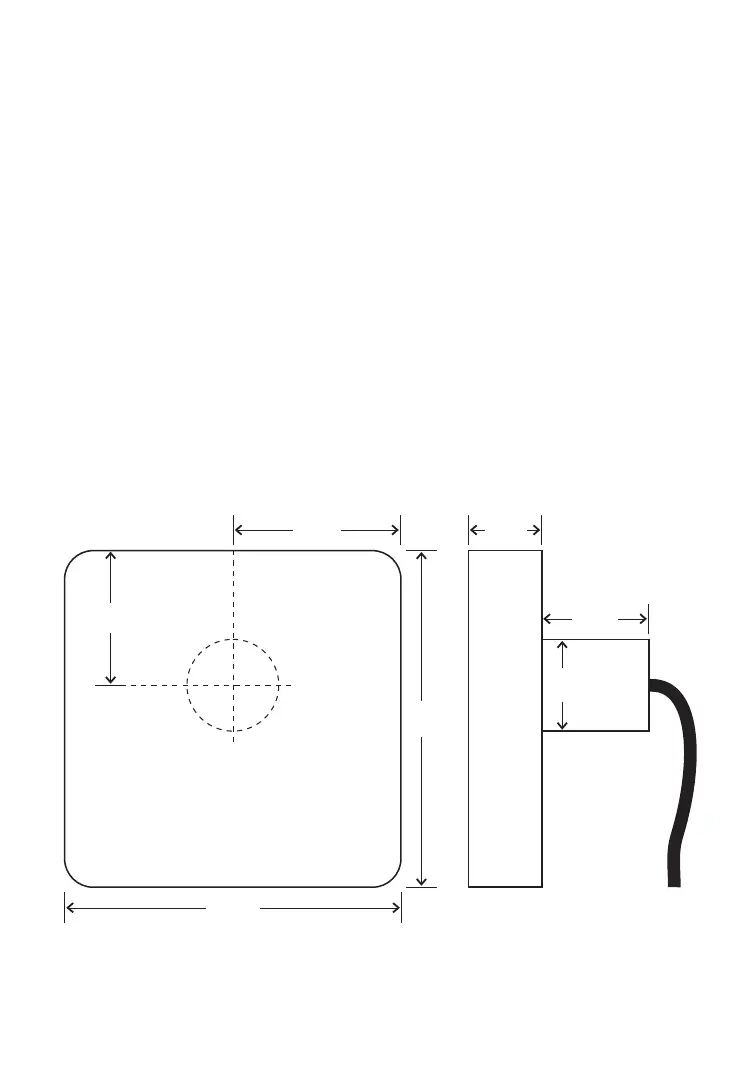
Mounting
The mounting surface must be flat. Use the
template to set the centre of the fixing hole.
• Drill a 32mm (1.25”) diameter mounting hole
through the bulkhead.
• Remove the fixing nut. Peel the protective
paper off the foam gasket and attach the
gasket to the rear of the instrument.
• Insert the instrument through the bulkhead.
Hand tighten the nut and then finally tighten
with a spanner. Do not over tighten so that
the water sealing ability of the gasket is
damaged.
112mm
(4.4”)
4.5mm
(1.75”)
30mm
(1.2”)
112mm
(4.4”)
24mm
(1”)
56mm
(2.2”)
35mm
(1.4”)
 Loading...