How to fix unstable picture on NEC PlasmaSync PX-42VP4G?
- LLaurie ValdezSep 4, 2025
To fix an unstable picture on your NEC monitor, ensure the computer’s resolution setting is appropriate and set to the proper resolution.
How to fix unstable picture on NEC PlasmaSync PX-42VP4G?
To fix an unstable picture on your NEC monitor, ensure the computer’s resolution setting is appropriate and set to the proper resolution.
Why mechanical sound is heard on NEC Monitor?
The mechanical sound you hear from your NEC monitor may be from the cooling fans used to prevent overheating.
How to fix tint that is poor or colors that are weak on NEC PlasmaSync PX-42VP4G Monitor?
If the tint is poor or the colors are weak on your NEC monitor, adjust the tint and color under the PICTURE settings.
Why nothing appears on NEC PlasmaSync PX-42VP4G Monitor screen?
If nothing appears on your NEC monitor screen, ensure the computer is turned on and a source is connected to the monitor. If the power management function is in standby or off mode, operate the computer (move the mouse, etc.). Also, check if LOOP OUT is set to ON and, if so, set it to OFF.
How to fix front panel buttons that do not function on NEC PlasmaSync PX-42VP4G?
If the front panel buttons on your NEC monitor are not working, set the Control Lock to OFF, as the buttons do not function during Control Lock.
What to do if POWER/STANDBY indicator is blinking in green and red, or green on NEC Monitor?
Promptly switch off the power of the main unit of your NEC monitor.
How to fix poor picture with RGB signal input on NEC PlasmaSync PX-42VP4G Monitor?
If you have a poor picture with RGB signal input on your NEC monitor, adjust the picture controls as needed and check the 15 PIN connector pin assignments and connections.
How to fix poor picture with VIDEO signal input on NEC Monitor?
If you are experiencing a poor picture with VIDEO signal input on your NEC monitor, adjust the picture control as needed. Also, try another location for the monitor and ensure all connections are secure.
Why picture is disturbed, sound is noisy and remote control operates erroneously on NEC Monitor?
If the picture is disturbed, the sound is noisy, and the remote control operates erroneously on your NEC monitor, leave some space between the display and any connected components that might be set directly in front or at the side of the display.
What to do if NEC Monitor’s power does not turn on with the remote control?
If your NEC monitor isn't powering on with the remote, first ensure the monitor's power cord is plugged into a working outlet. If all indicators are off, press the power button on the monitor itself. Replace the remote's batteries if they are worn out. Also, check the IR REMOTE setting and set it to OFF. Finally, verify the ID number setting; set an ID number with the ID SELECT button, or set the ID number to ALL.
General precautions for using the plasma monitor and keeping the manual for future reference.
Instructions for operating safety and to avoid damage to the unit, including shock and fire hazards.
Requirements for heat dispersal when installing the monitor in an enclosure.
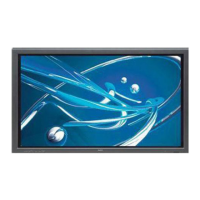
Overview of the plasma monitor's features, design, and visual technology.
Lists the items included with the plasma monitor package.
Lists optional accessories available for the plasma monitor.
Identifies and explains the function of the controls and indicators on the front of the monitor.
Details the various input/output connectors on the rear of the plasma monitor.
Explains the functions of each button on the remote control unit.
Defines the optimal distance and angles for remote control operation.
Provides guidelines for proper care and usage of the remote control.
Instructions for connecting PCs and Macintosh computers to the plasma monitor.
Guide for connecting a document camera to the plasma monitor.
Instructions for connecting VCRs and Laser Disc players to the plasma monitor.
Steps for connecting a DVD player to the plasma monitor.
Details the pin configuration and signals for the DVI connector.
Instructions for bundling cables at the back of the unit using provided clamps.
Instructions for turning the monitor on and off.
How to adjust the sound volume using the remote or unit buttons.
Procedure to cancel or restore the sound.
How to check the current monitor settings displayed on the screen.
Function to adjust picture position and enlarge the image.
Automatically adjusts picture size and quality.
How to select one of five screen sizes for different video content.
Explains how to navigate and use the On-Screen Menu (OSM) system.
Settings for adjusting Bass, Treble, Balance, and Audio Input allocation.
Options for adjusting aspect ratio, position, size, and fine picture details.
Settings for OSM display, BNC/D-SUB input, RGB select, HD select, and reset.
Timer, Power On Mode, Control Lock, IR Remote, Loop Out, ID Number, Video Wall settings.
How to adjust contrast, brightness, sharpness, color, and tint for optimal picture quality.
Selecting picture modes (NORMAL, THEAT. 1/2, DEFAULT) based on ambient lighting.
Procedure to set color tone by adjusting color temperature (LOW, MID, HIGH).
How to adjust white balance for each color temperature to achieve desired color quality.
Assigning desired inputs to the AUDIO 1, 2, and 3 connectors.
Adjusting image position, size, fine picture, and picture adjustment.
Selecting input for 5 BNC connectors (RGB, component, SCART1/2).
Selecting signals for the RGB1 terminal (D-SUB input).
Setting the number of vertical lines for input high definition images (1035 vs 1080).
Restoring all settings to factory defaults.
Energy-saving function to reduce monitor power consumption when idle.
Automatically discriminates film images for cinema mode playback.
Activates the brightness limiter to protect the display.
Sets inverse mode or displays a white screen.
Sets the duration for INVERSE or WHITE screen display.
Enables a function that moves a white vertical bar across the screen.
Sets duration and speed for the SCREEN WIPER function.
Switches the picture size setting for RGB input signals between ON and OFF.
Sets automatic ON/OFF times and input modes for the monitor.
Selects the input mode when the monitor is switched on.
Enables or disables the wireless transmission of the remote control signal.
Sets unique ID numbers for multiple displays to control them individually.
Configures the video wall layout (1, 4, or 9 screens).
Sets the display position for each screen in a video wall setup.
Automatically assigns ID numbers to multiple displays.
Adjusts image position and corrects flickering for video walls.
Sets uniform brightness for each display in a video wall.
Enables access to all menu items for advanced users.
Sets the video signal format (AUTO, PAL, NTSC, SECAM).
Checks input signal frequencies, polarities, and resolution.
Provides a reference table for external control codes.
Details supported resolutions and signal types for 42Wide VGA/42XGA models.
Details supported resolutions and signal types for the 50XGA model.
Technical specifications for the 42Wide VGA model.
Technical specifications for the 42XGA model.
Technical specifications for the 50XGA model.
| Screen Size | 42 inches |
|---|---|
| Display Type | Plasma |
| Resolution | 1024 x 768 |
| Native Resolution | 1024 x 768 |
| Aspect Ratio | 16:9 |
| Brightness | 1000 cd/m² |
| Contrast Ratio | 10000:1 |
| Viewing Angle | 160° |
| Viewing Angle (Horizontal) | 160° |
| Viewing Angle (Vertical) | 160° |
| Power Consumption | 350 W |
| Input Video Compatibility | NTSC, PAL |
| Input Connectors | Component, S-Video, Composite, VGA |


 Loading...