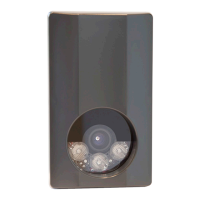
ANPR
© Nedap AVI, P.O. Box 103, NL-7140 AC GROENLO Page 4 of 27
2 GETTING STARTED
2.1 MOUNTING THE ANPR
Determine how to mount the ANPR. Onto a pole or behind the barrier. Mount behind the barrier to ensure
recognition right in front of the barrier.
Important mounting issues are:
• Best focus distance is between 3 and 6 meters.
• Angle between ANPR and number plate should be smaller than 25 degrees.
Mounting details are described in chapter 3.
2.2 CONNECTING THE ANPR
The ANPR is delivered with 5m cables for power, I/O and network. Power supply, RS485 communication and I/O
are combined in one cable. Ethernet network is a second cable. The cables are pre-fitted to the ANPR. For
installation the ANPR does not need to be opened.
Connecting the power supply and network cables are required to configure the ANPR.
Connection details are described in chapter 4.
2.3 ASSIGNING AN IP-ADDRESS
Enter the default IP-address in the address bar of your web browser.
Default IP address is:
IP address: 192.168.0.21
The login window appears where the user is asked to type the username and password.
Username: superuser
Password: superuser
Go to the system configuration and setup the network configuration as desired. If required, now also other
configuration settings may be changed.
Details about network settings are described in chapter 5.3.1.
2.4 TESTING THE ANPR
Test the ANPR to check if it is aligned correctly and if it is able to read the license plates.
Drive the vehicle into the position where it should be possible to read its license plate.
Connect to the ANPR using your web browser and select the 'Camera OCR' feature. On the left side of the page
'live' video images are shown and also the license plate reading results. It might be necessary to adjust the ANPR
alignment.