EasyManuals Logo

Nedap TRANSIT Entry User Manual

Nedap TRANSIT Entry
30 pages
To Next Page IconTo Next Page
To Previous Page IconTo Previous Page
Page #7 background imageLoading...
Page #7 background image
TRANSIT ENTRY | INSTALLATION GUIDE
Installation
7/30
Installation Procedure
1 Disconnect the power supply.
2 Remove the complete front cover from the TRANSIT Entry.
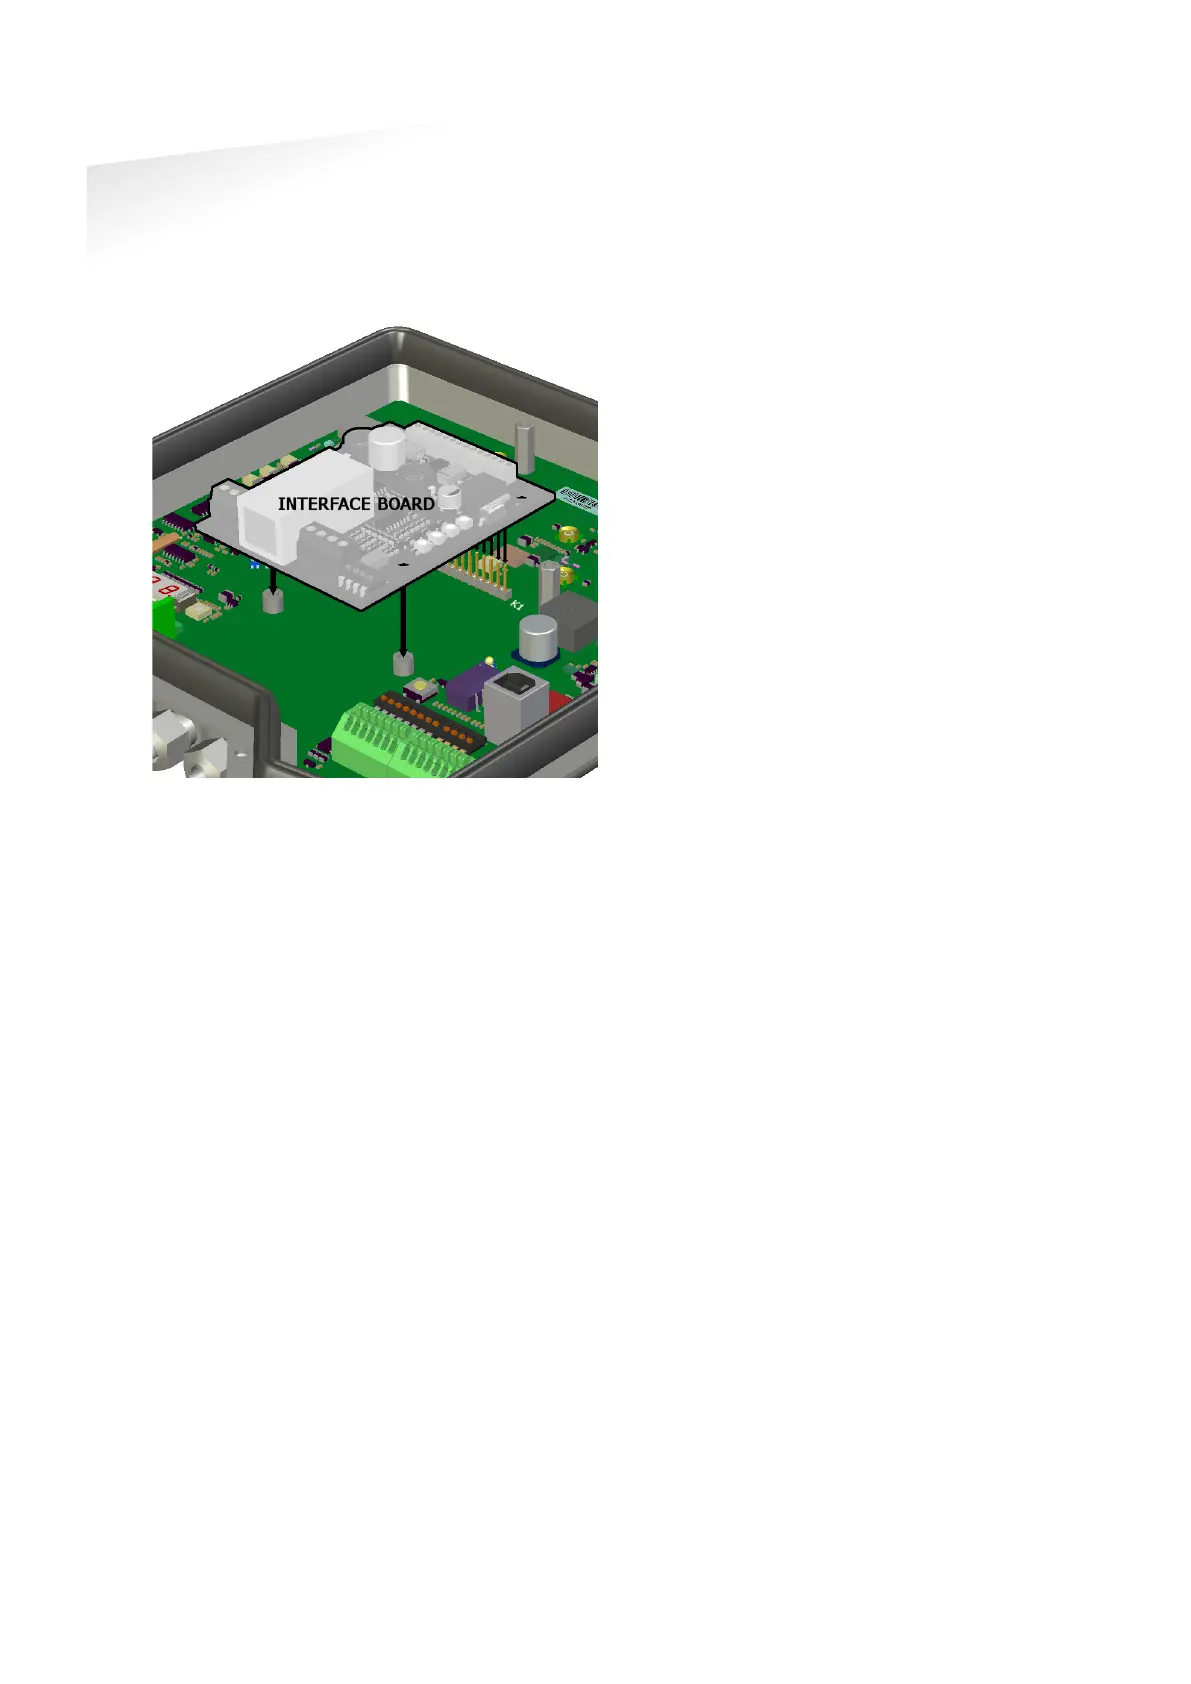
3 Place the interface board on the 14-pin header K1. Make sure it’s firmly
positioned and makes good contact with connector K1.
Figure 5: interface board installation
4 Tighten the two screws to fix the board into place.
5 Read the board’s installation guide for additional notes like address
settings, jumper settings and wiring details.
6 Replace the front cover on the TRANSIT Entry.

Other manuals for Nedap TRANSIT Entry

Questions and Answers:

Question and Answer IconNeed help?

Do you have a question about the Nedap TRANSIT Entry and is the answer not in the manual?

Nedap TRANSIT Entry Specifications

General IconGeneral
BrandNedap
ModelTRANSIT Entry
CategoryRfid Systems
LanguageEnglish

Related product manuals