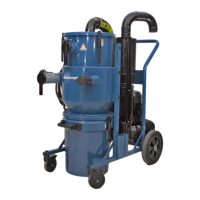
S - Vacuum Cleaners
CAUTION!Risk of equipment damage
• Turn off the vacuum cleaner if dust escapes
from it.
• Do not use the vacuum cleaner if there is re-
stricted or no airflow. The fan motor can be-
come overheated. Prevent overheating by
ensuring that a flow of air passes the fan
• Motors rotating in the wrong direction can
cause overheating.
5.1Vacuuming
NOTE!
• The starting handle makes Y/D start possible
in both rotational directions. The motor’s dir-
ection of rotation must match the arrow on
the fan housing, see Section4.2Impeller ro-
tation.
• For best results, adjust the gulper head de-
pending on the type and weight of material
to be vacuumed, see Figure9.
• During start, the vacuum cleaner may move
in a sideways direction, so be sure to always
hold onto the vacuum cleaner when starting.
Turn on the vacuum cleaner as follows:
1 Verify that the suction hose is connected to the
fan.
2 Open the lid for filter cleaning slightly.
3 Connect the power supply.
4 Turn on the switch to start the vacuum cleaner.
See Section3.3Side channel fan starter.
5 When the motor rotates in the correct direction,
allow the motor to reach full revs before switching
to D position.
NOTE!
• Clean the filter after each use.
• When the filter is clogged or the pre-separ-
ator is full, suction power is reduced. Clean
the filter and empty the pre-separator. See
Chapter6Maintenance.
5.2Reset motor protection
If the motor protection is activated, the fan is turned
off.
CAUTION!Risk of equipment damage
Check why the motor protection was activ-
ated and correct the problem. See section
Chapter7Troubleshooting.
See Figure3. Restart the fan as follows:
1 Turn the Start switch (A) to the 0 position.
2 Press in the button (B).
3 Turn the Start switch back on to restart the fan.
6Maintenance
WARNING!Risk of personal injury
• Always disable the control system before dis-
connecting power to the vacuum cleaner.
• Disconnect the vacuum cleaner from the
electrical supply before any type of service or
transportation.
• Do not spread dust when cleaning or repla-
cing filters. Empty dust into a container or
dust bag.
CAUTION!Risk of equipment damage
• Use only Nederman original spare parts and
accessories.
• Store the vacuum cleaner in a standing posi-
tion.
6.1Clean the cartridge filter/filter pack-
age
NOTE!
• Clean the filter after each use.
• If using a washable filter, it can be washed
with water and detergent. Let it air dry.
• Replace the cartridge filter after it has been
washed twice.
• If the cartridge filter is placed into a dust bag
for disposal, tie off the dust bag. See Fig-
ure11.
1 Turn off the vacuum cleaner.
2 Empty pre-separator, if one is used.
3 Empty dust from the filter into a container or dust
bag.
4 Clean the cartridge filter by tapping it lightly on a
hard surface or by washing it, if using a washable
filter.
6.1.1Manual reverse air cleaning
See Figure10.
1 Turn on the vacuum cleaner.
2 Disconnect the hose (A).
3 Open and close the lid (B).
4 Repeat three times.
EN
21

 Loading...