Time-setting options en
13
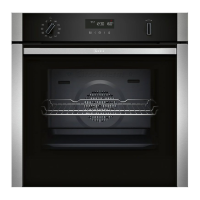
■ Appliance heats up (fig. !)
■ Temperature has been reached (fig. ")
Residual heat
When the appliance is switched off, the temperature
indicator shows the residual heat in the cooking
compartment. The lower the temperature drops, the
less the indicator is filled.
Notes
■ The temperature indicator only shows the increasing
temperature for types of heating for which a
temperature is set. With cleaning functions, for
example, it is filled immediately.
■ Due to thermal inertia, the temperature displayed
may be slightly different to the actual temperature
inside the cooking compartment.
Rapid heating
With Rapid heating, you can shorten the heat-up time.
Suitable heating functions include:
■ ‚ CircoTherm hot air
■ … Bread-baking setting
■ ƒ Top/bottom heating
Only use rapid heating when a temperature of over
100 °C has been selected.
To achieve an even cooking result, do not place your
food into the cooking compartment until rapid heating is
complete.
1. Set the type of heating and temperature.
2. Touch the ° button.
The / symbol appears in the display, and the
% arrows are filled from the bottom to the top.
The oven starts to heat up after a few seconds.
Once rapid heating is complete, an audible signal
sounds and the ° symbol goes out. Place your food in
the cooking compartment.
OTime-setting options
Ti me- set t i ng opt i ons
Your appliance has different time-setting options.
An audible signal sounds once the cooking time or
timer duration has elapsed. You can cancel the audible
signal early by pressing the 0 button.
Note: You can change how long the audible signal
sounds for in the basic settings. ~ "Basic settings"
on page 15
Note: If you have set a time-setting option, the time
interval increases if you set a higher value. Example:
You can set a cooking time of up to one hour in one-
minute increments; for cooking times over one hour,
you can set a cooking time in five-minute increments.
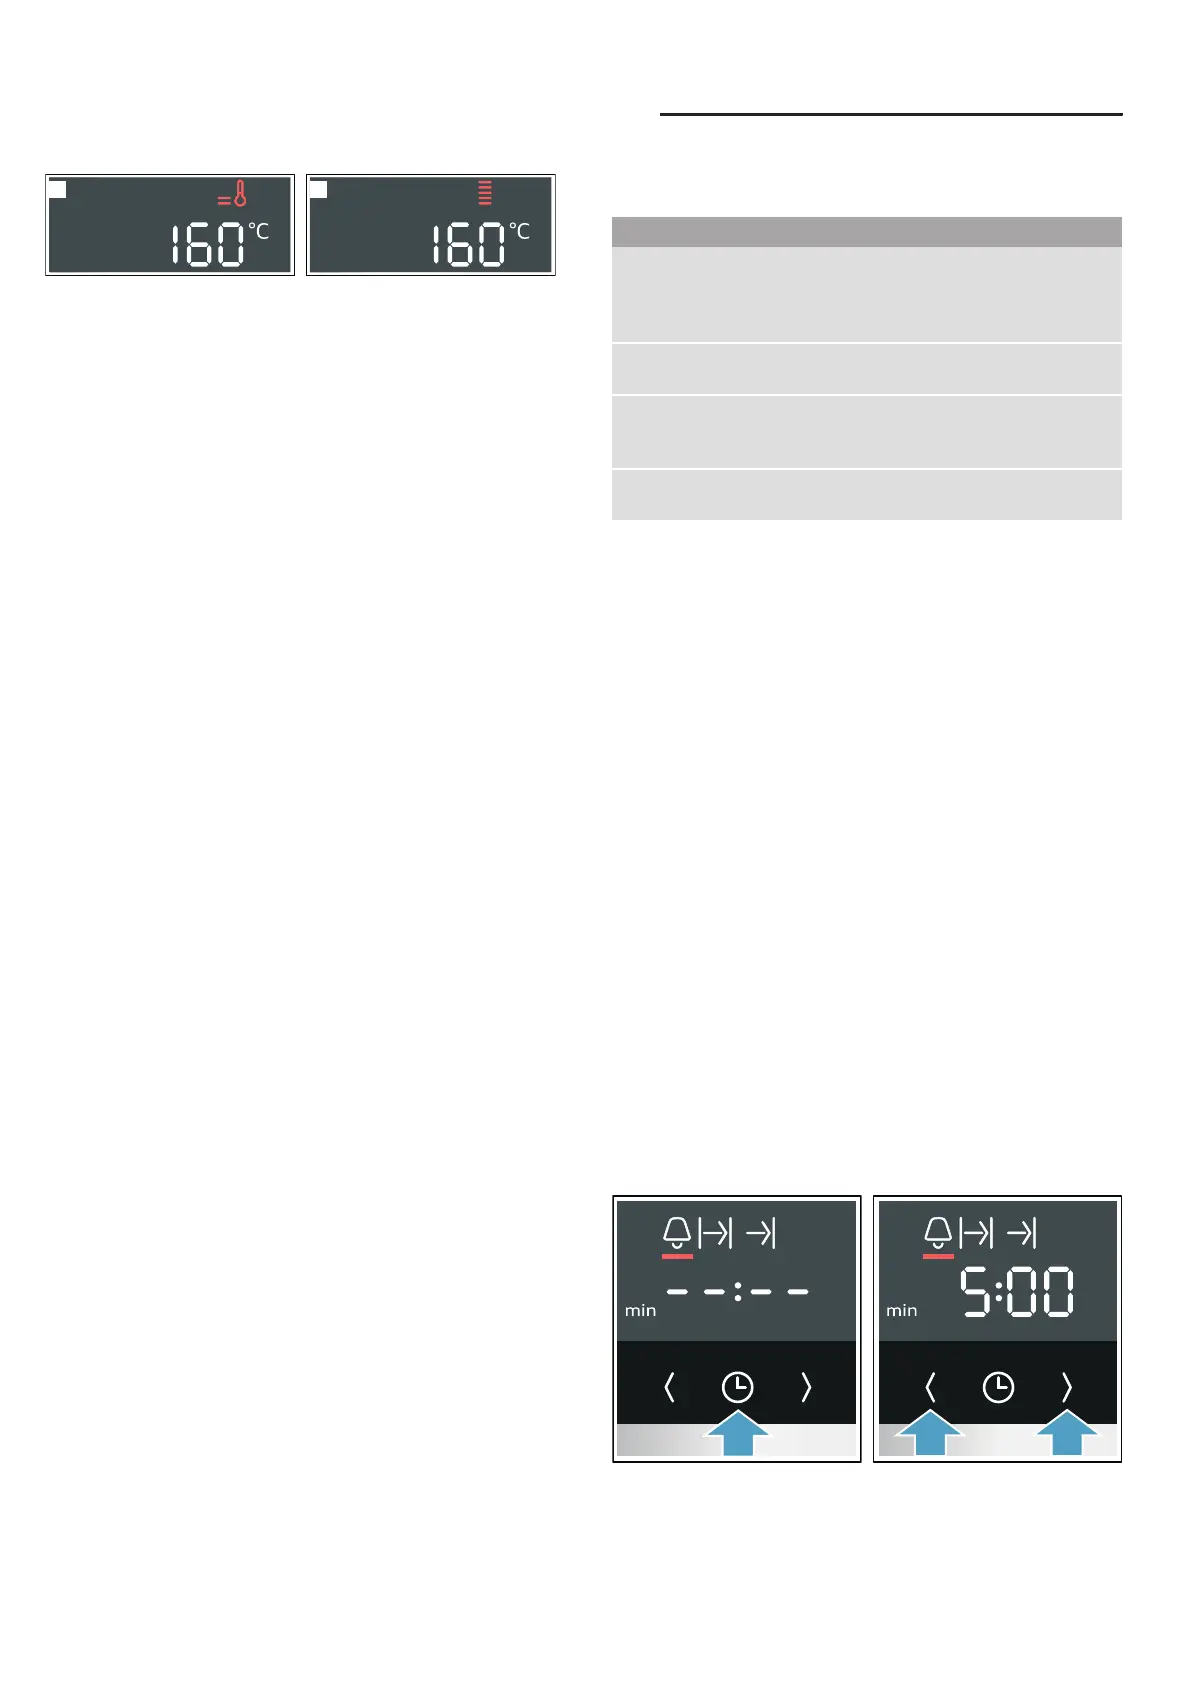
Setting the timer
The timer can be set when the appliance is switched on
or off. It has its own audible signal so that you can tell
whether it is the timer duration or a cooking time that
has elapsed.
Tip: If the set timer duration is the duration for which
you want to cook your food, use the cooking time. The
appliance then switches off automatically.
1. Press the 0 button repeatedly until the Q symbol is
selected.
2. Use the ( and) buttons to set the timer duration.
– Default value for the ( button = 5 minutes
– Default value for the ) button = 10 minutes
The setting is applied
automatically. The timer duration starts to count
down after a few seconds.
2
1
Time-setting option Use
Q Timer The timer functions like an egg timer. It runs
independently of the appliance when it is
heating and of other time-setting options, and
does not affect the appliance.
x Cooking time Once the set cooking time has elapsed, the
appliance automatically stops heating.
y End time Enter a cooking time and the required end
time. The appliance starts up automatically so
that it finishes cooking at the required time.
0 Time Set the time, e.g. after a power cut, or change
it, e.g. from summer time to winter time.