© 2016 Nelson Stud Welding, Inc. Page 16
All Rights Reserved. January 2016 Part No. 729-110-043 Rev. 1.02
7 Troubleshooting
7.1 Visual Weld Inspection and Weld Parameter Adjustments
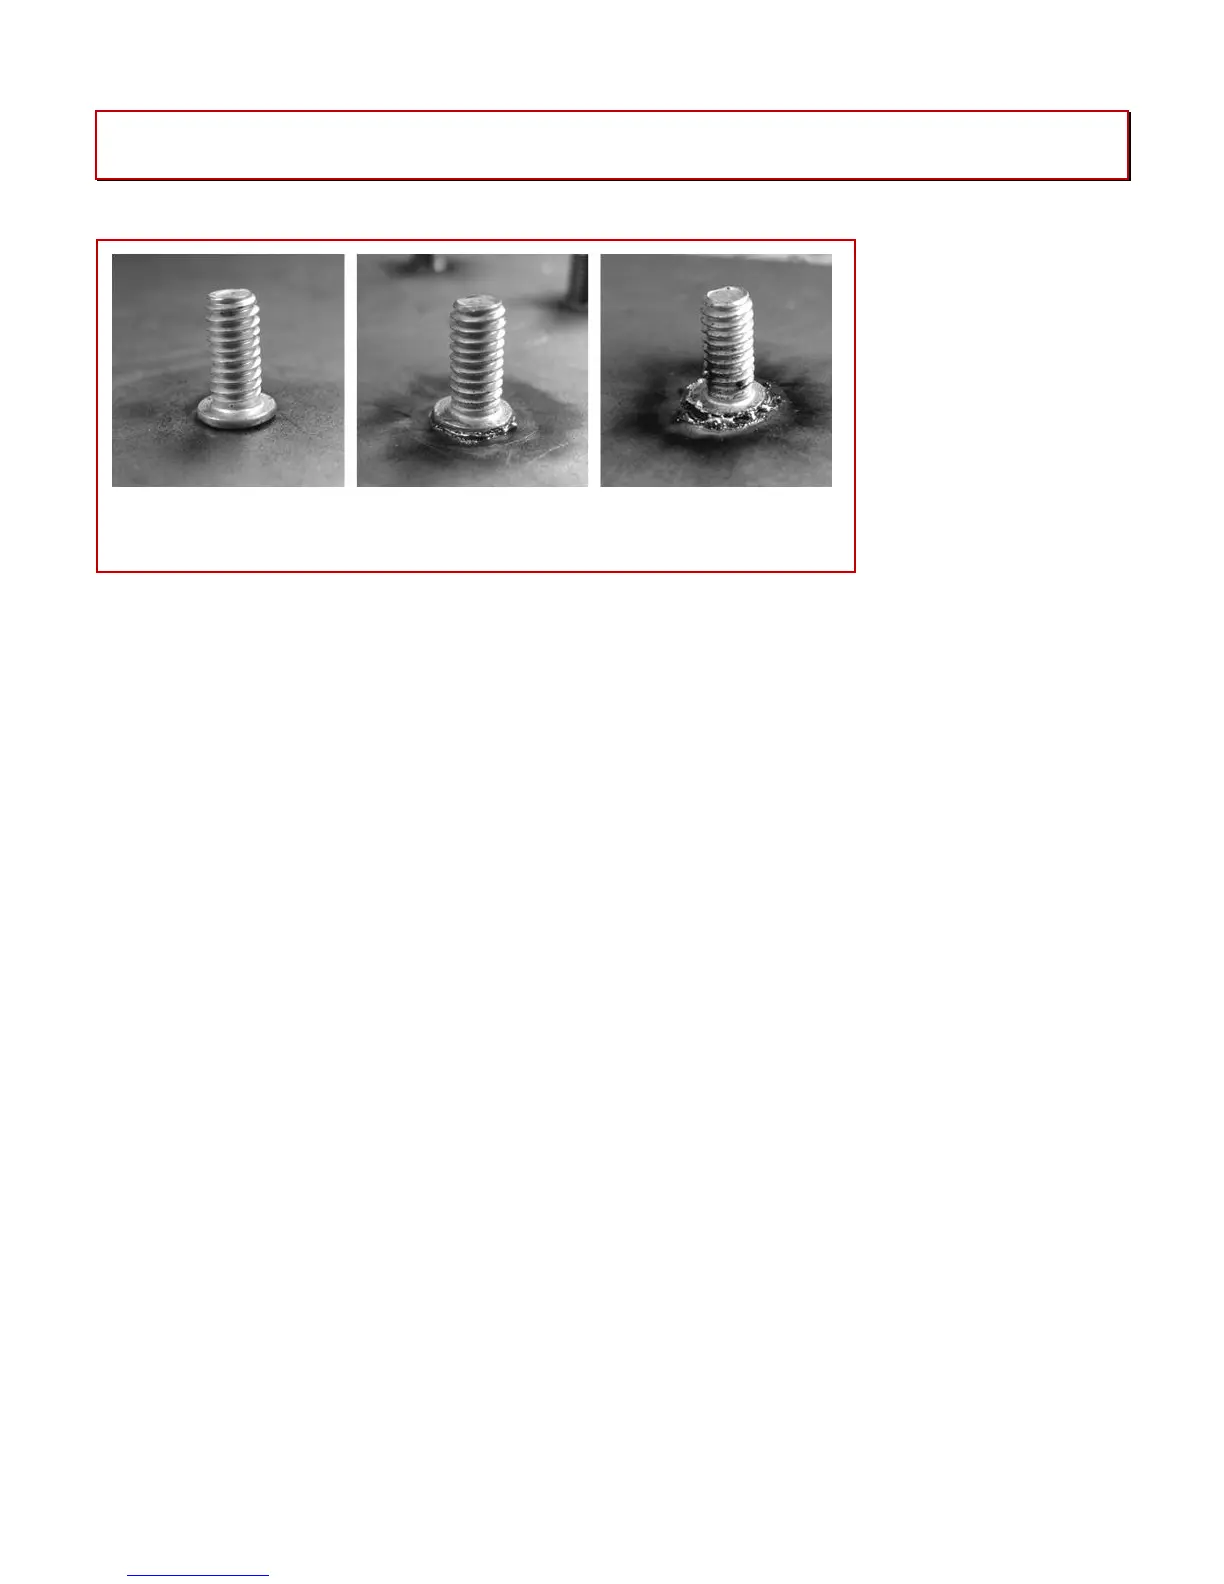
Figure 7.1 Weld Quality Visual Inspection
7.2 Weld Quality Physical Inspection and Weld Parameter Adjustments
If visually inspecting the welds reveals a questionable weld, the weld should be physically tested.
Initial weld set ups should also be physically tested.
Suggested physical tests for steel and stainless steel studs are as follows:
1 Bend Test. Stud to be tested shall be bent away from its vertical axis 90° or until failure.
Failure should occur in the stud proper, or, on thin plate, a full stud diameter plug of base
metal should be torn out.
2 Torque Test. Stud shall be torqued until a pre- specified loading is attained or until the stud
fails or, on thin plate, a plug of the base material should tear out.
Physical test procedures for inspecting (magnesium) aluminum alloy studs are:
3 Bend Test. The stud to be tested shall be bent, using a bending tool approximately 15° away
from its vertical axis before the stud breaks in the weld shank or the base material fails.
NOTE: Do not bend aluminum studs by striking with a hammer, always use a bending tool.
4. Torque Test. The stud to be tested shall be torqued in the conventional manner by applying torque
until the stud fails or a predetermined torque load is reached.
7.2.1 Recommendations
Before starting any stud welding operation, or after the equipment has remained idle for a period
of time, trial or test studs should be welded to a plate for testing. Testing should continue until
there is no failure of a test stud.