26
SCREENGUARD
™
INSTALLATION AND USER MANUAL
MAINTENANCE
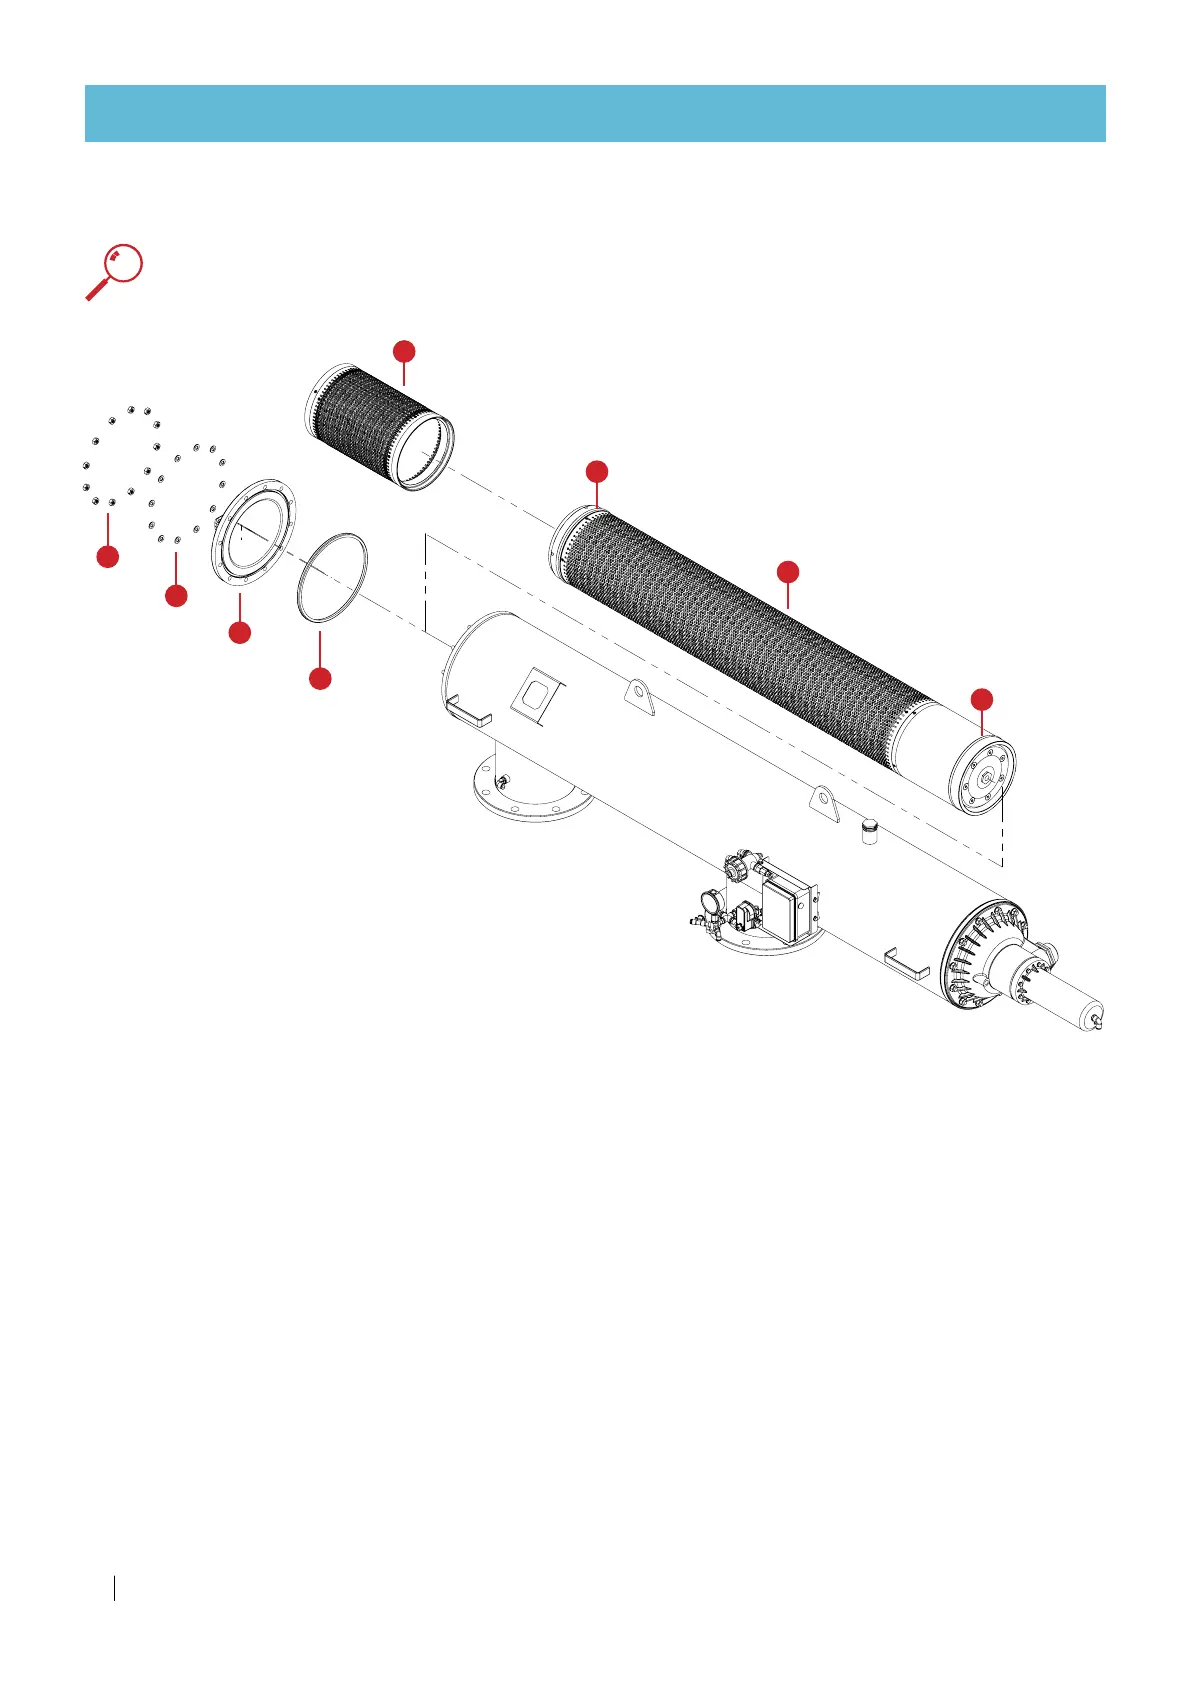
Screen assembly cleaning
Disassembly:
1.
Unscrew nuts (A) with a 17mm wrench.
2.
Remove washers (B).
3.
Remove plastic cap (C) and gasket (D).
4.
Pull strainer (E), flush with fresh water and remove dirt and debris.
5.
Pull screen assembly (F).
6.
Flush screen assembly (F) from the outside in with pressurized water and remove dirt.
If the screen is still dirty, separate the flushing assembly from the screen assembly (see page 32) and
flush screen assembly (F) from the inside out with pressurized water and remove remaining dirt.
Assembly:
If the flushing-assembly has been separated from the screen assembly, rejoin them (see page 32).
1.
Lubricate screen assembly O-rings (G).
2.
Insert screen assembly (F) (mind screen direction) and push all the way in.
3.
Insert the strainer (E).
Make sure the strainer (F) is aligned and positioned inside the socket of the screen assembly (F).
4.
Make sure gasket (D) is in place, and position plastic cap (C) in place.
5.
Place washers (B) and nuts (A) and tighten the nuts.
ATTENTION
Do not attempt to extract the screen assembly from the piston-side of the filter, it might damage the filter.
A
C
B
D
E
F
G
G