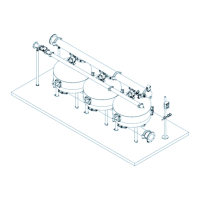
SCREENGUARD
™
INSTALLATION AND USER MANUAL
35
TROUBLESHOOTING
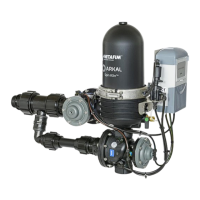
Aquative solenoid replacement
Disassembly:
1.
Open the flush controller box using a cross-head screwdriver.
2.
Extract one battery to deactivate the controller during the
procedure.
3.
Take the battery compartment out.
4.
Disconnect the solenoid wires from the terminal block.
5.
Loosen the cable gland nut by hand.
6.
Gentlly pull the solenoid wires through the cable gland.
7.
Disconnect the control tubes from the 3 fast connectors (A).
8.
Manually unscrew 2 screws (B) with a crosshead screwdriver.
9.
Release the Aquative solenoid (C) from the Controller Support
Bracket (D).
10.
Disconnect the 3 fast connectors (A) from the Aquative
solenoid (C) with a 14mm wrench.
Assembly:
1.
Connect the 3 fast connectors (A) to the new Aquative
solenoid (C) with a 14mm wrench.
2.
Place the Aquative solenoid (C) on Controller Support Bracket (D).
3.
Manually fasten 2 screws (B) with a crosshead screwdriver.
4. Gentlly thread the solenoid wires throug the cable gland.
5. Connect the solenoid wires to the terminal block (mind polarity).
6.
Refasten the cable gland nut by hand.
7.
Connect the control tubes to the 3 fast connectors (A).
(Mind proper location, see control-tube connection scheme,
page 12.)
8.
Put the battery compartment back in place
(make sure that the solenoid wires pass under the battery
compartment in a tidy manner).
9.
Put the extracted battery back in place to reactivate the controller.
10.
Close the flush controller box (mind the alignment of the cover
gasket to ensure sealing).
1
1
1
1
4
2
3
5
6
10
10
10
10
B
C
A
A
A
D