c. Rotate the riser locking latch on the left side of the riser up and toward air duct.
The riser raises up slightly from the controller module.
d. Lift the riser up, and then set it aside on a stable, flat surface.
2. Replace the mezzanine card:
a. Remove any QSFP or SFP modules from the card.
b. Loosen the thumbscrews on the mezzanine card, and gently lift the card directly out of the socket and
set it aside.
c. Align the replacement mezzanine card over the socket and the guide pins and gently push the card into
the socket.
d. Tighten the thumbscrews on the mezzanine card.
3. Reinstall the riser:
a. Align the riser with the pins to the side of the riser socket, lower the riser down on the pins.
b. Push the riser squarely into the socket on the motherboard.
c. Rotate the latch down flush with the sheet metal on the riser.
Step 5: Install the controller module
After you have replaced the component in the controller module, you must re-install the
controller module into the chassis, and then boot it to Maintenance mode.
You can use the following animation, illustration, or the written steps to install the controller module in the
chassis.
Installing the controller module
Steps
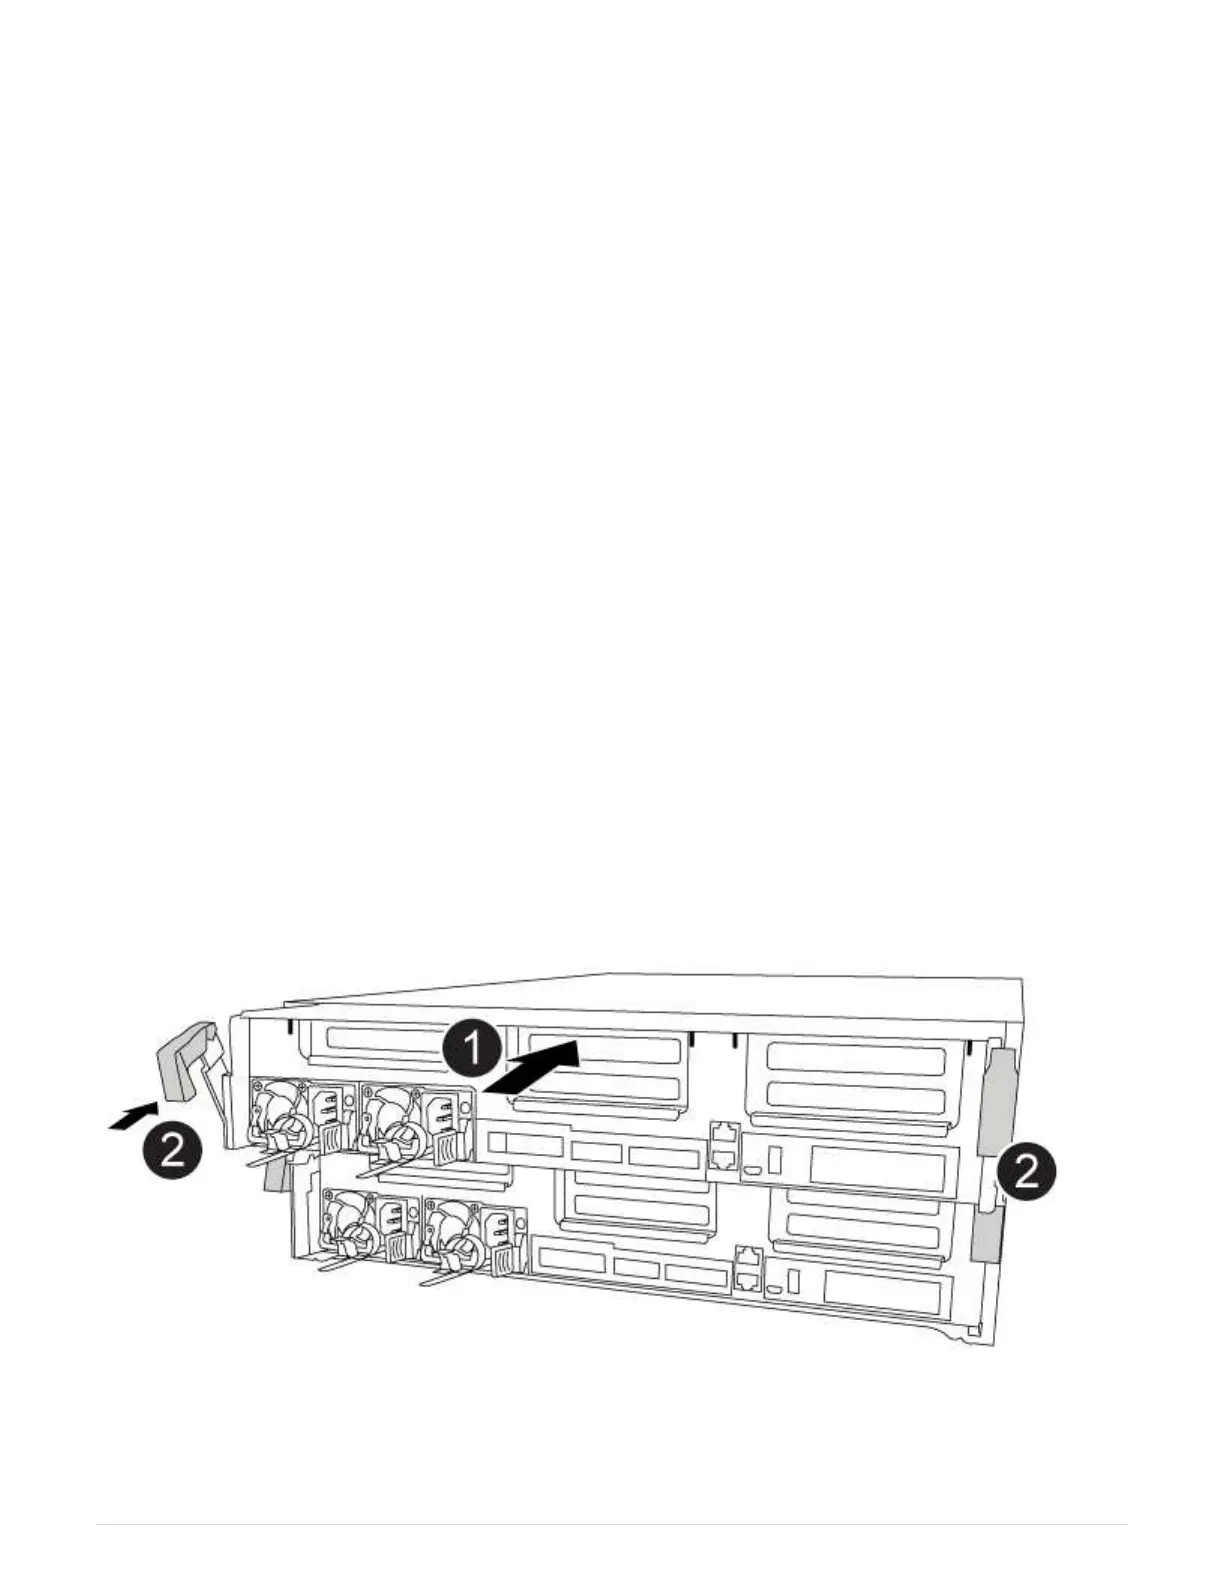
1. If you have not already done so, close the air duct.
2. Align the end of the controller module with the opening in the chassis, and then gently push the controller
1423
 Loading...


