Chapter 4: Drive Connection 81
One CE7922
Controller Tray or
CE7900 Controller
Tray and One to
Four DE6900 Drive
Trays without
Trunking
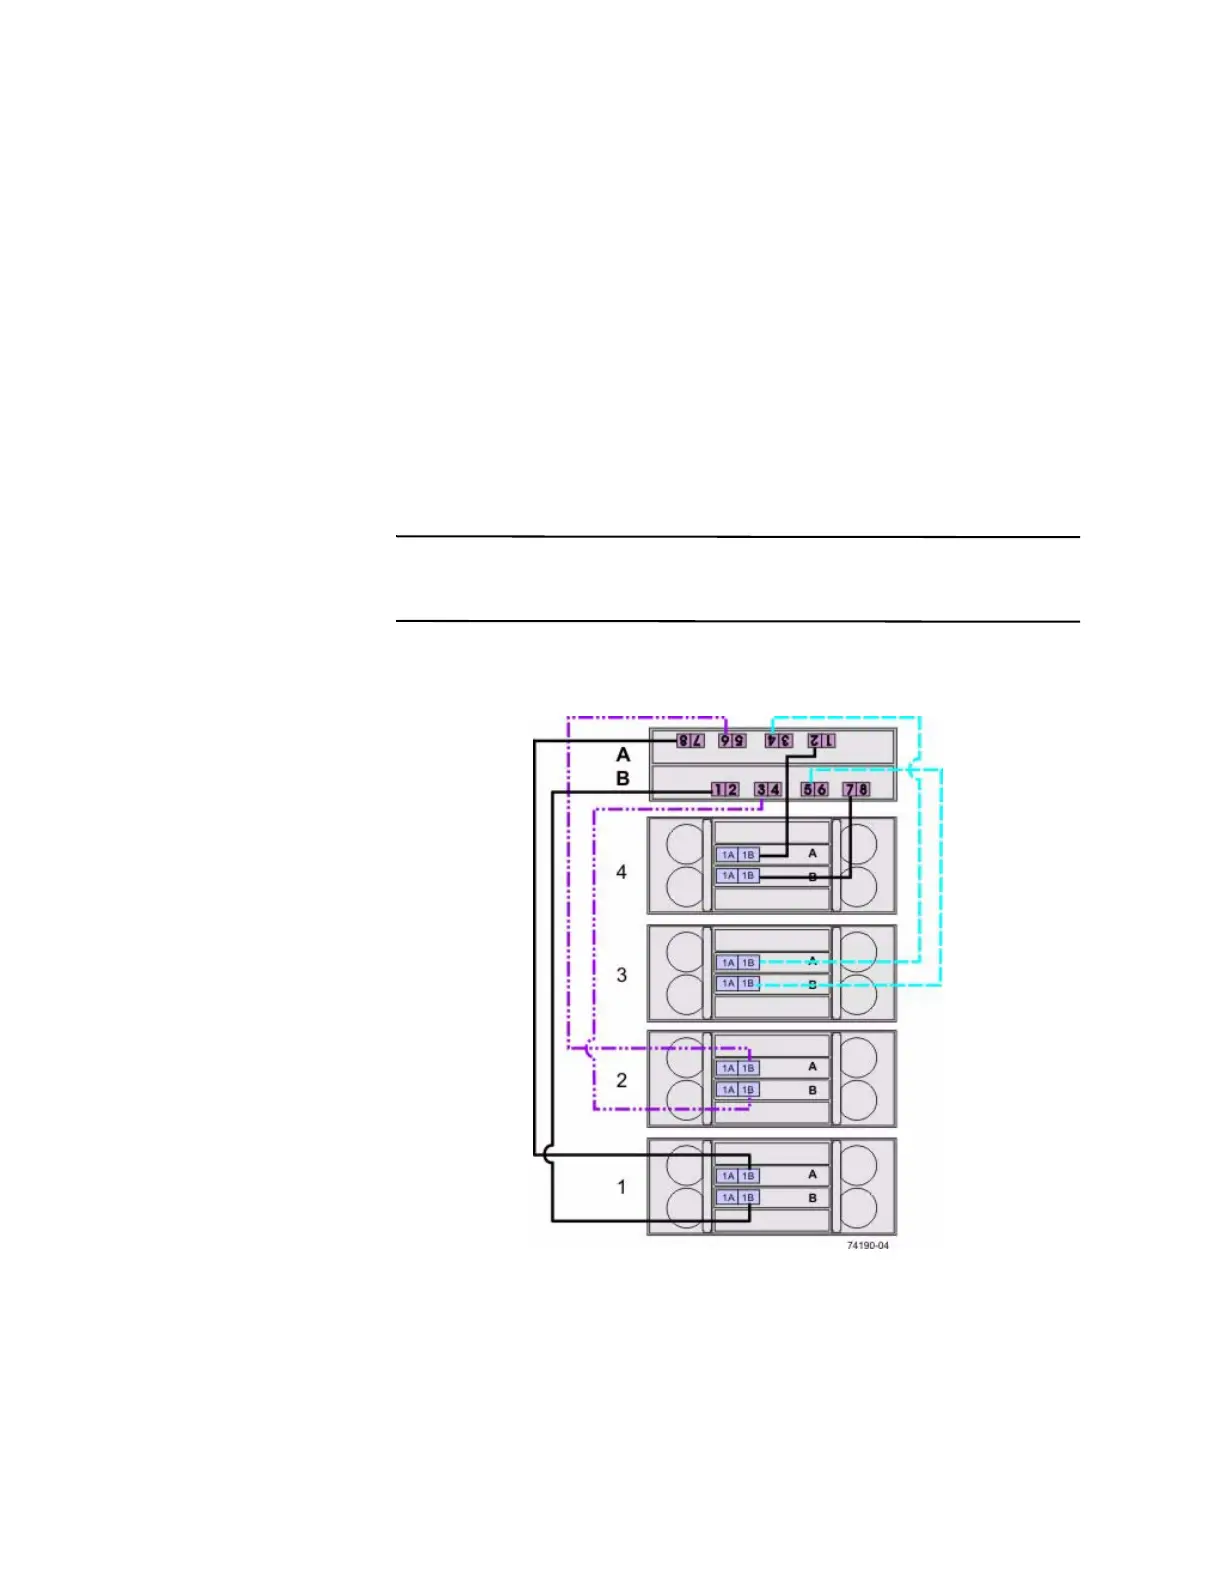
In the cabling configuration figures that follow, the controller tray is placed on top,
and the controllers are labeled as A and B. Because the DE6900 drive trays are very
heavy, they are installed starting at the bottom of the cabinet. The drive trays are
labeled from the bottom upward as 1, 2, 3, and so on. The figures in this section show
representative configurations for cabling.
NOTE The controller tray and the drive trays do not have to be stacked in this exact
order, and there is no requirement that you label the drive trays in this particular
sequence. Just make sure that the DE6900 drive trays are at the bottom of the cabinet.
Figure 18 One CE7900 Controller Tray or CE7922 Controller Tray and Four
DE6900 Drive Trays without Trunking
 Loading...