4. Carefully push the drive drawer all the way in until the latch fully engages.
Attention: Risk of equipment damage — Stop pushing the drive drawer if you feel excessive resistance or binding. Use
the release levers at the front of the drawer to slide the drawer back out. Then, reinsert the drawer into the slot, and ensure
that it slides in and out freely.
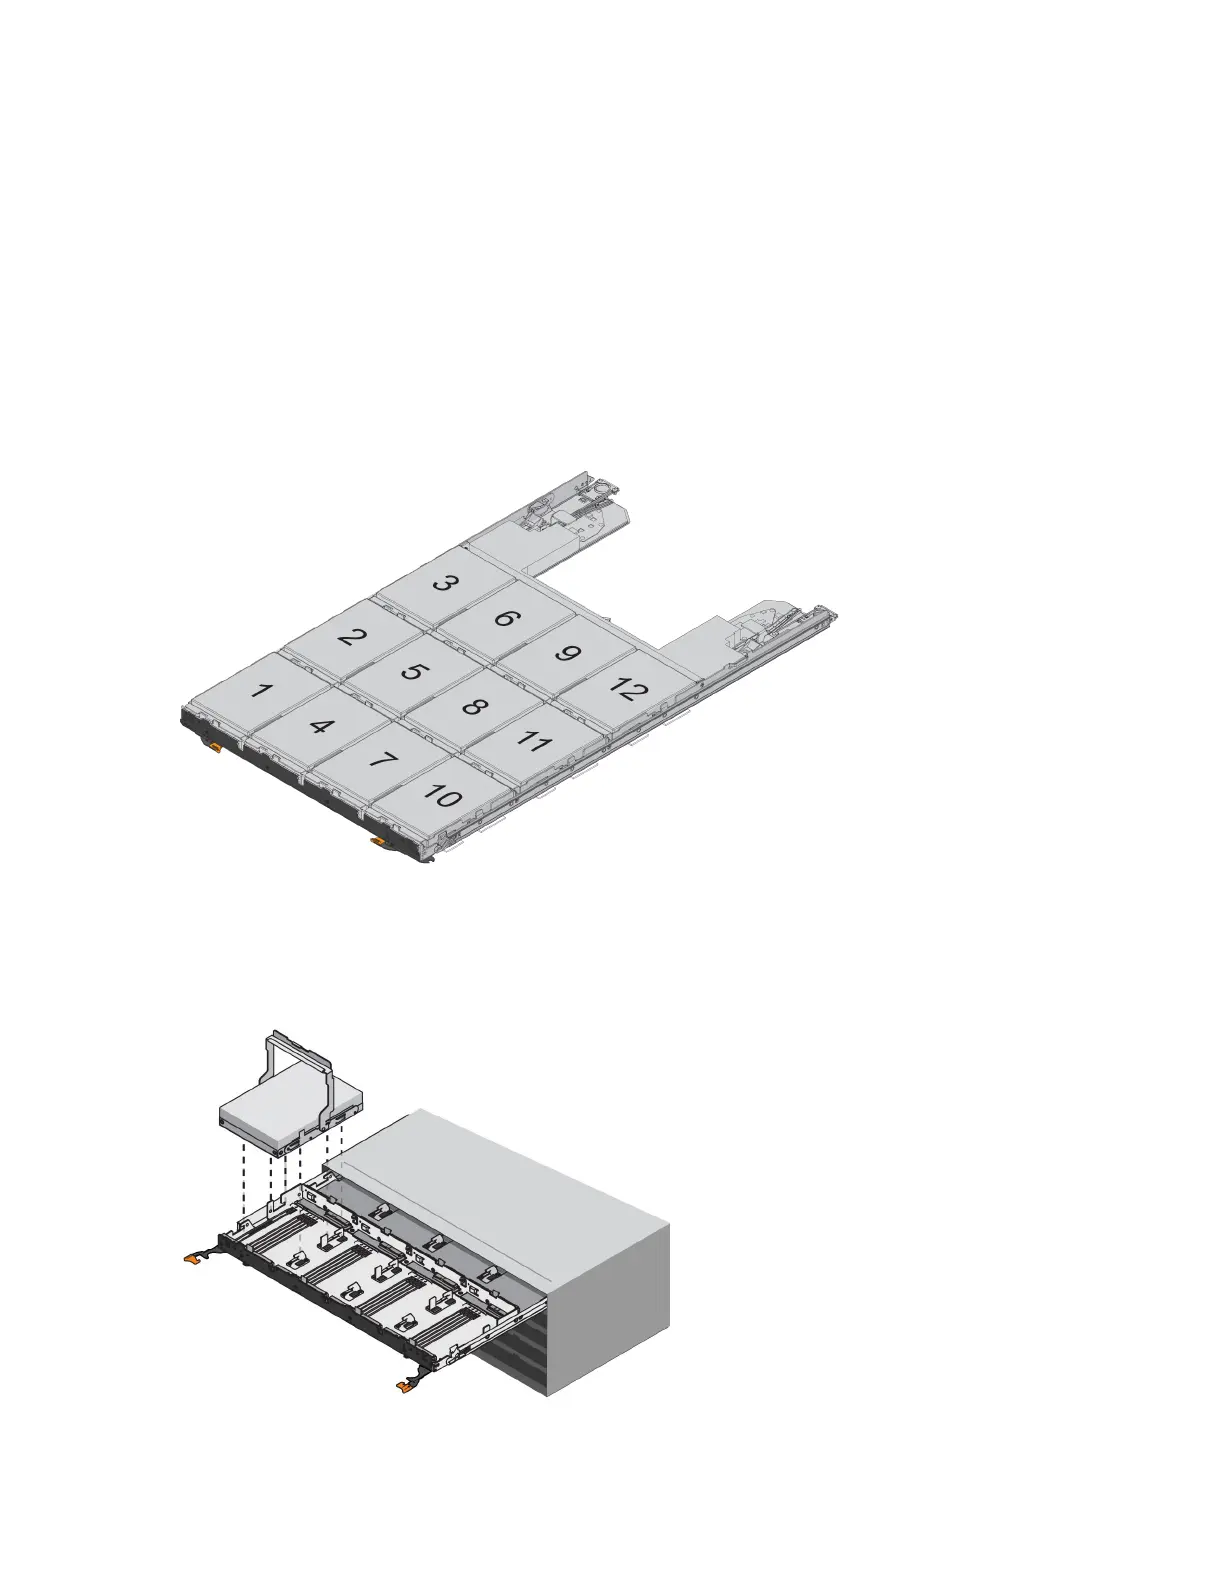
5. Follow these steps to reinstall the drives in the drive drawer:
a. Unlatch the drive drawer by pulling out on both levers at the front of the drawer.
b. Using the extended levers, carefully pull the drive drawer out until it stops. Do not completely remove the drive drawer
from the drive tray.
c. Determine which drive to install in each slot by using the notes you made when removing the drives.
Attention: Possible loss of data access – You must install each drive in its original location in the drive drawer.
d. Raise the handle on the drive to vertical.
e. Align the two raised buttons on the drive with the notches on the drawer.
f. Lower the drive straight down, and then rotate the drive handle down until the drive snaps into place.
g. Repeat Step
d
through Step
f
to install all of the drives.
12
Replacing a Drive Drawer in a 60-Drive Tray