Complete system setup and configuration | Stage 4
2
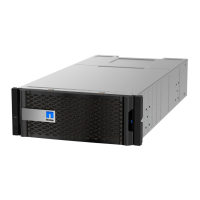
Power on the controllers
Connect and secure the power cables:
• Connect the shelves to dierent power sources.
• Connect the controllers to dierent power sources.
Note: The system begins to boot as soon as the power supplies are
connected to the power sources. Booting may take up to 8 minutes.
21
3
4
5
21
3
4
5
3
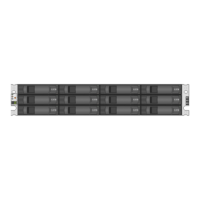
Complete initial cluster setup:
1. Make sure that your laptop has network discovery enabled*.
See your laptop’s help for network discovery settings.
2. Connect your laptop to the Management switch.
3. Access the network computers and devices:
- Open File Explorer
- Click network in the left pane
- Right click and select refresh.
4. Double-click either ONTAP
Note: Accept any certificates displayed on your screen.
*If your laptop does not support network discovery,
see the Installation and setup guide for your model for
how to complete initial cluster setup.
Management subnet
Laptop
If your system has one or more external drive shelves, set the shelf IDs:
1. Connect the shelves to dierent power sources, power on the drive shelf, and then remove the end cap on the left of the shelf.
2. Press and hold the shelf ID button until the first digit blinks, and then press the button to advance
the first digit (0-9) to the desired number. The first digit continues to blink.
3. Press and hold the button until the second digit blinks, and then press the button to advance
the second digit (0-9) to the desired number. The first digit stops blinking, and the second digit continues to blink.
4. Press and hold the button until the second digit stops blinking, and then replace the end cap on the shelf.
5. Wait about 10 seconds for both digits to start blinking again and for the LED to illuminate,
and then power-cycle the drive shelf to make the shelf ID take eect.
6. Repeat these steps for any remaining drive shelves.
1
5
Completing setup
1. Click...
a) mysupport.netapp.com
b) Create/log in to your account
c) Download and install Active IQ Config Advisor
(used at the end)
d) Register your system
2. Verify the health of your system by running Config Advisor.
3. After you have completed the initial configuration, go to
the NetApp ONTAP Resources page for information
about configuring additional features in ONTAP.
4
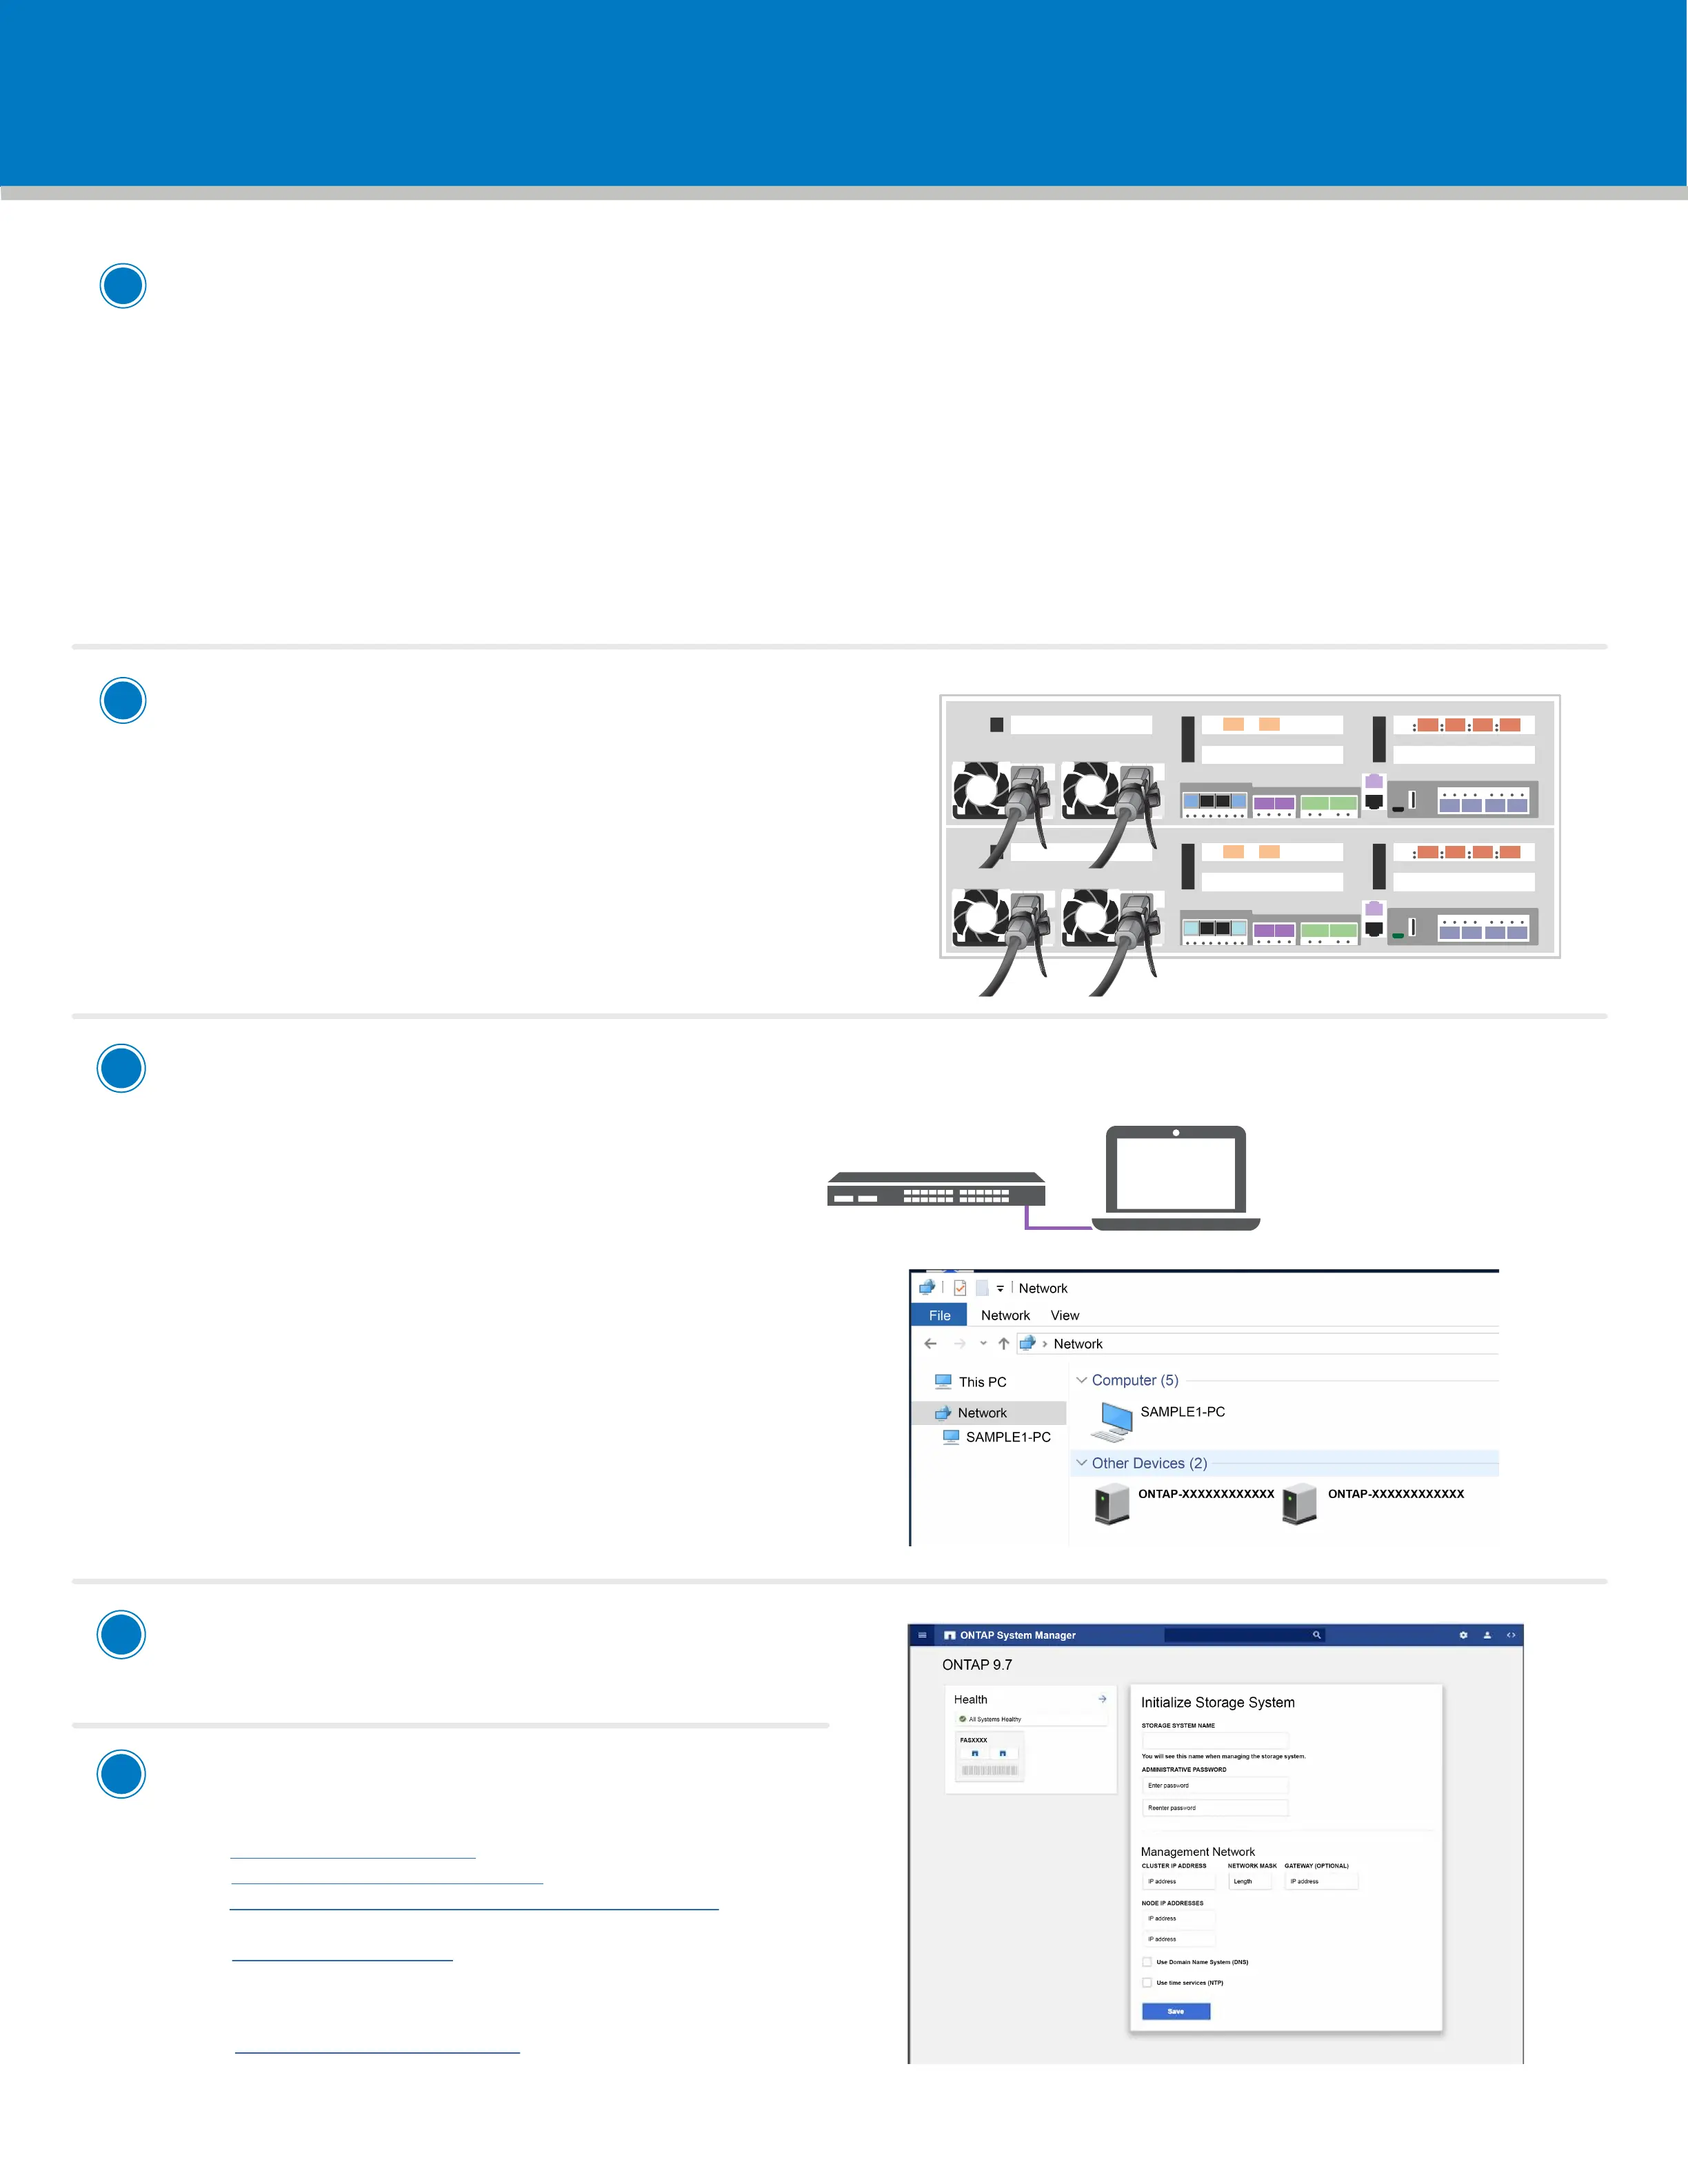
Use System Manager Guided Setup
to configure your cluster

 Loading...