Do you have a question about the NetApp FAS9000 and is the answer not in the manual?
Instructions for unpacking, installing rails, chassis, components, and management devices.
Guidance on connecting controllers to network switches using various cable types.
Steps to power on drive shelves and configure their unique identification numbers.
Instructions for powering on the system nodes after shelf setup.
Connecting a laptop for network discovery and initial cluster configuration.
Utilizing System Manager Guided Setup for cluster configuration.
Steps for completing setup, verifying health, and accessing additional resources.
The NetApp FAS9000 Systems Installation and Setup Instructions manual provides a comprehensive guide for deploying and configuring NetApp FAS9000 storage systems. This document outlines a four-stage process: preparing for installation, installing hardware, managing cable storage, and completing system setup and configuration.
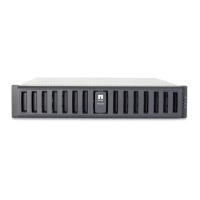
The NetApp FAS9000 is a high-performance storage system designed for enterprise environments, offering robust data management and storage capabilities. Its primary function is to provide scalable and reliable storage for various applications, ensuring data availability and integrity. The system supports both switchless and switched cluster configurations, allowing for flexible deployment based on network architecture and performance requirements. It integrates with external storage shelves (DS212C or DS224C) to expand capacity, making it suitable for growing data needs. The FAS9000 leverages NetApp ONTAP software, which provides advanced data management features, including data protection, efficiency, and scalability. The system is designed to be user-friendly, with a guided setup process that simplifies initial configuration and ongoing management.
The installation process begins with a "Pre-setup" phase, where users are instructed to unpack all boxes and inventory contents. This step emphasizes checking the Hardware Universe for specific power requirements, watching setup videos, and reviewing the NetApp ONTAP Configuration Guide. These preliminary steps ensure that all necessary components are present and that the user is familiar with the installation procedures and system capabilities.
The "In the box" section details the various cables included with the system, such as 10 GbE and 40 GbE network cables, MiniSAS HD cables for storage, 40 GbE cluster interconnect cables, Ethernet cables, and power cables. A USB console cable is also provided for direct system access. Additionally, the manual lists items the user needs to provide, including 8U of rack space per chassis, a Phillips #2 screwdriver, additional network cables for connecting to network switches and clients, and a laptop or console with USB/serial connection and web browser access for configuration. This comprehensive list helps users prepare all necessary tools and infrastructure before starting the physical installation.
The hardware installation phase, "Install hardware | 2," guides users through unpacking and installing the system components. This involves installing rail kits, mounting the empty chassis into the rack, reinstalling system components into the chassis (matching chassis slot IDs with component slot ID stickers), attaching cable management devices, and placing the bezel on the front of the system. Visual aids, such as diagrams of handles and cable management devices, are included to assist with these steps. Safety precautions, such as "LIFTING HAZARD" warnings for both empty and fully-populated chassis, are prominently displayed to ensure user safety during installation.
A critical aspect of hardware installation is "Cable controller to switches." The manual presents two options: "Switchless cluster" and "Switched cluster." For a switchless cluster, users connect cluster interconnect ports A (e4a) and B (e8a) directly between controllers. For a switched cluster, these ports are connected to a cluster switch. The manual also details connecting wrench ports to management switches and e4b/e8b ports (and e2a, e2c, e10a, e10c ports for switched clusters) to data switches. Cable management is emphasized, with instructions to strap cables to cable management arms. Power connections are also detailed, explaining that PSU 1 and PSU 3 power side A FRUs, while PSU 2 and PSU 4 power side B FRUs, and instructing users to connect power cables to different power sources. A crucial warning, "DO NOT power on controllers at this point," is highlighted to prevent premature system activation.
"Cable storage | 3" focuses on cabling the FAS9000 with external storage, specifically DS212C or DS224C disk shelves. This section provides detailed instructions for connecting shelf-to-shelf ports, and then connecting controllers to Stack 1 and Stack 2. The manual illustrates multipath HA cabling and optional quad-path HA cabling, ensuring redundant connections for high availability. Instructions for inserting SAS cable tabs (UP or DOWN) until they click are provided, along with clear diagrams showing the intricate cabling paths between controllers and multiple disk shelves (IOMA, IOMB, IOM12).
The final stage, "Complete system setup and configuration | 4," covers powering on the system and initial configuration. Users are guided to power on the shelves first, connecting power cords to different circuits and turning on power switches. If shelf IDs need to be changed, a step-by-step process is provided: removing end caps, pressing and holding the shelf ID button to set the first digit, then the second digit, and finally power-cycling the drive shelf after an Amber LED appears. After shelf IDs are set, users are instructed to turn on the power switches to all nodes, ensuring proper power distribution from PSUs to FRUs.
Initial cluster setup involves network discovery. The manual advises connecting a laptop to the management switch and accessing network computers and devices. It provides steps for opening File Explorer, clicking "Network," and then double-clicking either ONTAP icon to begin configuration. A note about accepting certificates is included. The next step is to use System Manager Guided Setup to configure the cluster, simplifying the process for users.
While the manual primarily focuses on installation and initial setup, it implicitly supports maintenance through its structured approach and emphasis on proper cabling and configuration. The detailed instructions for unpacking, installing, and cabling components ensure that the system is set up correctly from the start, reducing the likelihood of future issues that would require maintenance.
The "Pre-setup" phase, by directing users to review the NetApp ONTAP Configuration Guide and watch setup videos, encourages a thorough understanding of the system, which is beneficial for troubleshooting and maintenance. The Hardware Universe is also referenced for power requirements, indicating a resource for detailed specifications that can be crucial for maintenance planning and component replacement.
The clear diagrams for cabling, including multipath and quad-path HA cabling, highlight the system's design for redundancy and high availability. This design choice inherently reduces downtime and simplifies maintenance by allowing components to be serviced without interrupting operations. The instructions for strapping cables to cable management arms contribute to a tidy and organized setup, which makes future access for maintenance, such as component replacement or cable inspection, much easier and less prone to errors.
The power distribution instructions, detailing which PSUs power which FRUs, are valuable for maintenance. In case of a power supply failure or a need to isolate power to specific components, this information allows technicians to identify and address issues efficiently. The warning "DO NOT power on controllers at this point" during initial setup is a preventive measure that avoids potential damage or misconfiguration, thereby reducing future maintenance needs.
The process for setting shelf IDs, including the steps for power-cycling the drive shelf, is a specific maintenance-related procedure that might be performed during system expansion or reconfiguration. The guided setup using System Manager and the recommendation to run Config Advisor to verify system health are proactive maintenance steps. Config Advisor helps identify potential issues early, allowing them to be addressed before they escalate into critical problems.
Finally, the "Completing setup" section directs users to mysupport.netapp.com, where they can create an account, download and install Active IQ Config Advisor, and register their system. Active IQ Config Advisor is a key maintenance tool that provides insights into system health and performance, helping users proactively manage and optimize their storage environment. The reference to the NetApp ONTAP Resources page for information about configuring additional features in ONTAP further supports ongoing system management and optimization, which are integral parts of a comprehensive maintenance strategy.
In summary, the NetApp FAS9000 manual provides a robust framework for installation and initial configuration, with inherent features and recommendations that contribute to the long-term maintainability and reliability of the storage system.
| Model | FAS9000 |
|---|---|
| Form Factor | Rack-mountable |
| Operating System | ONTAP |
| RAID Levels | RAID-DP, RAID-TEC |
| High Availability | Yes |
| Power Supply | Redundant power supplies |
| Storage Protocols | NFS, CIFS, iSCSI, FC, FCoE |
| Supported Drive Types | SSD, SAS |
| Controller Type | Active-Active |
| Networking | 10/25/40/100GbE |
| Data Reduction | Compression, Deduplication |
| Scalability | Up to 24 nodes |