EasyManua.ls Logo

NetApp FAS26 Series - User Manual

NetApp FAS26 Series
4 pages
Print Icon
To Next Page IconTo Next Page
Loading...
Prepare for installation Install hardware Cable storage
Complete system setup
and configuration
1 2 3 4
FAS26xx Series Systems
Installation and Setup Instructions
Screwdriver Client
With a USB/serial connection and access to a
Web browser to configure your storage system
Rack space
2U per chassis
You provide
In the box
Cluster Interconnect cables
Part number X6566B-05-R6 (112-00297)
or X6566B-2-R6 (112-00299)
10 GbE network cables
(order dependent)
Part number X6566B-2-R6 (112-00299)
or X6566B-3-R6 (112-00300) or X6566B-5-R6 (112-00301)
Optical network cables (order dependent)
Part number X6553-R6 (112-00188) or X6554-R6 (112-00189) or X6536-R6 (112-00090)
Data and cluster Interconnect cables
1. Go to
mysupport.netapp.com and create an account, register your system, and get your license keys. 
2. Unpack all boxes and inventory contents.
3. Go to the AFF and FAS System Documentation Center and click FAS26xx series, and then Installation and Setup:
- Download and complete the Cluster Configuration Worksheet.
- Watch the videos listed under Setup videos.
Pre-setup
Storage cables
mini-SAS HD to mini-SAS HD cables
Part number X66030A (112-00435) or X66031A (112-00436)
or X66032A (112-00437) or X66033A (112-00438)
Additional cables
Power cables
Ethernet cables
micro USB console cable
Additional network cables
For connecting your storage system to your
network switch and Microsoft
®
Windows
®
client
Prepare for installation | 1
215-15014_A0
Question and Answer IconNeed help?

Do you have a question about the NetApp FAS26 Series and is the answer not in the manual?

Summary

Prepare for installation

In the box

Lists cables and components included with the FAS26xx system.

You provide

Lists required user-supplied items like rack space, tools, and client.

Install hardware

Install system hardware

Instructions for racking the system and placing the bezel.

Cable controllers for ONTAP

Details cabling for switchless or switched ONTAP configurations, including data and management connections.

Connect power cords

Instructions to connect both power cords to the system units.

Cable storage

Cabling FAS26 xx with no external storage

Instructions for connecting SAS ports between controllers for systems without external drive shelves.

Cabling FAS26 xx with external storage

Steps for connecting disk shelves (DS212C/DS224C) via IOM A and IOM B.

Complete system setup and configuration

Set drive shelf IDs

Procedure to set unique IDs for external drive shelves.

Complete initial cluster setup

Guides initial setup via network discovery or console connection.

Use System Manager Guided Setup

Utilize the System Manager tool for guided cluster configuration.

Completing setup tasks

Verify system health with Config Advisor and find resources for further configuration.

Overview

This document outlines the installation and setup procedures for NetApp FAS26xx Series Systems, covering everything from initial unboxing to complete system configuration. It is designed to guide users through the process of setting up their storage system, whether it involves a simple configuration without external storage or a more complex setup with additional disk shelves.

Function Description

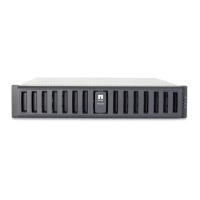
The NetApp FAS26xx Series Systems are designed as robust storage solutions, providing data management capabilities for various IT environments. These systems are built to offer reliable data storage and access, supporting both switchless and switched ONTAP configurations to integrate seamlessly into existing network infrastructures. The core function of these systems is to store, manage, and protect data, ensuring high availability and performance. They are capable of operating with or without external disk shelves, offering flexibility in scaling storage capacity based on user needs. The installation process emphasizes careful cabling and configuration to ensure optimal performance and connectivity within a data center or server room. The system supports various network cable types, including 10 GbE network cables and optical network cables, to facilitate high-speed data transfer and network integration. Additionally, it includes provisions for connecting to management networks, allowing for remote administration and monitoring. The overall design focuses on providing a scalable and manageable storage platform that can adapt to evolving data requirements.

Usage Features

The installation guide details several key usage features that streamline the setup and ongoing operation of the FAS26xx Series Systems.

  • Pre-setup and Inventory Management: Before physical installation, users are guided to create an account on mysupport.netapp.com, register their system, and obtain license keys. This ensures that the system is properly licensed and ready for activation. The process also includes unpacking all boxes and inventorying contents, which helps in verifying that all necessary components are present before starting the physical installation. This step is crucial for preventing delays and ensuring a smooth setup.
  • Documentation and Video Resources: Users are directed to the AFF and FAS System Documentation Center, where they can access specific resources for the FAS26xx series, including an Installation and Setup guide. A critical step involves downloading and completing the Cluster Configuration Worksheet, which helps in planning the network and storage configurations in advance. Additionally, the guide recommends watching setup videos, providing visual aids that can simplify complex steps and reduce the likelihood of errors during installation.
  • Rack Installation: The physical installation begins with racking the system. The guide refers to instructions provided in the rail kit for proper mounting in a system cabinet. This ensures that the system is securely installed and properly aligned within the rack, which is essential for stability and airflow.
  • Bezel Placement: After racking, users are instructed to place the bezel over the front of the system. The bezel serves both an aesthetic purpose and helps with airflow management, contributing to the system's overall cooling efficiency.
  • Cable Management: The system incorporates cable management arms, which are attached during the installation process. These arms help organize and secure cables, preventing tangles and improving airflow within the rack. Proper cable management is vital for maintaining a clean and efficient data center environment, making troubleshooting easier and reducing the risk of accidental disconnections.
  • Flexible Network Cabling Options: The guide provides detailed instructions for cabling the controller for both switchless ONTAP (Option A) and switched ONTAP (Option B) configurations.
    • Switchless ONTAP (Option A): This configuration involves connecting 10 GbE network cables from ports e0c/0c to the data switch. It also includes connecting Ethernet cables from the wrench port to the management or subnet switch. For this option, specific instructions are given to connect port e0a to port e0a and port e0b to port e0b, facilitating direct controller-to-controller communication without an external cluster switch.
    • Switched ONTAP (Option B): In this setup, 10 GbE network cables are connected from ports e0c/0c to the data switch, and Ethernet cables from the wrench port go to the management or subnet switch. For Option B, ports e1a and e0b are connected to the cluster switch, enabling communication through an external switch. This flexibility allows users to choose the network architecture that best fits their existing infrastructure and performance requirements.
  • Power Cord Connection: Users are explicitly instructed to connect both power cords to all units, emphasizing that both must be used. The guide also highlights the use of retaining clips to secure the power cords, preventing accidental disconnections. A critical warning is issued: "DO NOT power on system at this point," ensuring that all cabling is complete before power is applied, which is a standard safety and best practice measure.
  • External Storage Cabling (DS212C or DS224C disk shelves): For systems with external storage, the guide provides detailed cabling instructions for connecting disk shelves. This involves connecting shelf-to-shelf ports through each domain (IOM A and IOM B) and connecting each node to IOM A and IOM B in the stack. This ensures proper data path redundancy and connectivity for the external storage.
  • Shelf ID Configuration: If the system includes external drive shelves, a specific procedure is outlined for setting the shelf IDs. This involves powering on the drive shelf, removing the end cap, and using an orange button to set the desired two-digit ID. This step is crucial for the system to correctly identify and manage each drive shelf. The process includes pressing and holding the button until digits blink, advancing digits, and then power-cycling the drive shelf to apply the changes.
  • Initial Cluster Setup: After cabling, the guide moves to the initial cluster setup, ensuring controller modules are completely cabled before turning on power supplies.
    • Network Discovery Enabled (Option A): If the laptop has network discovery enabled, users connect their laptop to the management switch and then double-click either ONTAP icon found in network devices. This simplifies the initial connection process.
    • Network Discovery Not Enabled (Option B): If network discovery is not enabled, users are instructed to set the console port on their laptop to 115,200 baud with N-8-1 and connect to the micro-USB port on the controller with a console cable. They then connect the laptop to the management switch and assign a TCP/IP address. An initial node management IP address is assigned either through DHCP or manually using a console session (e.g., PuTTY). Finally, users open a browser and enter the management IP address to access the system.
  • System Manager Guided Setup: After initial network configuration, users are directed to use the System Manager Guided Setup to configure their cluster. This tool provides a user-friendly interface to complete the setup process.
  • Completing Setup with Config Advisor: The final step involves verifying the system's health by running Config Advisor. This tool helps identify and resolve any potential configuration issues. Users are also directed to the NetApp ONTAP Resources page for information on configuring additional features in ONTAP, allowing for further customization and optimization of their storage system.

Maintenance Features

While the document primarily focuses on installation and initial setup, several aspects implicitly contribute to ease of maintenance:

  • Modular Design: The system's components, such as controllers and disk shelves, are designed to be modular. This modularity simplifies replacement and upgrades, as individual units can be swapped out without requiring a complete system overhaul.
  • Cable Management: The inclusion of cable management arms is a direct maintenance feature. By keeping cables organized and secured, it reduces the time and effort required for troubleshooting, replacing components, or performing routine maintenance tasks that involve accessing the rear of the system.
  • Clear Cabling Diagrams: The detailed cabling diagrams for various configurations (switchless ONTAP, switched ONTAP, and external storage) serve as valuable references for maintenance. If a connection needs to be verified or re-established, these diagrams provide clear visual guidance, reducing the risk of incorrect connections.
  • System Documentation and Support: The emphasis on accessing the AFF and FAS System Documentation Center and mysupport.netapp.com ensures that users have readily available resources for troubleshooting and maintenance. These platforms typically offer knowledge bases, FAQs, and support channels to assist with any operational issues.
  • Config Advisor: The use of Config Advisor as a final setup step is a proactive maintenance feature. By verifying the system's health and configuration, it helps identify potential issues early on, preventing them from escalating into more significant problems that could impact system performance or availability.
  • Remote Management: The ability to connect to the management switch and access the system via a web browser (using the management IP address) facilitates remote monitoring and management. This allows administrators to perform maintenance tasks, check system status, and configure settings without needing physical access to the hardware, which is crucial for data centers and remote deployments.
  • License Key Management: The initial step of obtaining license keys from mysupport.netapp.com is important for ongoing maintenance, as it ensures that the system remains compliant and eligible for software updates and support services.
  • Power Cord Retaining Clips: The use of retaining clips for power cords is a small but significant maintenance detail. It prevents accidental power disconnections, which could lead to system downtime or data corruption, thereby contributing to system stability and reducing unscheduled maintenance.

In summary, the NetApp FAS26xx Series Systems are designed for straightforward installation and robust operation, with features that support both initial deployment and long-term manageability. The comprehensive guide ensures that users can set up their storage solution efficiently and maintain it effectively.

NetApp FAS26 Series Specifications

General IconGeneral
Operating SystemONTAP
ProcessorIntel Xeon
Controller TypeDual Controller
Supported ProtocolsNFS, CIFS, iSCSI, FC, FCoE
RAID Levels SupportedRAID-DP, RAID-TEC
Drive Types SupportedSSD
Data ReductionYes
High AvailabilityYes
Power SupplyRedundant

Related product manuals