STOP HERE. If you have NO external storage, skip to section 4, complete system setup and configuration.
LN K LN K
LN K LN K
LN K LN K
LN K LN K
LN K LN K
LN K LN K
LN K LN K
LN K LN K
LN K LN K
LN K LN K
LN K LN K
LN K LN K
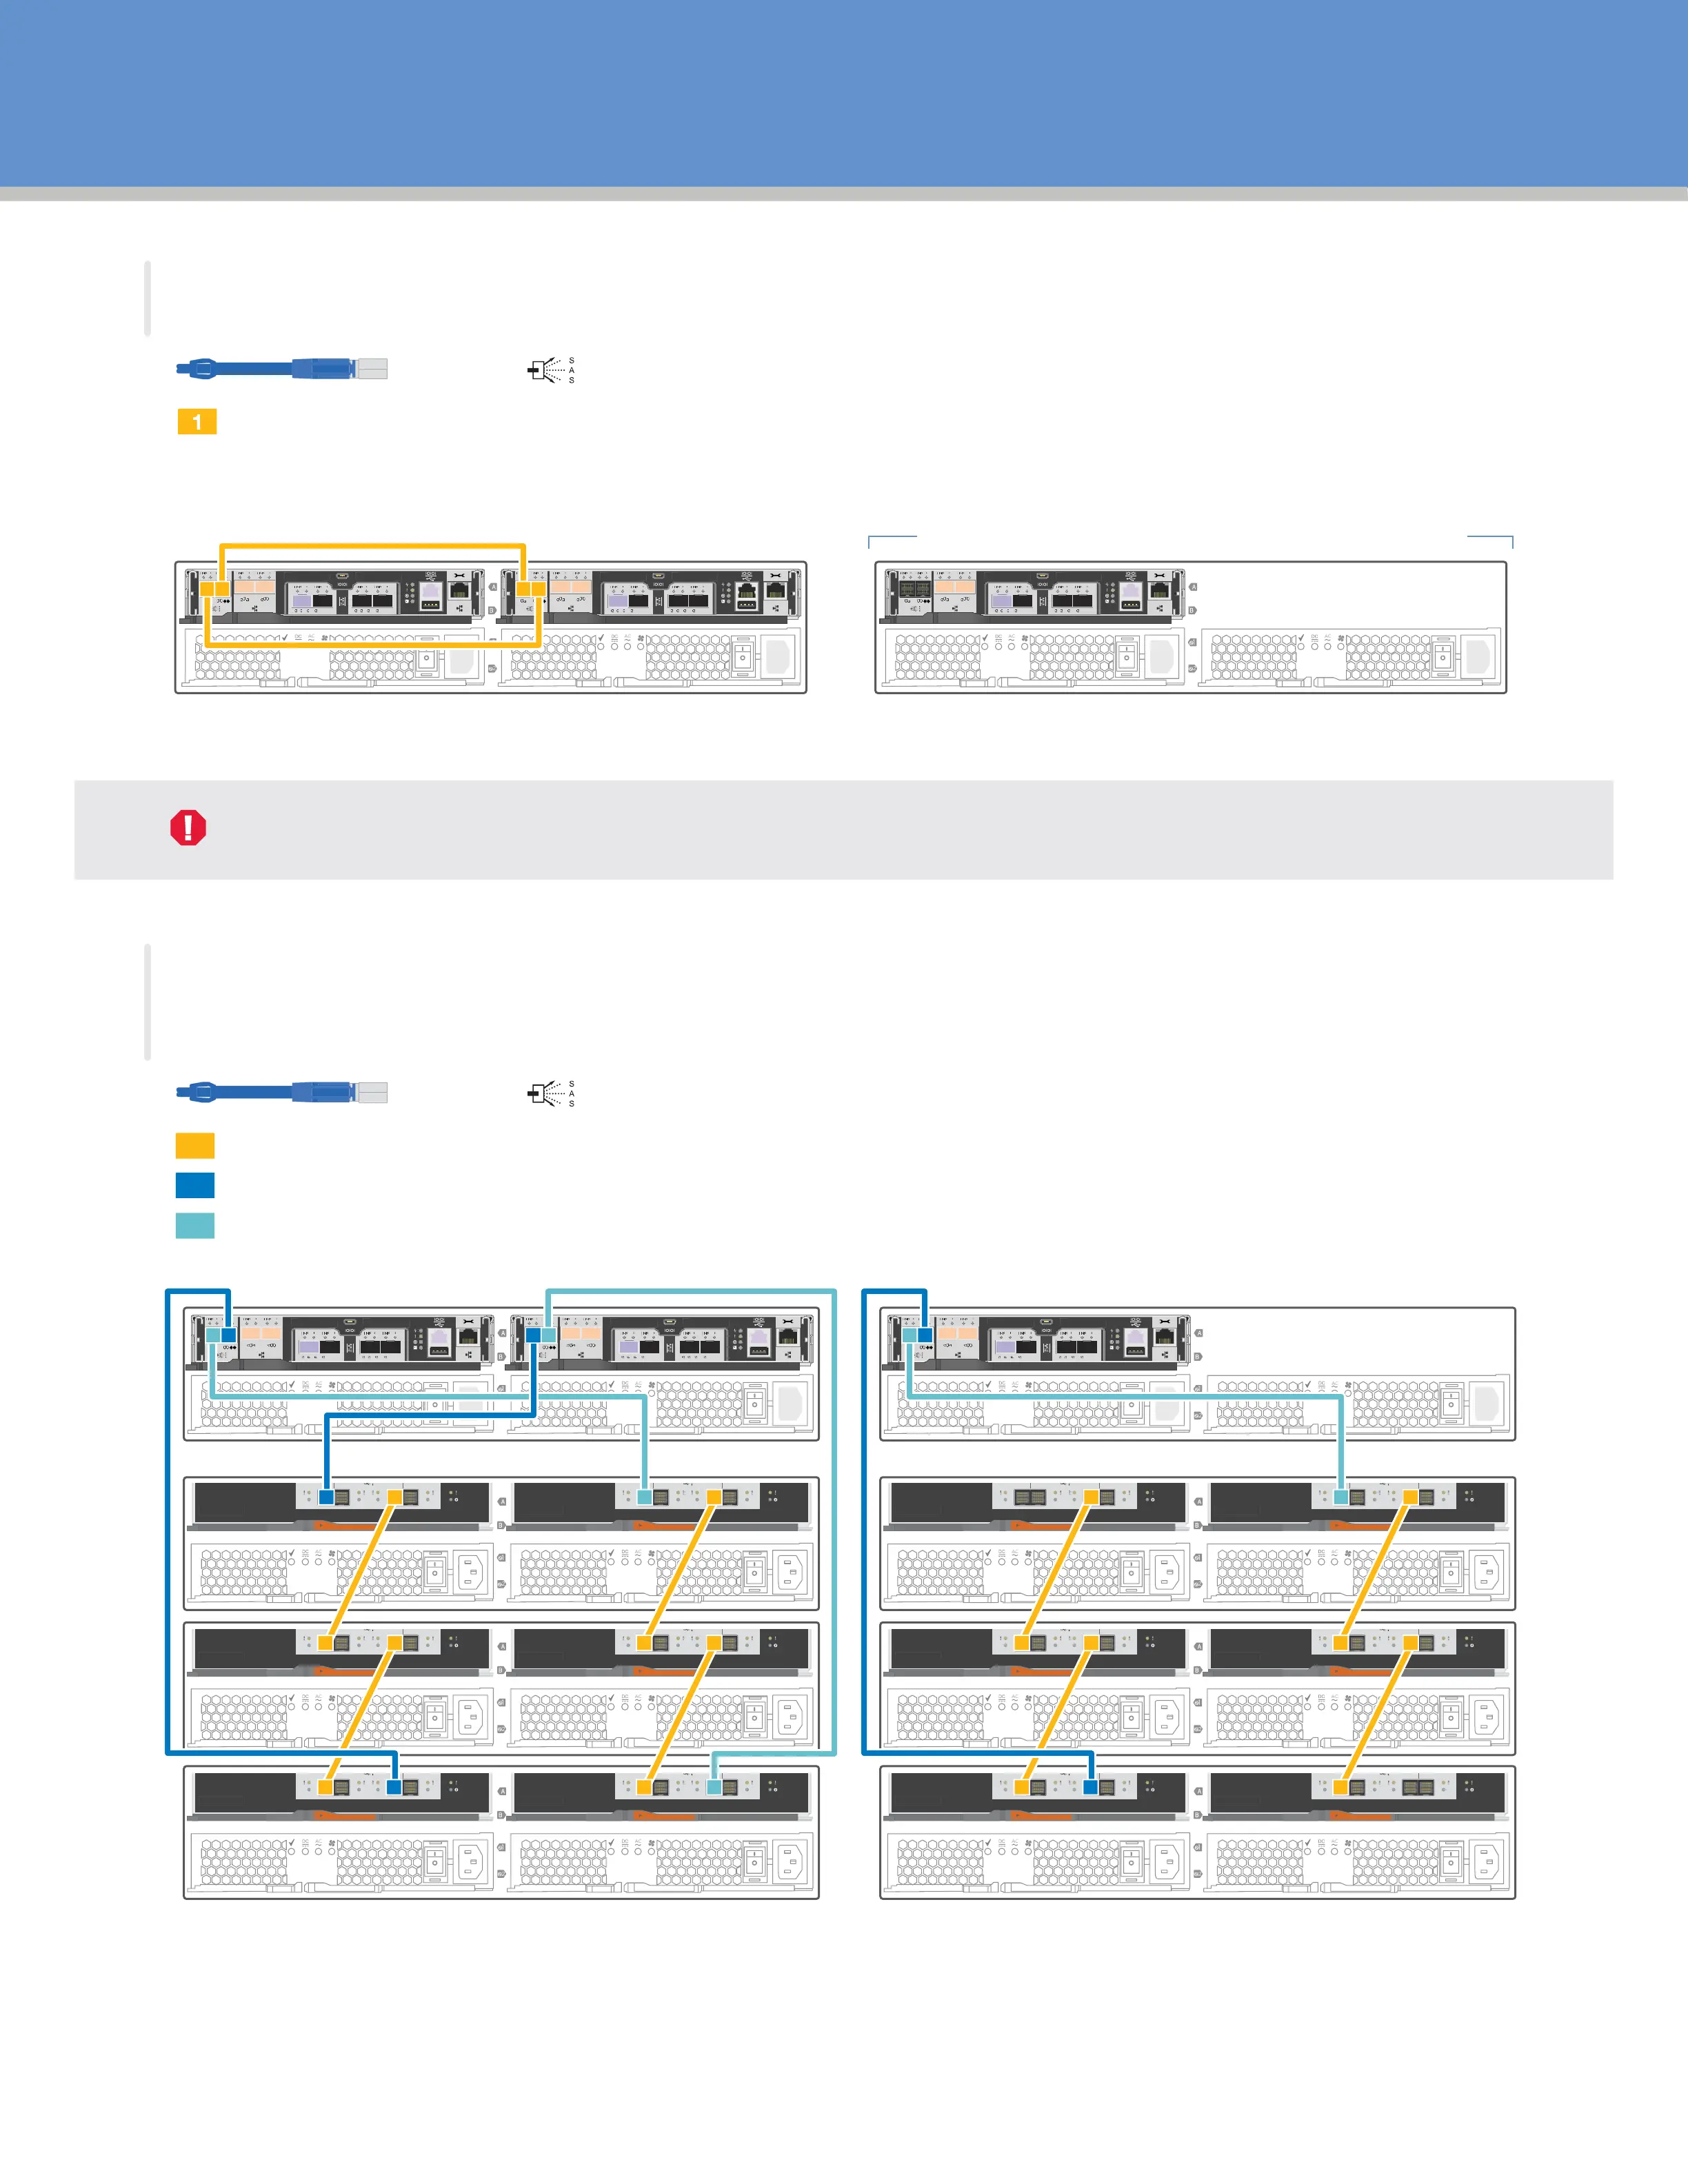
Dual controller system
LN K LN K
LN K LN K
LN K LN K
LN K LN K
LN K LN K
LN K LN K
LN K LN K
LN K LN K
LN K LN K
LN K LN K
LN K LN K
LN K LN K
Single controller system
Cabling a FAS26xx series with NO external storage
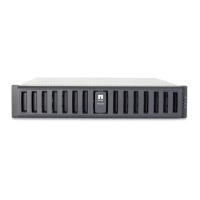
Cabling a FAS26xx series WITH external storage
(DS212C or DS224C disk shelves)
Cable storage | Stage 3 (Choose option A or B below)
A
B
First
shelf
IOMA IOMA
Last
shelf
First
shelf
Last
shelf
IOMBIOMB
No additional cabling required for a single controller.
Single controller system
Dual controller system
Connect the SAS ports of both controllers:
• Controller 1 0a to Controller 2 0b
• Controller 1 0b to Controller 2 0a
Storage cables
2
1
3
Connect the shelf-to-shelf ports through each domain (IOM A and IOM B)
Connect each node to IOM A in the stack
Connect each node to IOM B in the stack
Storage cables