EasyManua.ls Logo

NETGEAR Desktop Pro Series GS110MX User Manual

NETGEAR Desktop Pro Series GS110MX
2 pages
To Next Page IconTo Next Page
Page #1 background imageLoading...
Page #1 background image
Installation
Connect Devices to the Switch
1. Connect devices to the RJ-45 network ports on the switch front panel.
Ports 1 through 8 support 1G, 100M, and 10M. Ports 9 and 10
support 10G, 5G, 2.5G, 1G, and 100M. Use the cables that we
recommend on the other side of this installation guide.
2. Connect one RJ-45 port on the switch to a network. In a high-speed
network, use port 9 or 10.
Note: In a small oce or home oce network, connect the switch to the LAN
port of a router that, in turn, is connected to an Internet modem.
8-Port Gigabit Ethernet Unmanaged Switch
with 2-Port 10G/Multi-Gig Uplinks
Desktop Pro Series GS110MX
Connect the Power Adapter to the DC Input
Check the LED Status
Package Contents
Switch
Power adapter (localized to the country of sale)
Rack-mount brackets and screws for rack installation
Wall-mount screws for wall installation and rubber feet for desktop
installation (in one bag)
Installation guide
Power LED Gigabit Ethernet port LEDs for ports 1 through 8
On
O
1G link (both port LEDs on). Both port LEDs blinking
indicates trac activity.
100M link (le port LED on, right port LED o). Le
port LED blinking indicates trac activity.
10M link (le port LED o, right port LED on). Right
port LED blinking indicates trac activity.
No link (both port LEDs o).
Multi-Gigabit Ethernet port LEDs for ports 9 and 10
10G link (both port LEDs on). Both port LEDs blinking
indicates trac activity.
5G link (le port LED on, right port LED o). Le port
LED blinking indicates trac activity.
2.5G link (le port LED o, right port LED on). Right
port LED blinking indicates trac activity.
1G or 100M link (both port LEDs on). Both port LEDs
blinking indicates trac activity.
No link (both port LEDs o).
10G/Multi-Gig switch (XS508M)
Sample connections
10G link
to 10G NAS
Internet
10G link to
network router
1G link to
WAC74 0 A P
1G link to
computer
GS110MX switchGS110MX switch
2.5G link to
WAC74 0 A P
1G link to
computer
1G link to
computer
10G link 10G link
Question and Answer IconNeed help?

Do you have a question about the NETGEAR Desktop Pro Series GS110MX and is the answer not in the manual?

NETGEAR Desktop Pro Series GS110MX Specifications

General IconGeneral
ModelGS110MX
CategorySwitch
SeriesPro Series
10G/Multi-Gigabit Ports2
MAC Address Table Size8K
Switch TypeUnmanaged
Power over Ethernet (PoE)No
Storage Temperature-20° to 70° C (-4° to 158° F)
Humidity90% maximum relative humidity, non-condensing
Jumbo Frame Support9KB
Operating Temperature0°C to 50°C
Power SupplyInternal

Summary

Connecting Devices to the Switch

Connecting Network Ports

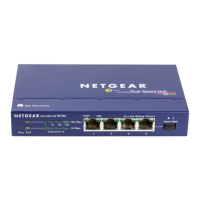
Connect devices to RJ-45 ports (1-8 for 1G, 100M, 10M; 9-10 for 10G, 5G, 2.5G, 1G, 100M) and to the network.

Sample Connections Diagram

Illustrates sample connections from the switch to network routers, NAS, and computers.

Package Contents and Power Connection

Package Contents

Lists the items included in the product package.

Connecting the Power Adapter

Instructions on how to connect the power adapter to the switch.

Understanding LED Status Indicators

Power LED Status

Indicates the power status of the switch.

Gigabit Ethernet Port LEDs (Ports 1-8)

Details link speeds (1G, 100M, 10M) and traffic activity for ports 1 through 8.

Multi-Gigabit Ethernet Port LEDs (Ports 9-10)

Details link speeds (10G, 5G, 2.5G, 1G, 100M) and traffic activity for ports 9 and 10.

Installation and Specifications

Cables and Supported Speeds

Information on network cable types and their supported speeds.

Mounting Options

Instructions for attaching the switch to a wall or installing it in a rack.

Technical Specifications

Details the network interfaces, power, dimensions, and weight of the switch.

Support and Regulatory Information

Provides links for product support and regulatory compliance information.

Related product manuals