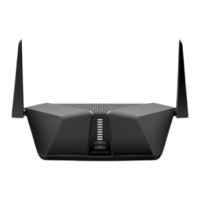
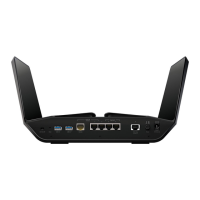
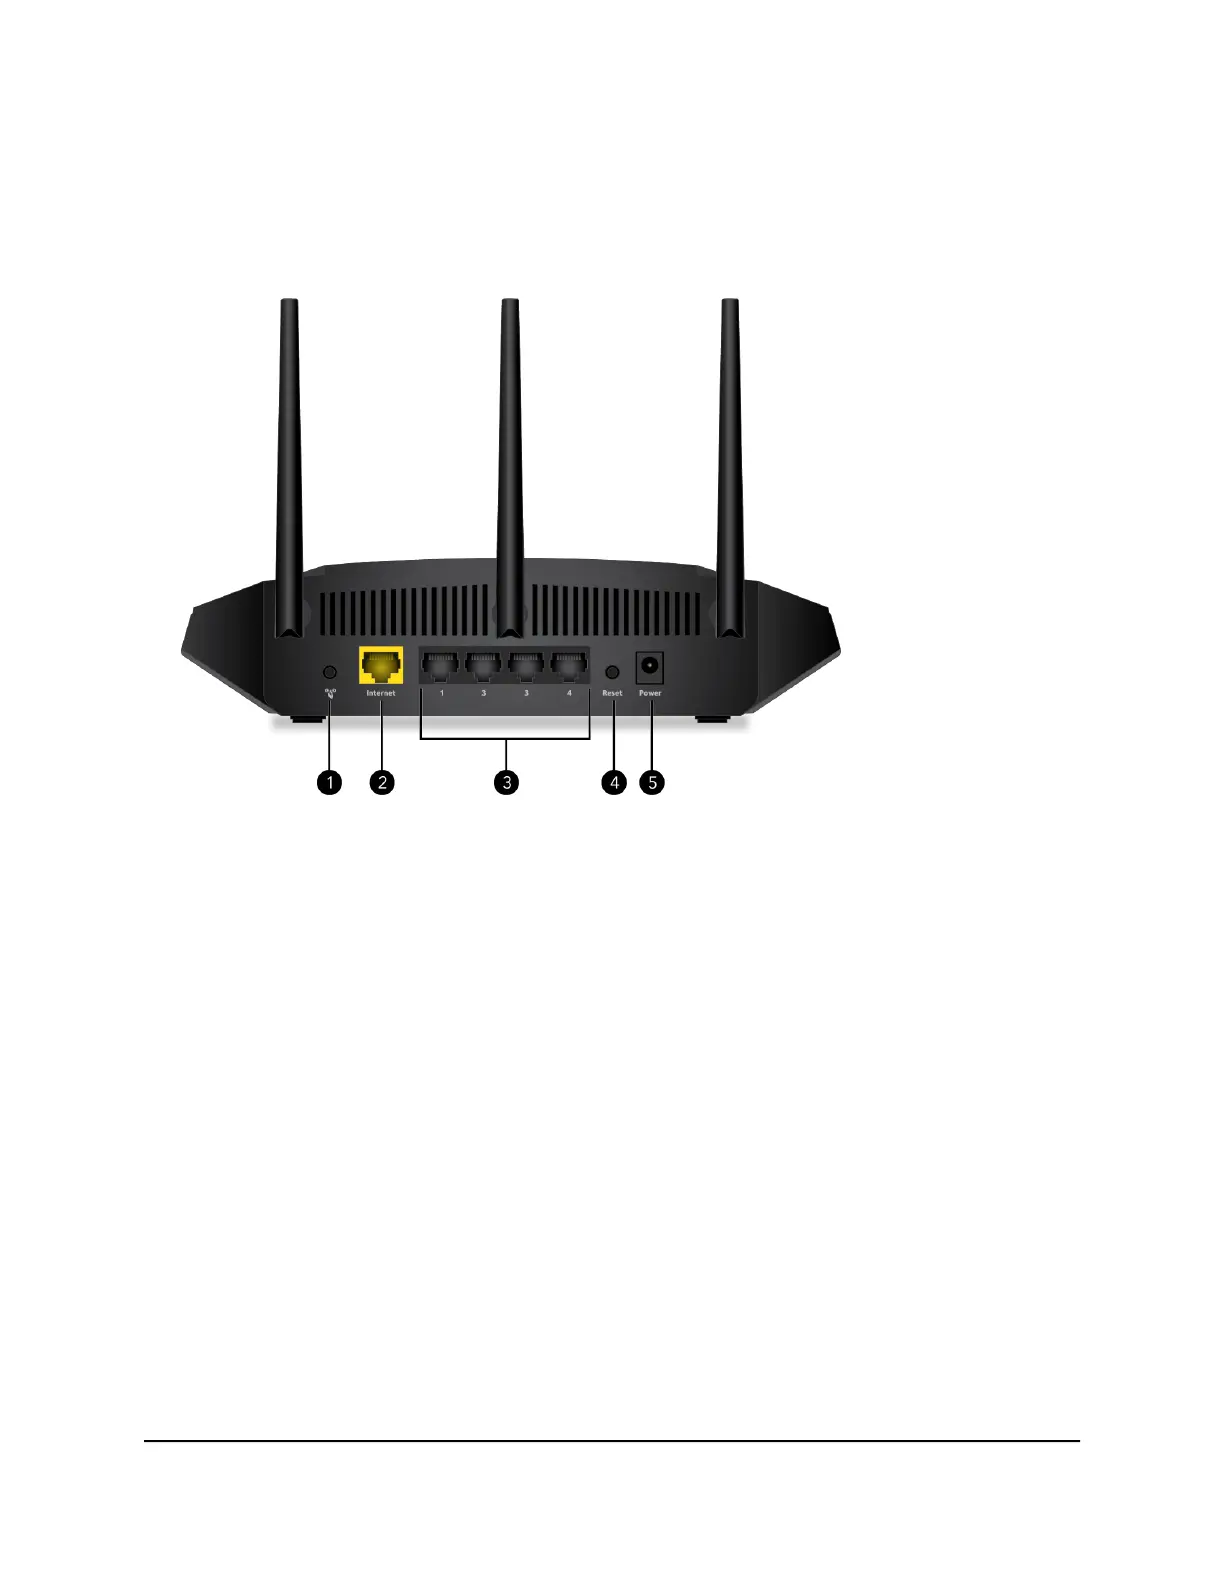
Back panel
The following figure shows the connectors and buttons on the back of the router.
Figure 3. Rear panel
The rear side panels contains the following components:
1. WPS button. Pressing the WPS button lets WPS-enabled device join your router's
WiFi network without typing the WiFi password.
2. Internet port. One Gigabit Ethernet RJ-45 WAN port to connect the router to an
Internet modem such as a cable modem or DSL modem.
3. Ethernet ports. Four Gigabit Ethernet RJ-45 LAN ports. Use these ports to connect
the router to devices that have an Ethernet LAN port.
4. Reset button. Pressing the Reset button resets the router. If the Reset button is
pressed for at least 10 seconds and then released, the router returns to its factory
settings.
5. DC power connector. Connect the power adapter that came in the product package
to the DC power connector.
User Manual12Hardware Setup
4-Stream AX1800 WiFi 6 Router