150Mbps Wireless-N Broadband Router Quick Installation Guide
7
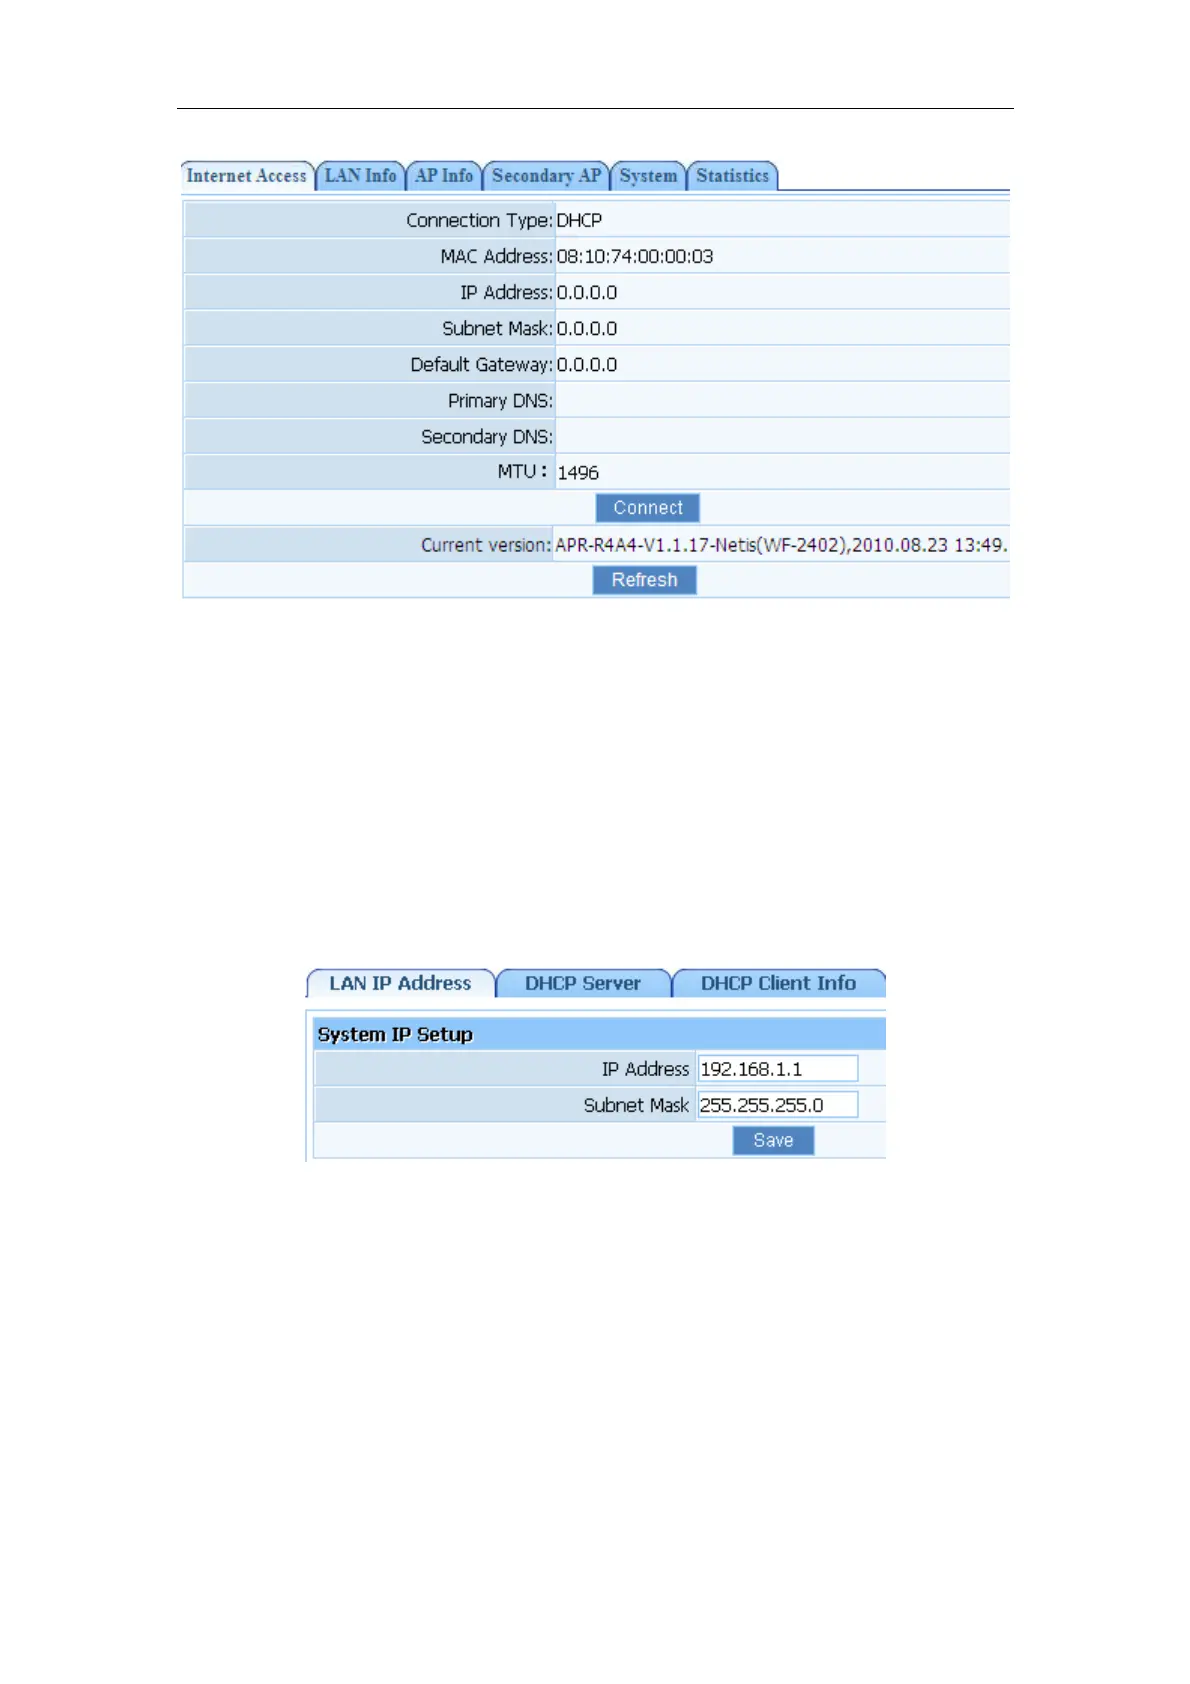
Figure 7-2
¾ If you are still not connected, or experience an erratic connection, your modem may have
the same IP as the router (192.168.1.1). You will need to change the router's IP. Click on
‘LAN Setup’- ‘LAN IP Address’ and you will see this IP in the main interface. You may edit it
to something different (192.168.2.1 for example). After entering the new IP, click on ‘Save’
below, the router will reboot, and you will need to enter the user name and password again.
Check your system status for IP again, and test connection.
Note: You will need to enter the new IP in the browser to access the user interface for any future
setting changes.
Figure 7-3
7.2. Advanced Settings
7.2.1. Restore to Factory Default
If the router ever freezes in a setting change process or if you can’t access it because you can’t
remember the IP you have given it or other problem, you may have to utilize the reset button on
the back of the router to put it back to factory settings. You have to press and hold this button
 Loading...