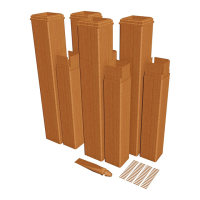
Check Box for These Contents
In the event of missing or defective parts please call our customer service dept. at
1 800 282 9346, ext #20
(Mon. to Fri. 8:00 AM to 4:00 PM EST).
1. Keystone Top Lid (2)
2. Arch Keystones (2)
3. Keystone Bottom Plate (2)
4. Arches (4)
5. Arch Rafters (8)
1 1/2” x 1 1/2” x 27.9"
6. Post Caps (4)
7. Side Panel Horizontal Rails (4)
1 1/2” x 1 1/2” x 21.75”
8.
Sur-Fit Bracket for Side Panel Horizontals
(8)
9. Side Panel Vertical Spindles (6)
7/8” x 1 1/2” x 49"
10. Side Panel Horizontal Spindles (14)
1/4” x 1 1/2” x 15.25"
11. Posts (4)
4’ x 4’x 65.5"
12.
#8 x
1 1/2 in. (3.8 cm.)
Stainless Steel Screws
(for Sur-Fit Brackets) (24)
13.
#8 x
2 1/2 in. (6.4 cm.)
Stainless Steel Screws
(for Keystone and
Arch to Post Connection) (16)
Tools You Will Need
• Hammer
• Tape Measure
• Level
• Stool or Short Ladder
• Shovel or Auger
• Cordless Drill
General Information
• Read Instructions through carefully before beginning assembly.
• When assembling components, place on a non-abrasive surface
(i.e. shipping box) to avoid scratching.
• We recommend an area approx 10’x 8’ for unobstructed assembling.
• You should not need to use excessive force when assembling components.
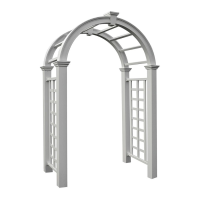
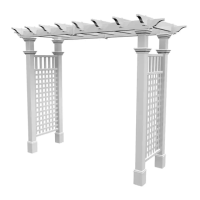
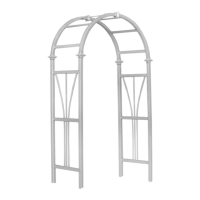
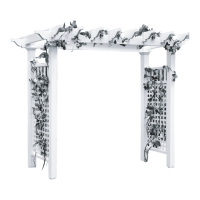
The Nantucket Deluxe Arbor
Please read through before starting assembly.
ASSEMBLY INSTRUCTIONS
12
5
9
8
7
1
6
4
2
1
(Not to scale)
3
94.1 in.
239 cm.
94.1 in.
239 cm.
65.6 in.
166.7 cm.
22.0 in.
55.9 cm.
30.0 in.
76.2 cm.
51.8 in.
131.5 cm.
59.8 in.
151.8 cm.
IMPORTANT: CHECK THE INSIDE OF YOUR POSTS FOR ALL MATERIALS.
13
10
11
www.newenglandarbors.com
Ver 3/Nov 2008